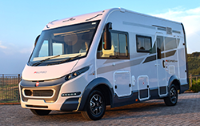
Park Up Right
Parking and Camping Regulations, Guidelines, and Authorized Sites in the UK and the EU.
The ideal scenario:
Hop into your motorhome, start the engine, embark on your journey, discover a place that captures your interest, park, and relish the moment! Spontaneity and freedom at their best! However, the reality is a bit more complex. Similar to most places worldwide, the United Kingdom has regulations and constraints related to parking and camping that you must comply with to remain lawful. These regulations encompass all types of recreational vehicles, be it a luxurious A-class motorhome or a compact 2-berth camper. In the following section, we'll delve deeper into these rules and restrictions.... Read on
-
Can I park my motorhome or camp on any land I like?
When it comes to parking, the answer is rather straightforward:
No. Unless you're parking at a designated caravan or motorhome park, you must acquaint yourself with the regulations and guidelines pertaining to your chosen location. It's possible that simply parking or camping wherever you please could, from a legal standpoint, constitute trespassing. The land you're on typically belongs to a specific individual, and you must obtain explicit permission to park there. Failing to do so puts you in violation of the law, thereby committing an offense. This holds true for England, Wales, and Northern Ireland.
In Scotland;
The situation is somewhat distinct due to the Land Reform (Scotland) Act of 2003. This legislation permits camping on most unenclosed lands, but it's limited to non-motorized activities. You can set up a tent, but if your plan involves parking your motorhome on that particular piece of land, you'll still need to secure the landowner's explicit consent.
In any of these regions – England, Wales, Northern Ireland, or Scotland – it can be advantageous to utilize the internet to ascertain land ownership and determine whether it's available for camping. You can also identify places and areas where you can park your motorhome for free. -
Can I park my motorhome on the street and live in it?
In spite of the existence of the Caravan Sites & Control of Development Act, as well as more recent legislation pertaining to travelers, there is, in fact, no specific legal prohibition against parking your motorhome by the roadside and sleeping in it. Nevertheless, it's worth noting that you might attract the attention of law enforcement, and they may approach your vehicle to inquire about your activities. If the officers suggest that you relocate, it is advisable to heed their advice.
Should you choose to park alongside the road, it's essential to ensure that your motorhome doesn't obstruct other road users in any way, as jeopardizing their safety, as well as your own, is unwise. Parking in a public car park managed by a local authority involves different considerations. Typically, these municipal car parks are subject to Traffic Regulation Orders (TROs), which often prohibit activities like sleeping, camping, and cooking. Additionally, TROs may specify weight restrictions for vehicles using the car park. If you're seeking a safe spot to park and sleep for the night, truck stop lay-bys can serve as a reasonable compromise, as they often permit overnight parking.
It's important to remember that while the motorhome lifestyle promises considerable freedom and the ability to embark on spontaneous adventures, there are still rules and regulations that must be observed. Running afoul of the law is an ordeal you'd prefer to avoid.
-
What are the rules on wild camping with a campervan or motorhome?
Before we delve into the legality of wild camping, it's crucial to distinguish it from overnight parking for campervans or motorhomes. Wild camping entails setting up camp in remote, undeveloped areas, rather than established campsites or organized locations.
Parking in designated areas doesn't automatically grant permission for overnight stays, as regulations can differ. Always be attentive to signage, and when uncertain, consider relocating.
To locate suitable overnight parking spots in the UK, consult the Brit Stops website or their printed guide.
In select UK National Parks, such as Dartmoor and the Lake District, specific areas permit wild camping. It's advisable to confirm the availability of these locations before your excursion, as the options may be limited.
When engaging in wild camping, adhere to fundamental etiquette: minimize your environmental impact, take nothing but photographs and memories, avoid setting up camp near paths or roads, and show respect for fellow visitors. Arriving later and departing early can help minimize disruptions.
Wild camping regulations in the UK vary depending on the specific country within the UK and the particular location you intend to visit. Here's a general overview:
Scotland:
Scotland boasts some of the most permissive wild camping laws in the UK. The Land Reform (Scotland) Act 2003 grants you the right to wild camp on most unenclosed land in Scotland, provided you follow the Scottish Outdoor Access Code. This code encourages responsible camping that respects the environment and local communities.England and Wales:
Wild camping is generally not legally permitted in England and Wales, with a few exceptions in specific areas where it may be allowed with landowner consent or under particular conditions. National Parks and certain areas in Dartmoor might grant permission for wild camping, but it's essential to review the local regulations. In most instances, you'll need the landowner's approval or use designated campsites.Northern Ireland:
Wild camping regulations in Northern Ireland align with those in England and Wales, typically requiring landowner consent or specific conditions in select areas.It's imperative to thoroughly research and comprehend the rules and guidelines for the region you plan to explore. In general, when participating in wild camping in the UK:
- Camp discreetly and leave no evidence of your presence.
- Keep group sizes small and durations short.
- Avoid camping near roads, buildings, or cultivated land.
- Show respect for local communities, wildlife, and the environment.
- Embrace the "Leave No Trace" principles, including the responsible removal of all waste and refuse.
- Always obtain landowner permission when necessary.Wild camping can provide a delightful experience, but it's vital to conduct thorough research, plan responsibly, and abide by local regulations to ensure your camping is legal and environmentally considerate.
If you wish to obtain information about a specific location, consider the following resources:
-
Is it legal to sleep in a campervan or motorhome overnight on the road in the UK?
Roads and thoroughfares are typically under the jurisdiction of the Local Authority, and parking overnight on the roadside may potentially infringe upon legal regulations. It's important to note that there is no inherent legal right to park along the roadside. Nevertheless, apart from the regulations stipulated in the Highways Act 1980 and the Caravan Sites and Control of Development Act, there are no explicit laws that outright forbid it.
Public car parks, on the other hand, are typically subject to Traffic Regulation Orders, which can vary across the UK. These orders frequently proscribe activities such as sleeping, camping, and cooking, and may also impose restrictions concerning the size and type of vehicles allowed. Nonetheless, for those seeking overnight parking options, truck stops often present a favorable choice.
-
Is it illegal to go wild camping in a motorhome or campervan in Europe?
Wild camping regulations across Europe exhibit commonalities with those in the UK, but each country has its distinctive approach to the matter.
Generally, the use of designated campsites or Aires (approved motorhome parking areas found throughout Europe) is encouraged. Nevertheless, wild camping is frequently permissible in numerous national parks or other regions, provided it is conducted responsibly and with the consent of the landowner.
Before embarking on a journey to a foreign country, it is essential to conduct comprehensive research to ensure awareness of the latest rules and regulations.
For further guidance on overnight parking in Europe, you may find valuable information by visiting the following websites:
-
Are the wild camping rules different in Scotland, Wales, or Northern Island?
Wild camping regulations differ across the UK, necessitating an understanding of regional distinctions:
-
Scotland:
Unique legislation, including the Land Reform (Scotland) Act 2003 and the Scottish Outdoor Access Code, makes wild camping on most unenclosed lands permissible. However, this applies primarily to non-motorized activities. To camp with your campervan or motorhome, you must still secure landowner permission. When granted permission, practice courtesy, avoid obstructing access points or causing damage.
-
Wales:
Rules in Wales are akin to those in England. Opting for National Parks is convenient, with Snowdonia National Park being particularly open to wild camping. Adherence to considerate camping practices, obtaining landowner permission, and selecting quiet areas should prevent issues when venturing further afield.
-
Northern Ireland:
Regulations in Northern Ireland closely resemble those in England and Wales. Seek landowner consent, arrive later in the day, and depart early in the morning to minimize disruptions to others.
Please note that regulations may change, so it's advisable to stay informed about the latest guidelines when planning your wild camping trips in these regions.
-
- Details
- Written by: Ricky Clark
- Category: FAQ
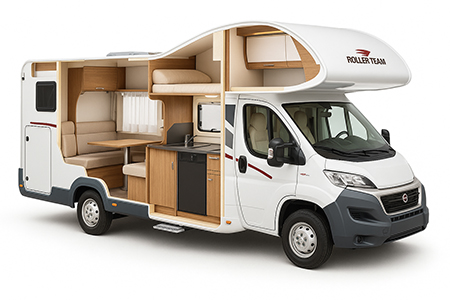
Understanding Motorhome Builds
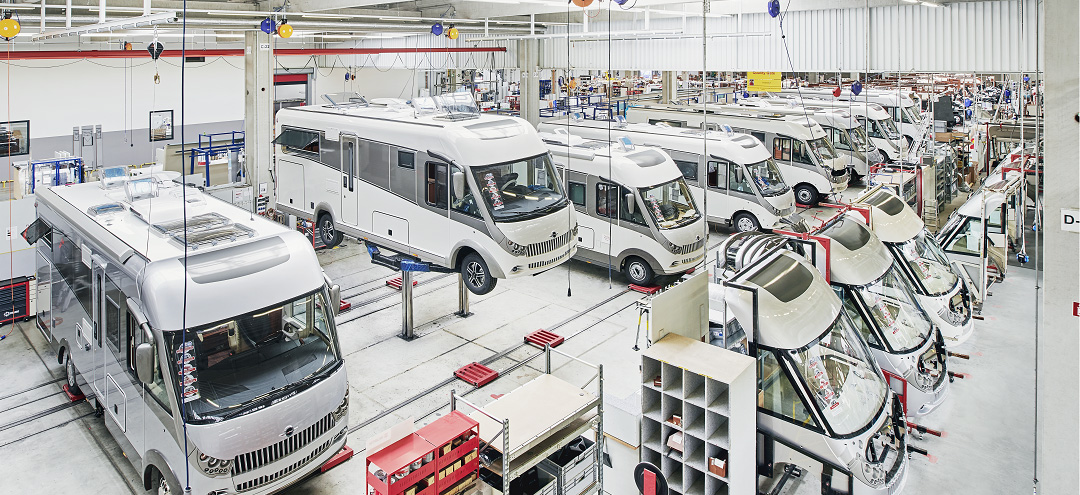
Understanding Motorhome Manufacturer Builds
When purchasing a motorhome, one of the most important decisions is choosing the right manufacturer. Whether you're a first-time buyer or an experienced traveller looking to upgrade, it's easy to get lost in the wide range of brands, build standards, and price points. So, how different are the manufacturers really — and is paying more always worth it?
Let’s take a look at the pros and cons of motorhome manufacturers across the low-end, mid-range, and high-end markets.
Entry-Level & Budget-Friendly Brands (e.g., Roller Team, Rimor, Sunlight)
Pros:
-
Affordability:
These motorhomes are designed to be accessible, offering functional layouts at lower price points.
-
Modern Styling:
Despite their price, brands like Roller Team often offer attractive interiors and decent onboard tech.
-
Lightweight Conversions:
Usually based on popular chassis like Fiat Ducato or Ford Transit, making servicing straightforward.
Cons:
-
Build Quality:
While not poor, the materials and construction (such as thinner panels, simpler insulation, or plastic fittings) may not be as robust or long-lasting as higher-end models.
-
Noise and Rattles:
Over time, you may experience more squeaks, creaks, and movement inside as the van gets used.
-
Fewer Customisation Options:
Limited factory upgrades or choices in layout and finish.
Ideal for:
Couples or families entering the motorhome world or those who plan seasonal travel rather than full-time living.
Mid-Range Motorhomes (e.g., Swift, Bailey, Chausson, Adria)
Pros:
-
Balanced Value:
Mid-range brands often hit the sweet spot between price and quality, offering stronger construction, better insulation, and more storage.
-
Improved Comfort:
More refined interiors, wider beds, and more attention to acoustic insulation.
-
Better Aftercare:
Warranties and support are generally stronger at this level.
Cons:
-
Still Compromised in Places:
You’ll still find MDF in places where solid wood would be stronger, or plastic handles instead of metal. Some models may still have basic heating or water systems.
-
Inconsistency Across Models:
Quality can vary even within the same brand depending on the chassis or model line.
Ideal for:
Travellers seeking comfort and reliability for regular European tours without the premium price tag.
High-End & Luxury Motorhomes (e.g., Hymer, Carthago, Morelo, Niesmann + Bischoff)
Pros:
-
Exceptional Build Quality:
These vehicles are built for long-term travel, often using double floors, aluminium sandwich construction, and premium insulation.
-
Refined Living Experience:
Quiet on the road, warm in winter, cool in summer, and packed with luxury features like Alde heating, leather upholstery, and large garage space.
-
Resale Value:
They hold their value better due to the reputation of build quality and longevity.
Cons:
-
Price Tag:
You can pay double or even triple the price of a mid-range motorhome.
-
Servicing & Parts:
Luxury brands may have fewer service centres or require more specialist care, especially for integrated bodywork or unique components.
-
Overkill for Casual Use:
If you're only touring for a few weeks a year, the high cost may not offer a return on investment.
Ideal for:
Full-time travellers, winter tourers, and those seeking long-term reliability and luxury.
Are They All That Different?
Interestingly, most motorhomes share similar underpinnings: Fiat, Ford, or Mercedes chassis are extremely common, and appliances like fridges, heaters, and toilets are often sourced from the same manufacturers (like Dometic, Truma, or Thetford), regardless of the motorhome brand.
Yet when you look at the price difference — which can often be twice as much, or even more — between a basic model like a Roller Team and a premium brand like Hymer, it raises an important question:
Are you always paying for better quality — or could you be paying for things you don’t necessarily need?
The key differences typically lie in:
-
Construction Method
(e.g., timber vs aluminium framing, insulation thickness, single vs double floor)
-
Interior Finishes
(e.g., chipboard vs high-grade laminates or hardwood)
-
Factory Fit & Quality Control
(level of refinement, precision build, noise/vibration over time)
-
Dealer Network & Warranty Support
(length, responsiveness, and convenience of service options)
So, while an entry-level Roller Team may look quite similar to a high-end Hymer or Carthago at first glance, living in them or driving them long-term often reveals differences — especially in how solid, quiet, or warm the van feels after extended use.
However, that doesn’t mean lower-cost motorhomes aren’t a smart choice. In fact, brands like Roller Team offer excellent value for money, especially if:
-
You’re new to motorhoming and don’t want to overcommit
-
You tour mainly in spring/summer and don’t need heavy-duty insulation
-
You’re happy with stylish, functional design rather than luxury materials
-
You’d rather spend the money on travelling than on high-end finishes
-
You don’t need premium add-ons like automatic levelling, Alde heating, or double floors
In short,
if you buy based on what you actually need — not just what’s marketed as “premium” — a Roller Team or similar model can be a great investment. They meet all required construction and safety standards, look modern, and often come well-equipped for most touring needs.
- Details
- Written by: Ricky Clark
- Category: FAQ
Wet, Dry and Chain, what's the difference?
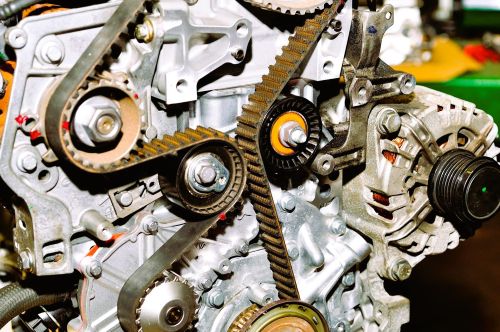
Timing belts are essential components in internal combustion engines, ensuring the precise synchronization of the crankshaft and camshaft for proper valve operation. There are three main types: wet, dry, and chain timing systems. Wet timing belts operate in an oil bath, reducing friction and extending their lifespan, while dry timing belts function without lubrication, often requiring more frequent replacements. Chain timing systems, made of metal, are durable and long-lasting but heavier and noisier than belts. Each type offers unique advantages and maintenance requirements, making the choice dependent on engine design and performance needs.
Wet Belts
Should You Steer Clear of Wet Timing Belts?
A Summary of Wet Belts
Recently, a different type of timing belt has gained attention: wet timing belts. These belts, prominently used in Ford's EcoBlue engines, have been causing significant issues in the automotive industry while largely flying under the radar. In this article, I take an in-depth look at this problematic component, exploring its intended purpose, the issues Ford aimed to address, and the challenges that have arisen as a result.
The Wet Timing Belt
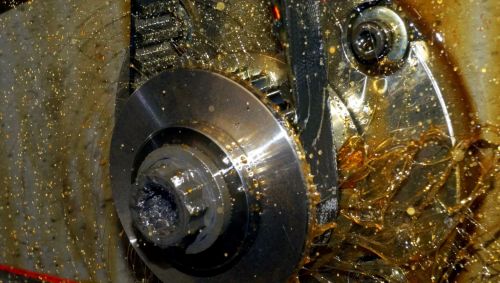
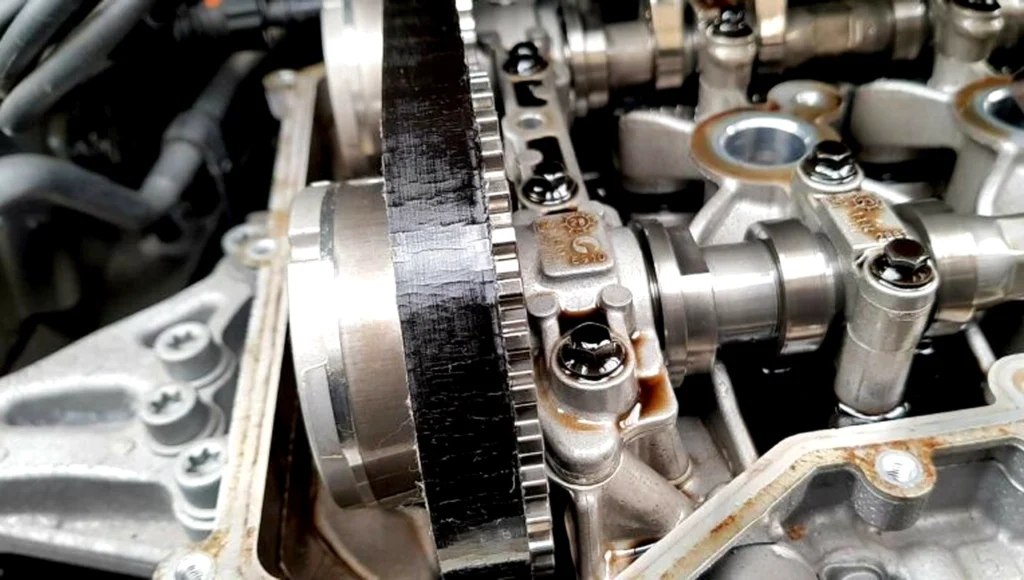
A traditional dry timing belt is typically located outside the engine, shielded by a protective cover. In contrast, a wet timing belt is positioned inside the engine, submerged in oil.
The Purpose of Wet Belts:
Extended Maintenance Intervals
- Lubrication from the engine oil reduces wear and friction, potentially increasing the belt's lifespan, improving fuel efficiency, and lowering CO2 emissions.
Improved Heat Dissipation
- Any heat generated by the belt can dissipate into the surrounding oil, helping to regulate engine temperatures.
Reduced Noise
- Noise and vibrations from the timing belt are dampened by the oil, contributing to quieter engine operation.
The first "belt-in-oil" system appeared in European-market Ford 1.8L diesel engines (1.8 TDCi). Volkswagen soon adopted the concept in certain EA211 and EA288 engine families. Ford later integrated wet belts into its EcoBoost engines in 2010 and expanded their use in 2016 with the launch of the EcoBlue engine, which powers a wide range of vehicles.
However, one of the primary causes of timing belt failure is fluid contamination, particularly from oil. This is why the "belt-in-oil" system has raised eyebrows. Oil exposure typically degrades the rubber in timing belts, leading to tooth separation or snapping. Combining these two elements in the same system may seem counterintuitive and potentially problematic.
To minimize the risk of issues with wet timing belts, it’s crucial to follow best practices for maintenance and usage. Here are the most effective strategies:
Follow the Manufacturer’s Maintenance Schedule
- Adhere strictly to the timing belt replacement intervals recommended by the manufacturer. Wet belts often have longer replacement intervals, but delaying maintenance can lead to failure.
Use High-Quality Oil and Filters
- Ensure you’re using the manufacturer-recommended oil grade and quality. Substandard oil can accelerate belt degradation. Regularly replace oil filters to prevent contaminants from circulating in the engine.
Check for Oil Contamination
- Inspect the oil for signs of debris, excessive wear particles, or contamination. Any irregularities can affect the wet belt's lifespan.
Address Oil Leaks Promptly
- Even a minor oil leak can disrupt the wet belt system. Regularly inspect the engine for leaks, particularly around seals, and repair them immediately.
Avoid Harsh Driving Conditions
- Consistent heavy towing, aggressive driving, or extreme temperatures can place additional strain on the timing belt and oil system. Operate the vehicle within its designed limits.
Monitor for Warning Signs
- Pay attention to unusual engine noises, vibrations, or performance issues, as these could indicate wear or damage to the timing belt. Address these promptly with a professional inspection.
Choose a Trusted Mechanic
- When it’s time for belt replacement or engine servicing, use a reputable mechanic familiar with wet belt systems. Improper installation can lead to premature failure.
By taking these precautions, you can reduce the likelihood of wet belt failures and maintain optimal engine performance.
What Issues Do Wet Belts Cause?
Wet timing belts were originally introduced to address a key challenge: reducing vehicle emissions. Automakers sought affordable and efficient ways to meet stricter environmental regulations, and wet belts emerged as a compact, quiet solution. These belts provided a 30% reduction in friction loss, improved fuel economy by around 1%, and contributed to lower emissions, making them a promising innovation for the automotive industry.
However, despite their intended benefits, the problems caused by wet belts often outweigh their advantages.
Primary Issues with Wet Belts
Susceptibility to Oil Impurities
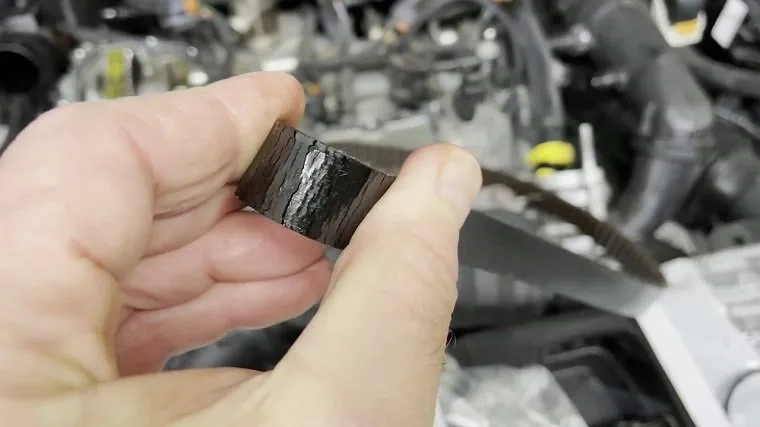
- Even minor contaminants in the oil, such as soot or crystalline particles, can accelerate belt wear. This wear results in belt material breaking off and mixing with the oil, which can clog the oil sump filter, leading to oil starvation.
Impact on Engine Components
- A clogged sump filter can cause cascading issues, including damage to the brake vacuum pump. This can lead to reduced braking performance, significantly increasing the risk of accidents.
Challenging Maintenance
- Replacing or maintaining a wet belt is significantly more labor-intensive compared to a dry belt. The process requires draining the oil and disassembling much of the engine to access the belt, resulting in longer repair times and higher labor costs.
While the wet belt was designed to solve efficiency and emissions challenges, its drawbacks—such as premature wear, system contamination, and maintenance complexity—often make it more trouble than it's worth for many vehicle owners.
Does My Motorhome Have a Wet Belt?
If your motorhome is powered by a Ford engine, there’s a good chance it may be equipped with a wet belt, particularly if it features an EcoBoost or EcoBlue engine.
To determine if your motorhome has a wet belt, check the engine:
-
Standard Timing Belt:
Located on the outside of the engine, it should be visible when you look under the hood.
-
Wet Timing Belt:
Positioned inside the engine and submerged in oil, it won’t be visible from the outside.
For a more definitive answer, you can refer to your motorhome’s manual or consult a mechanic.
How Can I Get the Most Out of My Wet Belt?
Dayco, a leading manufacturer of wet belts, emphasizes the importance of regular and proper maintenance to maximize the lifespan of your timing belt. Insufficient oil levels, neglecting routine maintenance, or using the wrong type of oil can negatively impact the belt's performance.
However, it's worth noting that many drivers are experiencing premature wet belt failures. While Ford recommends replacing the belt every 144,000 miles or 10 years, many garages suggest replacing it around 90,000 miles or every 5 years due to these early failures.
Unlike dry belts, which often show visible signs of wear, wet belts are more challenging to inspect. They don’t provide audible warnings before failure since any noise is dampened by the oil. As a result, drivers must rely on other indicators to detect potential problems.
Signs of a worn wet belt include:
- Difficulty starting the engine
- Poor idling or erratic engine performance at high speeds
Although wet belts are less likely to snap, their teeth can become loose, leading to belt slippage and engine desynchronization. A weakened belt may continue to run but will contaminate the oil with debris, further damaging the engine. Regular maintenance and early replacement are key to preventing these issues.
- Details
- Written by: Ricky Clark
- Category: FAQ
Roller Team - Cleaning your pride and joy
Your Roller Team Motorhome Cleaning Guide to a Spotless Motorhome!
Like your home, your motorhome needs regular cleaning to stay fresh and welcoming. After all, it’s your home on wheels!
Before going on that much-anticipated summer adventure, why not give your motorhome a thorough clean? At first, it might feel like a big task, but with the right tips, you’ll soon find yourself enjoying the process.
Cleaning your motorhome goes beyond just washing the exterior and tires—it’s about giving it a deep clean from top to bottom.
This guide is your go-to "Motorhome Cleaning Handbook," packed with tips to make sure you tackle the job with ease and keep the stress to a minimum. Ready to dive in? Let’s get started!
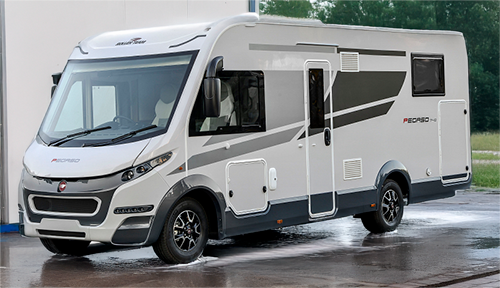
The importance of a regular motorhome cleaning routine?
A shining example
For motorhome enthusiasts, maintaining a clean and well-kept vehicle is essential, not only for aesthetics but also for performance, comfort, and resale value. A consistent cleaning routine ensures that your motorhome remains a welcoming haven for you and your passengers while preventing wear and tear from the elements. Here’s why a regular cleaning routine is crucial for motorhome owners.
Preserve the Exterior Finish
The exterior of a motorhome is constantly exposed to elements like UV rays, rain, dirt, and road salt, especially during road trips and off-season storage. UV exposure can lead to fading, while road salts and dirt can cause corrosion if left unattended. By regularly washing and applying a protective wax or sealant, you can prevent these issues, extending the life and appearance of your motorhome’s finish.
Prevent Mold and Mildew in Interior Spaces
Motorhomes, like any small living space, are prone to mold and mildew, especially in areas like bathrooms, kitchens, and around windows. Moisture build-up can be particularly challenging, especially after rainy trips or in humid conditions. Regularly cleaning and airing out the motorhome helps control humidity, preventing mold growth that can lead to unpleasant odors and potential health hazards.
Enhance Air Quality and Hygiene
A clean motorhome offers a more comfortable and healthy environment. Dust, pollen, and allergens can accumulate quickly, especially if you frequently travel to rural or natural areas. Regular cleaning and vacuuming help improve air quality, reduce allergens, and ensure a healthier space for everyone inside, especially if you travel with pets.
Maintain Functionality of Appliances and Fixtures
The appliances and fixtures in a motorhome are essential for comfort on the road, and they’re subject to regular use and exposure to a variety of conditions. Dust, grime, and grease can build up, particularly in the kitchen and around vents, reducing the efficiency and lifespan of appliances. By including appliance cleaning in your routine, you ensure they run smoothly, reducing the chances of costly repairs.
Prevent Rust and Corrosion of Mechanical Components
Undercarriages, tires, and other mechanical parts are especially vulnerable to the elements. Dirt, salt, and debris can cause rust and corrosion if left unchecked, leading to potential safety hazards and costly repairs. Regular washing and inspecting these components keep them in good condition and helps ensure a safe and reliable journey.
Improve Resale Value
A well-maintained, clean motorhome retains its value better than one that has been neglected. Regular cleaning not only maintains the visual appeal but also indicates to potential buyers that you’ve taken good care of the vehicle. This attention to cleanliness and maintenance can translate into a higher resale value if you ever decide to upgrade or sell your motorhome.
Identify Potential Issues Early
A thorough cleaning routine allows you to spot small problems before they escalate. Checking for cracks, leaks, loose seals, and other wear and tear can help you catch issues before they turn into major repairs, saving both time and money in the long run.
Essential Tips for Maintaining a Regular Cleaning Routine
-
Set a schedule:
Decide on a cleaning routine that works for you. After every trip is a good rule of thumb for many, but you may want to increase this if you travel frequently or in challenging conditions.
-
Invest in the right cleaning products:
Use products specifically designed for motorhome surfaces, appliances, and finishes to avoid damage.
-
Don’t overlook the undercarriage:
Especially after winter trips, cleaning the undercarriage is essential to remove salt and prevent rust.
-
Regularly clean and sanitize water systems:
Empty and clean the water tank, especially if your motorhome has been in storage.
-
Wax and protect:
A fresh coat of wax after washing the exterior provides an extra layer of protection against dirt and UV rays.
In Conclusion
Establishing a regular cleaning routine for your motorhome is essential to ensure longevity, safety, and comfort. A clean motorhome isn’t just more enjoyable for your travels—it’s a commitment to maintaining a cherished asset.
What are the benefits of regularly cleaning my motorhome?
-
As a motorhome owner, maintaining a clean vehicle goes beyond aesthetics; it's about preserving its value and functionality. Dirt, debris, and exposure to the elements can have damaging effects that shorten your motorhome’s lifespan. Regular cleaning protects both the exterior and interior from preventable wear and tear.
Here’s a closer look at why cleaning your motorhome is essential and the potential issues that can arise when it's neglected.
Preventing Exterior Damage
-
Bird Droppings:
The acidic nature of bird droppings can quickly erode your motorhome’s paint, leaving unsightly stains and creating vulnerable spots prone to rust.
-
Green Algae and Mold Growth
In humid or rainy climates, green algae and mold can grow on the exterior. This not only dulls the motorhome's appearance but can also create slippery surfaces that make cleaning more difficult over time.
-
Mud, Dust, and Road Salt
When left on the exterior, mud and dust can lead to tiny scratches on the paint and windows. Road salt, especially in winter, is corrosive and can cause rust to form on metal components, including undercarriages and wheel wells.
Maintaining Shine and Aesthetic Appeal
-
Loss of Shine
UV rays from the sun can fade and dull the paint over time. Regular washing helps preserve the luster, especially when combined with waxing, which provides an added layer of UV protection. A well-maintained shine not only keeps your motorhome looking fresh but also improves its resale value.
-
Chemical Spotting and Water Marks:
Exposure to sun and rain without washing can lead to chemical spotting, water stains, and etching on windows. These blemishes can become permanent, affecting visibility and the overall appearance of the motorhome.
Preventing Corrosion and Rust
-
Corrosive Elements:
When left unattended, elements like saltwater spray, road chemicals, and even morning dew can accelerate corrosion. Cleaning these off, especially in hard-to-reach areas, is crucial to prevent rust from forming on metal parts. This includes hinges, locks, and frames, which, if corroded, can become costly to replace or repair.
-
Protecting Roof and Seals:
The roof and seals on your motorhome are particularly vulnerable to damage from environmental exposure. By cleaning and inspecting these areas regularly, you’ll spot any cracking, separation, or mildew early, reducing the likelihood of water leaks and other costly repairs.
Improving Air Quality and Reducing Allergens Inside
-
Dust and Allergen Buildup:
Cleaning the interior is just as important as maintaining the exterior. Dust, pet hair, and pollen can accumulate, leading to allergies or respiratory issues, especially in confined spaces like a motorhome.
-
Preventing Mold and Mildew:
Motorhomes are prone to moisture buildup, especially in bathrooms, kitchens, and under sinks. By regularly cleaning and drying these areas, you can prevent the formation of mold and mildew, which are not only unsightly but can cause health issues and unpleasant odors.
Enhancing Safety
-
Better Visibility:
Clean windows and mirrors are essential for safe driving. Dirt, water spots, and bug splatters can obstruct your view, increasing the risk of accidents. Regular cleaning helps ensure your vision is clear, particularly in inclement weather.
-
Avoiding Slippery Surfaces:
Algae, moss, or other growth on the exterior can make steps and handles slippery, posing a hazard when entering or exiting the motorhome. Keeping these areas clean ensures a safer experience.
Prolonging the Lifespan of Mechanical Components
-
Engine and Underbelly:
Dirt, salt, and grime can accumulate under the motorhome, impacting the engine, exhaust system, and other mechanical components. By cleaning these parts, you help prevent deterioration and improve performance, reducing wear on costly components.
-
Protecting Awning and Accessories:
If your motorhome has an awning, bike rack, or other external accessories, cleaning them regularly can extend their lifespan. Dirt and moisture can cause rust or mildew on fabric awnings and corrode metal accessories if left unaddressed.
-
Where can I clean my motorhome?
-
Cleaning Your Motorhome on the Driveway!
One of the most obvious benefits of cleaning your motorhome on your own driveway is convenience. You can clean at your own pace, whenever your schedule allows, without the hassle of driving to a professional cleaning service. Plus, you save on the costs associated with commercial washes, which can be especially high for larger motorhomes. Instead, with just a few affordable cleaning supplies, you can achieve the same level of cleanliness without spending extra money.
-
Cleaning Your Motorhome in your garage!
Cleaning your motorhome in your garage can be a smart move for many reasons. This approach offers protection from the elements, a more controlled environment, and increased convenience. If you’re lucky enough to have a garage large enough to accommodate your motorhome.
-
Cleaning Your Motorhome at an outside cleaning station!
Cleaning your motorhome at an outside cleaning station has unique advantages that make it a convenient and effective option. These stations are designed specifically for larger vehicles, offering the space, tools, and sometimes even professional assistance to help you get the best results.
-
Cleaning Your Motorhome at the roadside!
Cleaning your motorhome at a roadside can be a convenient, practical solution for keeping your vehicle in great shape while you’re on the go, it’s essential to understand the potential legal restrictions to ensure you’re in compliance with local regulations. In most cases this is not strictly legal, however most police would likely turn a blind eye to it, albite not guaranteed.
When to clean my motorhome?
Keeping your motorhome clean is key to maintaining its longevity, appearance, and overall comfort. But with factors like the weather, your travel schedule, and seasonal maintenance to consider, it can be challenging to determine the best time for a thorough cleaning
After a Long Trip or Adventure
Perhaps the most important time to clean your motorhome is after a long trip. Extended travel inevitably leads to a buildup of dirt, bugs, and grime on the exterior, especially if you've driven through varied weather conditions or rugged terrain. Inside, dust, sand, and other debris can accumulate, particularly if you’ve been camping or spending time outdoors.
Why Clean Now?
- Dirt and grime can damage paint and finishes over time, while bugs can become difficult to remove if they’re left on too long.
- Interior cleaning prevents dust, food particles, and any potential mold or mildew from building up in confined areas.
- Cleaning right after a trip ensures your motorhome is ready to go for your next adventure.
Start of the Travel Season
At the beginning of the travel season, often in spring, a comprehensive cleaning can help get your motorhome in shape for the months ahead. After a period of winter storage, dust, and dirt may have settled, even if you’ve taken steps to protect the vehicle.
Why Clean Now?
- Removing accumulated dust, cobwebs, and any musty smells from storage gets your motorhome fresh and ready.
- It’s the perfect time to do a deep clean and inspect for any maintenance issues that may have arisen over the winter, such as tire condition, seal checks, and undercarriage rust.
- Washing and waxing the exterior in spring helps protect your motorhome from sun exposure and weather elements during peak travel season.
End of the Travel Season
Once your travel season is winding down and before you put your motorhome into storage, a thorough clean is essential. This step removes dirt, road salt, and other residues that could cause corrosion or other issues if left on over winter.
Why Clean Now?
- Clearing away grime from the season protects your motorhome’s surfaces from corrosion and fading.
- Cleaning the interior removes food particles, preventing pests from finding their way in during storage.
- It’s an excellent time to clean and organize your gear, ensuring everything is dry and properly stored for the colder months.
After Exposure to Extreme Weather
If your travels have taken you through harsh weather conditions—such as heavy rain, snow, or intense sun exposure—cleaning your motorhome afterward is highly recommended. Road salt, mud, and harsh UV rays can all take a toll on your motorhome’s exterior, while rain and humidity can create conditions for mold and mildew growth inside.
Exterior Wash and Protection
Exterior Wash and Protection
Regularly washing and protecting the exterior is fundamental to maintaining your motorhome’s look and preventing damage from environmental elements.
Tasks:
-
Pre-Rinse:
Begin with a pre-rinse to remove dirt and debris from the motorhome's exterior. Avoid using a pressure washer for this step unless it allows for adjustable pressure control.
-
Wash the Exterior:
Use a gentle, non-abrasive cleaner to wash the sides, roof, windows, and doors. Avoid harsh chemicals that could damage paint or decals.
- What cleaner?
Ensure that your cleaning product is specifically formulated for motorhomes. Apply it to the motorhome’s exterior and gently scrub with a soft brush to prevent scratches and protect the acrylic windows.
Some company products that are highly recommended
- Fenwicks
- Wet & Forget
- Autoglym
Always read the manufactures instructions around using there product.
Can You Use a Pressure Washer on a Motorhome?
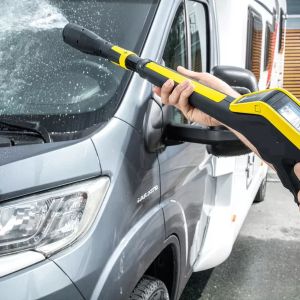
Yes, but with caution. Pressure washers can effectively remove stubborn dirt, mold, and grime from your motorhome, especially on large flat surfaces like the sides or roof. However, they can also cause damage if not used properly.
Best Practices When Using a Pressure Washer
Use the Right Pressure Setting:
- Opt for a pressure washer with an adjustable PSI (pounds per square inch). Stick to a range of 1000–1500 PSI to prevent damage.
- Use a wide-angle nozzle (25–40 degrees) to spread the force.
Maintain Distance:
- Keep the nozzle at least 2–3 feet away from the surface.
Avoid direct, prolonged spraying at a single spot.
Test First:
Test on a small, inconspicuous area to ensure the pressure isn't too harsh.
Focus Areas:
Use the pressure washer on hard-to-clean areas like wheels, undercarriage, and non-delicate bodywork.
Avoid Vulnerable Parts:
- Refrain from spraying near seals, vents, windows, doors, and decals, as the high pressure can strip or weaken them.
Never aim directly at seams or areas with caulking.
Use a Gentle Detergent:
Combine pressure washing with a motorhome-safe cleaning solution. Attach a detergent injector if your washer supports it.
Rinse Quickly and Evenly:
- Wash section by section and rinse immediately to prevent streaks or water spots.
Worst Things to Do with a Pressure Washer
Using Maximum Pressure:
-
- Excessive force can peel paint, remove decals, and compromise seals.
Spraying at Close Range:
-
- Holding the nozzle too close risks gouging the surface or pushing water into seals and vents.
Ignoring Sensitive Areas:
-
- Spraying water directly into electrical components, roof edges, or air vents can lead to water ingress and costly repairs.
Skipping Pre-Wash Steps:
-
- Pressure washing without brushing or rinsing first can grind debris into the surface, causing scratches.
Alternatives for Sensitive Motorhomes
If you’re unsure about using a pressure washer or have an older vehicle with delicate surfaces:
- Soft Wash Method: Use a hose with a low-pressure nozzle and soft microfiber brushes.
- Foam Cannon: Apply foam, let it sit to loosen grime, and then rinse with a garden hose.
- Bucket Method: Use a two-bucket system for manual washing.
In conclusion, pressure washing your motorhome can be safe and efficient if done carefully. However, when in doubt, hand-washing is always the safer, albeit more labor-intensive, option.
Cleaning sequence
The Motorhome Cleaning Sequence: A Step-by-Step Guide to Keeping Your Motorhome Spotless
Cleaning a motorhome involves more than a quick wipe-down; it’s about establishing a thorough routine that keeps your vehicle looking great and operating smoothly. By following a step-by-step cleaning sequence, you can cover every essential area and ensure that your motorhome is ready for the road in top condition. Here’s a complete motorhome cleaning sequence to make your next cleaning session efficient and effective.
Start with the Roof
It is always good to start at the top. You don't really want all that dirty water running down your freshly cleaned side pannels
Cleaning a motorhome roof is often overlooked, but it’s a critical starting point. Dirt, leaves, and even mold can accumulate on the roof, leading to water pooling and potential leaks. Follow these steps:
- Sweep off large debris like leaves or twigs.
- Use a mild cleaner suitable for motorhome roofs, particularly if you have a rubber roof.
- Rinse thoroughly and inspect for any signs of cracks, damage, or leaks, as addressing these early can prevent bigger issues.
Work Your Way Down to the Exterior Walls
Once the roof is clean, work down to the exterior walls. It’s best to clean from the top down to prevent re-soiling lower areas:
- Rinse off the dirt and grime with a hose or pressure washer (at a low setting).
- Apply a gentle, motorhome-safe soap, and scrub in sections.
- Rinse as you go to avoid soap drying and streaking.
- Check for any cracks, damaged decals, or wear, especially around windows, seals, and joints.
- After drying, apply a wax or protective sealant for an added layer of protection.
Clean the Windows and Mirrors
Clear windows and mirrors enhance visibility and aesthetics:
- Use a glass cleaner and a microfiber cloth for streak-free results.
- Be sure to clean both inside and outside surfaces.
- For tinted or special coatings, check the cleaner’s suitability to prevent damage.
- Clean any screens or shades attached to the windows for complete visibility and cleanliness.
Tidy Up the Awning
Awnings can attract dirt, mildew, and leaves, especially if they’re frequently extended in different locations. Clean these as follows:
- Extend the awning fully, and check for any damage.
- Sweep off loose debris, then scrub with a fabric-safe cleaner and brush.
- Rinse thoroughly and let it air dry before retracting to prevent mold and mildew.
Clean and Protect the Undercarriage
The undercarriage of your motorhome collects road grime, salt, and other materials that can lead to rust:
- Use a pressure washer to remove dirt and salt buildup from long trips, especially in winter.
- Inspect the undercarriage for rust and apply a rust prevention product if needed.
Focus on the Wheels and Tires
Tires and wheels accumulate brake dust, mud, and grime, and deserve special attention:
- Rinse off loose dirt, then use a brush with a tire cleaner to scrub thoroughly.
- Apply a rubber protectant to prevent cracking and extend the life of your tires.
- Check tire pressure, as well as the tread and condition, as part of your cleaning routine.
Deep Clean the Interior
Now it’s time to move inside. Follow these steps for a fresh and organized interior:
- Declutter:
Remove personal items, bedding, dishes, and anything else that’s not fixed in place.
- Dust and Vacuum: Use a vacuum to remove dust, pet hair, and debris from floors, furniture, and nooks and crannies.
- Clean the Kitchen: Scrub the countertops, sink, and appliances. Make sure the fridge is empty and cleaned, particularly before long storage.
- Sanitize the Bathroom: Clean and sanitize the toilet, shower, sink, and all surfaces. Don’t forget to check for any signs of mold or mildew.
- Wipe Down Surfaces: Use appropriate cleaners to wipe down all other interior surfaces, such as windowsills, counters, and cabinets.
- Freshen Upholstery: Clean and freshen upholstery, vacuuming any fabric surfaces. Consider using a fabric cleaner for any stains or dirt.
Sanitize Water Systems
Clean water systems are essential for safe and enjoyable trips:
- Drain and clean your freshwater tank, especially if it has been sitting unused for a while.
- Run a solution of water and a safe cleaning agent or sanitizer through the pipes.
- Drain and rinse thoroughly to prevent any residual chemicals from remaining in your water system.
Test and Clean Appliances
Appliances, like the fridge, stove, and HVAC systems, can harbor grime that impacts performance:
- Check each appliance to make sure it’s working properly.
- Clean vent covers and filters if accessible.
- Remove any residue or buildup in the kitchen area, particularly from the stove and microwave.
Final Touches: Refresh and Organize
Now that your motorhome is thoroughly clean, add the finishing touches:
- Place fresh linens, towels, and any essentials.
- Restock kitchen items and toiletries as needed.
- Add air fresheners or dehumidifiers if your motorhome will be in storage.
Perform a Final Check
Before declaring the cleaning job complete, walk through your motorhome and inspect all areas:
- Make sure all windows and doors are securely closed.
- Check that appliances are off and any loose items are secured.
- Ensure that everything is dry to prevent mildew or mold.
Final Thoughts
By following this motorhome cleaning sequence, you’ll keep your vehicle in top condition, inside and out. Regular, thorough cleaning not only preserves your motorhome’s value but also ensures a comfortable, inviting environment for you and your family. Happy travels!
Cleaning the roof
Cleaning the roof tools
As much as your tempted to get out there on a sunny day, it's not always the best time. A slightly dull overcast might be better. Harsh sun will dry up your work to quickly.
-
Ladder or access platform:
Ensure it is sturdy and safe for climbing. You might also find that fitting some pads to the ladder to stop it marking the motorhome if you need to lean it onto the side, alternatively lay a towel over the top to protect it or pipe-insulating foam tubes with a split down one side are ideal.
-
Soft-bristled brush:
To avoid scratching the roof surface us a soft brush, also a soft paint brush can help in those hard to reach areas or on the sealant to remove algae.
-
Non-abrasive cleaning solution:
Choose a cleaner safe for the roof material (EPDM rubber, fiberglass, or aluminum). Try to us approved motorhome- caravan cleaners and extra care on plastic windows and solar panels
- Bucket with water:
For rinsing or mixing the cleaning solution. If you take this up onto the roof, sit the bucket on a towel or simular. You don't want to drag it accross the roof and scratch it.
-
Hose with a spray nozzle:
For rinsing off dirt and cleaner, The multi spray heads are great for this, but again, be careful not to drag it accross the roof and try to find one with rubber protection and not brass head.
-
Microfiber cloths or mop:
For wiping and drying, or even the good old chamois leather
-
Safety equipment:
Rubber-soled shoes, gloves, and possibly a harness. The roof can become slippery.
-
Can I Stand on the Motorhome Roof to Clean It?
Yes, you technically can, but is it safe? Absolutely not.
Avoid those less solid parts like the bed overhang section which are often only bonded on. Stay close above the habitation section.
The roof of your motorhome can become dangerously slippery when wet with soapy water, increasing the risk of falling. Additionally, not all motorhome roofs are designed to support weight, and you certainly don’t want to find out the hard way. For your safety, it’s best to avoid standing on the roof. Instead, consider using kneel mats, similar to those used in yoga or fitness training, for added comfort and stability. Most importantly, always have someone nearby to pass tools up and down or assist if needed. Safety should always come first.
-
Solar Panel Cleaning
Keeping the solar panels on your motorhome clean is essential, as dirt and grime can significantly reduce their efficiency.
Use a sponge with water to gently clean the panels, and be sure to rinse thoroughly to remove any soap residue.
-
Arial
Don't forget to give this a quick wipe-down. While it has little impact on the reception, it will add that extra touch of sparkle!
-
Roof Lights
These need a degree of care as they can be damaged by harsh cleaning, so only use cleaners designed for it, (Fenwick Windowize or other acrylic windows cleaners)
Don't forget to open the window and use a paint brush and cleaner liquid to clean all those hard to reach areas and maybe spray with silicon lubricant well your there.
-
Polish
The polishing can add a lot of extra time, but will protect your hard work for a much longer period, but it's better to give it all a clean rather than only having enough time for a part clean. Alternatively - clean the whole motorhome and polish the roof and then next time clean the whole motorhome and polish the rest, then alternate.
Cleaning the main body
Tools Needed
As much as your tempted to get out there on a sunny day, it's not always the best time. A slightly dull overcast might be better. Harsh sun will dry up your work to quickly.
- Soft Brush or Wash Mitt
- Microfiber Cloths
- Bucket and Grit Guard
- Hose with an adjustable Nozzle
- Cleaning Products
- Squeegee
- Extendable Wash Brush & Paint Brush
-
Pre-Rinse:
Begin with a pre-rinse to remove dirt and debris from the motorhome's exterior. Avoid using a pressure washer for this step unless it allows for adjustable pressure control and do not point directly at seals (windows - panels). These will eventually be damaged by this. (at this stage just use clean water)
-
Wash the Exterior:
Wash with soapy water mix appied with a soft brush or cloth to avoid damage - Always avoid using dry cloths or brushes on dry panels, as this could cause scratches. For best results, use recognized motorhome cleaners such as Fenwicks or Jennychem, Autoglym. These products are specially designed to clean without damaging the surface or finish of your motorhome.
- Rinse Thoroughly:
After washing, rinse the vehicle thoroughly with clean water to remove all soap residue.
- Dry Gently:
If necessary, dry the surface using a microfiber cloth or chamois to avoid water spots.
-
What cleaner?
Fenwick's Caravan & Motorhome Cleaner
A popular and trusted cleaner for caravans and motorhomes. It's gentle on surfaces but tough on dirt, removing grime, bird droppings, and road tar. It's biodegradable and safe for use on all surfaces, including windows and decals.
Muc-Off Cleaner
Muc-Off is known for its high-performance cleaners, and their Caravan Cleaner is no exception. It’s formulated to remove dirt, grime, and road salt, leaving a streak-free finish. It's also eco-friendly and safe for all caravan finishes.
Thetford Caravan Cleaner
Thetford’s cleaner is specifically designed for cleaning caravans and motorhomes. It removes dirt and grease without damaging the surfaces and is suitable for both the bodywork and the windows
Turtle Wax Caravan & Motorhome Wash & Wax
Turtle Wax’s wash and wax formula cleans and polishes your caravan in one step, providing a protective layer to help resist dirt and grime build-up in the future. It’s ideal for maintaining a glossy finish.
Jason's Caravan Cleaner
A professional-grade cleaner, Jason's Cleaner removes dirt and stubborn stains while protecting the exterior finish. It’s easy to apply and is safe for use on a wide range of surfaces, including aluminum and fiberglass.
-
Polish
The polishing can add a lot of extra time, but will protect your hard work for a much longer period, but it's better to give it all a clean rather than only having enough time for a part clean. Alternatively - clean the whole motorhome and polish the Sides and then next time clean the whole motorhome and polish the rest, then alternate.
Let there be light, window cleaning?
How to Clean Your Motorhome Windscreen for a Crystal-Clear View:
Keeping your motorhome windscreen clean is vital for safety, especially on long trips where visibility is paramount. Dirt, streaks, and smears can obstruct your view, so maintaining a spotless windscreen should be a priority. Plus, clean windows enhance your motorhome's overall appearance. Here’s a straightforward guide to achieving sparkling results.
What’s the Best Way to Clean a Motorhome Windscreen?
The optimal method involves starting with the exterior, progressing to the interior, and finishing by topping up your wiper fluid. Cleaning the outside first ensures you can easily spot any smudges or streaks on the inside.
Essential Equipment for Cleaning Your Windscreen
To achieve a streak-free finish, gather these tools:
-
Microfibre cloths:
Excellent for removing dust, grease, and debris.
-
Glass cleaner:
Choose an ammonia-free or specialist auto glass cleaner.
-
Water and bucket:
Useful for pre-cleaning heavy dirt.
-
Telescopic squeegee:
Ideal for reaching tall windscreens.
-
Optional products:
Rain repellents, anti-fog solutions, or DIY vinegar mixtures.
Cleaning the Outside of Your Windscreen
Start by removing heavy dirt and debris. Use water and a soft brush or a telescopic squeegee to cover every part of the windscreen.
- Lift wiper blades to clean underneath and inspect for wear or damage.
- Clean wiper blades with a mix of water and baking soda, alcohol, or mineral spirits.
- Replace wipers every 2-3 years or sooner if they show signs of wear.
Deep Clean with a Microfibre Cloth
Once surface dirt is gone, dry the windscreen with a lint-free towel.
- Apply a glass cleaner and wipe in a circular motion with a clean microfibre cloth.
- Finish with paper towels for a streak-free shine.
Polishing Your Windscreen
Polishing removes fine streaks and provides a protective finish.
- Use products like smear-free glass cleaners, anti-fog treatments, or rain repellents.
- Alternatively, polish with a vinegar solution (480ml water, 60ml vinegar, ½ tsp dish soap).
Cleaning the Inside of Your Windscreen
Move to the interior once the exterior is spotless:
- Sit in the passenger seat for easier access.
- Use a microfibre cloth and water or a pivoting cleaning tool for hard-to-reach areas.
- Avoid spraying cleaner directly onto the dashboard to prevent damage.
Top Up Wiper Fluid for Smear-Free Driving
Keep the wiper fluid reservoir full with a solution that includes antifreeze, ensuring clear visibility in all weather
FAQs and Pro Tips
Can I Clean My Windscreen with Vinegar?
Yes, mix 480ml water, 60ml white vinegar, and ½ tsp dish soap for an effective DIY cleaner.
What’s the Best Windscreen Cleaner?
Opt for products like ArmorAll, Autoglym Fast Glass, or Car Gods 54 Zeus Glass Perfection. Always choose ammonia-free formulas to avoid streaks
DIY Cleaner Options?
Aside from vinegar solutions, water with a microfibre cloth works well for routine cleaning.
Pro Tips for Sparkling Results:
- Clean both sides: Don’t forget the interior, where fingerprints and suction cup marks accumulate.
- Use clean cloths: Ensure microfibre cloths are lint-free before use.
- Approach from the passenger side: This avoids interference from the steering wheel.
- Protect the interior: Cover your dashboard and seats while cleaning to prevent spills.
By following these steps, your motorhome windscreen will stay crystal clear, ensuring safe and enjoyable journeys!
Motorhome Wheels
How to Clean Motorhome Wheels: Alloy and Steel
Cleaning your motorhome wheels is a crucial part of maintaining its overall appearance and functionality. Whether you have shiny alloy wheels or rugged steel ones, proper cleaning prevents corrosion, improves safety, and ensures your motorhome always looks its best on the road or at the campsite.
Both alloy and steel wheels require different approaches to cleaning, but with the right products and techniques, the process can be simple and effective.
Why Keep Motorhome Wheels Clean?
Motorhome wheels endure tough conditions—mud, brake dust, road grime, and even salt from winter roads. Neglecting them can lead to damage or rust, especially for steel wheels. Cleaning not only enhances the look of your motorhome but also extends the lifespan of the wheels.
Products to Use for Motorhome Wheels
For Alloy Wheels
-
Acid-Free Alloy Wheel Cleaner
-
- Look for a product specifically designed for alloy wheels. Acid-free formulas dissolve brake dust and road grime without damaging the wheel’s surface.
Many cleaners change color as they react with dirt, making it easier to see where to rinse.
Rain Repellent or Tyre Gel
- Apply a protective product to repel water, dust, and grime, keeping the wheels cleaner for longer.
- A tyre gel can restore shine to your tyres, giving them a brand-new appearance.
For Steel Wheels
-
Heavy-Duty Degreaser or Steel Cleaner
- Steel wheels can accumulate rust and tougher grime. Use a cleaner with rust inhibitors to prevent corrosion.
A general-purpose automotive cleaner works well for regular maintenance.
-
Rust Remover (if needed)
- For steel wheels with rust spots, a rust remover will clean them up effectively.
- Follow up with a rust-resistant sealant or paint for long-lasting protection.
Wheel Cleaning Tools
- Wheel Brush:
Use soft bristles for alloy wheels to avoid scratches. For steel wheels, a sturdier brush is better suited to remove tough dirt and rust.
-
Pressure Washer:
A powerful spray of water can loosen dirt and debris quickly, saving time and effort.
-
Microfibre Cloths:
Essential for drying the wheels after cleaning to prevent watermarks or streaks.
-
Protective Sealant or Wax:
- A sealant creates a barrier against future dirt buildup and protects against corrosion for both alloy and steel wheels.
Step-by-Step Guide to Cleaning Motorhome Wheels
Step 1: Pre-Rinse the Wheels
- Use a pressure washer or hose to remove loose dirt, mud, and debris. Ensure you spray both the outer and inner surfaces of the wheels.
Step 2: Apply the Cleaner
- Spray your chosen cleaner evenly across the wheels.
- For Alloy Wheels: Use an acid-free cleaner designed to dissolve brake dust and grime.
- For Steel Wheels: Apply a degreaser or cleaner, focusing on rust-prone areas.
Step 3: Agitate Stubborn Dirt
- Use a wheel brush to scrub the surface gently.
- For alloy wheels, concentrate on hard-to-reach areas like spokes.
- For steel wheels, a stiffer brush can help break down tougher grime or rust.
Step 4: Rinse Thoroughly
- Rinse off the cleaner using a pressure washer or hose, ensuring no residue is left behind.
Step 5: Dry the Wheels
- Use a microfibre cloth to dry the wheels completely. For steel wheels, ensure no moisture is left behind to prevent rust.
Step 6: Protect and Shine
- Alloy Wheels: Apply a rain-repellent spray or tyre gel to enhance the shine and protect the surface.
- Steel Wheels: Use a rust-resistant sealant or automotive paint for added durability.
Additional Tips for Long-Lasting Results
-
Regular Cleaning:
Clean your motorhome wheels every few weeks or after trips through muddy or salty areas. -
Inspect for Damage:
Look for cracks, rust spots, or worn areas. Address these immediately to prevent further damage. -
Avoid Harsh Chemicals:
Stick to products designed for your wheel type to avoid damaging finishes or causing corrosion. -
Use the Right Tools:
Ensure your brushes and cloths are clean to avoid scratching or spreading dirt. -
Store Smartly:
If your motorhome is stored for long periods, cover the wheels to protect them from UV rays and dirt.
With these steps and tips, your motorhome wheels—whether alloy or steel—will remain in excellent condition, ready for every adventure.
Don't be a Streaker - clean those streaks
-
Those black Streaks
To remove black streaks on your motorhome, use an abrasive polishing agent or a dedicated black streak remover (several brands are available). Apply it with a microfiber cloth, mitt, or brush for best results.
-
Prevent them black Streaks
Absolutely! The most effective way to prevent those dreaded black streaks on your motorhome is with regular cleaning.
After washing your motorhome, open the windows and doors, and use a black streak remover to wipe down the rubber seals. This will help clear away denatured rubber particles from the seals before they can streak down your paintwork.
Additionally, applying an overwintering spray will keep the surface slick, helping to prevent dust and particles from sticking to the paintwork.
Get inside - clean inside
Complete Guide to Cleaning Your Motorhome Interior
The interior of your motorhome is just as important as the exterior. A clean, organized interior enhances comfort, promotes hygiene, and helps you make the most of your travels. Here’s a step-by-step guide to ensure your motorhome interior stays in top-notch condition, along with additional tips for storage, maintenance, and odor control.
- Declutter and Remove Loose Items
Before you begin cleaning:
- Remove items not in use: Decluttering frees up space and makes cleaning easier. Be selective and practical—store sentimental items elsewhere if not essential for the trip.
- Secure all loose items: Prevent items from falling or shifting during cleaning or while driving.
Dusting and Vacuuming
- Start with the ceiling: Use a duster or vacuum with a soft brush attachment to remove cobwebs and dust from vents, corners, and light fixtures.
- Vacuum systematically: Work in small sections, focusing on floors, carpets, and upholstery.
- Move furniture where possible: Cleaning under and behind furniture prevents the accumulation of dirt and allergens.
Wipe Down Surfaces
- Use a damp microfiber cloth and a mild, non-abrasive cleaner to wipe surfaces like cabinets, countertops, and cupboard doors.
- Avoid dishwashing liquid with harsh chemicals, as it can damage finishes.
- Pay special attention to corners and edges where crumbs and dirt may accumulate.
Kitchen Cleaning
Treat your motorhome kitchen like your home kitchen:
- Clean sinks and worktops: A vinegar-water solution works well to remove stains and grease.
- Wash utensils and appliances: Ensure all pots, plates, and utensils are clean and stored securely.
- Appliance cleaning:
- Refrigerator: Empty it completely. Clean removable shelves and trays with dish soap, then wipe the interior with a damp cloth. Don’t forget to clean the vents.
- Microwave and stove: Remove food residue and clean with mild soap and water.
- Oven or dishwasher (if present): Follow manufacturer guidelines for cleaning.
Bathroom Cleaning
Bathrooms in motorhomes require special care:
- Antibacterial solutions: Use these for general cleaning, especially on countertops, faucets, and handles.
- Shower walls and curtains: Clean with vinegar or a non-abrasive cleaner to prevent mold and soap scum.
- Toilet care: Avoid bleach, which can damage seals and plastic. Instead, use soapy water for scrubbing and a vinegar solution in the cassette to eliminate odors and sanitize.
Upholstery and Fabric Care
- Vacuum regularly: Remove dirt, dust, and allergens from upholstery and seating areas.
- Spot cleaning: Treat stains with a fabric-specific cleaner, ensuring the material doesn’t discolor or damage.
Window Cleaning
Motorhome windows are often acrylic and require extra care:
- Avoid harsh cleaners: Use mild, non-corrosive products to prevent scratches.
- Dry with chamois leather or a soft cloth: Prevent streaks and damage by using gentle materials for drying.
- Clean the windscreen and mirrors thoroughly: Ensure visibility and safety by keeping all glass surfaces spotless.
Floor Cleaning
- Vacuum first: Remove loose dirt and debris.
- Clean according to material:
- Rugs or carpets: Use a vacuum cleaner or carpet cleaner for deep cleaning.
- Vinyl or laminate floors: Mop with a mixture of warm water and mild detergent.
- Hard floors: Use a damp mop for an even, polished finish.
Cleaning Storage and Organization
- Empty storage spaces: Remove everything from cupboards, drawers, and exterior lockers.
- Clean inside and out: Wipe down storage compartments and remove any debris or odors.
- Organize smartly: Group items by use (kitchenware, clothing, tools) and store them securely to prevent movement during travel.
Odor Control
- Ventilation: Open windows and roof vents regularly to allow fresh air circulation.
- Odor absorbers: Use baking soda or activated charcoal to eliminate smells in small spaces like cupboards and refrigerators.
- Regular waste disposal: Empty waste bins and cassettes frequently to prevent unpleasant odors.
Maintenance Tips for Longevity
- Inspect regularly: Look for wear and tear, leaks, or signs of pests. Address these issues promptly.
- Clean spills immediately: Prevent stains and lingering odors by cleaning up as soon as spills occur.
- Protect surfaces: Use mats or protective liners on countertops, shelves, and under seating areas.
A Final Touch for a Sparkling Motorhome
After cleaning, make your motorhome feel homely and inviting:
- Add fresh linens: Replace bedding, towels, and curtains with clean ones.
- Decorate sparingly: A few personal touches like cushions, throws, or plants can make the space cozy without cluttering.
- Double-check essentials: Ensure all cleaning tools, safety items, and frequently used accessories are in their designated spots.
A clean, well-organized motorhome not only improves your travel experience but also ensures the longevity of your investment. With these comprehensive cleaning practices, you’ll always be ready to hit the road in style and comfort!
Cleaning a motorhome’s decals and graphics
When cleaning your motorhome decals and graphics, it's important to avoid harsh chemicals that can cause discoloration or fading. Be gentle during cleaning to prevent any risk of the decals detaching.
For a safe and effective clean, use a soft cloth or brush with plenty of soapy water. Alternatively, consider using Erase Away foam pads. These non-abrasive pads are free from harmful chemicals and are perfect for cleaning both flat and raised decals without causing damage.
Cleaning Seals, and not the ones found in the zoo
The seals around a motorhome’s hatches, doors, and windows can accumulate algae and dirt over time. Start by thoroughly washing them with soapy water and allowing them to dry completely.
To keep the rubber seals in good condition, apply a silicone spray like Thetford’s Seal Lubricant. This helps maintain their flexibility, prevents cracking, and offers protection against UV damage, ultimately extending their lifespan.
Awning And Outdoor Accessories
When cleaning your motorhome awning, be gentle and avoid scrubbing too hard to prevent any damage. Don’t forget to clean the underside, as it’s especially prone to dirt buildup. For effective cleaning, you can use awning cleaners such as 303 Fabric Cleaner, Thetford Awning Cleaner, or Fenwick’s Caravan Awning Cleaner, all of which are designed to safely clean and protect your awning fabric.
- Details
- Written by: Ricky Clark
- Category: FAQ
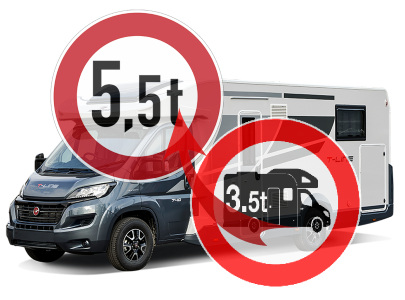
Above 3.5 Tonnes - Is it a beast or a blessing
Whether your upgrading yours or buying, hopefully this will help you decide.
-
Upgrading yours - Things to consider
Some of the things you may need to do before getting your 3.5 tonne motorhome reregistered.
- Suspension - this maybe either adding air suspension or stiffer suspension to compensate for the additional weight.
- Engine upgraded - with all this extra weight you will need extra power to get it up those hills - this maybe just having it re-mapped by re-programming the vehicle ECU or you may need to dig deeper adding major components.
- Braking - You may want to consider improved braking. This maybe in the form of a higher quality of pads and shoes, but may need a higher performance disc.
- Possible warranty issues - if this is a relatively new vehicle this could have an impact on your warranty, either motorhome or base vehicle.
- Insurance - this could impact on your insurance policy.
- Many of these upgrades come at a cost, so it's important to consider how important this upgrade is.
- Your licence - in the UK to drive a vehicle above 3.5 tonne requires additional driving licence categories often not given to new drivers.
You may want to consult a qualified engineer to discuss these changes.
-
Purchasing above 3500kg Motorhome. - Hassle free
Buying above 3.5 tones rather than upgrade.
- Suspension - designed for the additional weight.
- Engine - with all this extra weight it will often have a bigger engine with more BHP.
- Braking – often comes with improved braking or even additional axels.
- Warranty – no issues around the warranty because it has not been modified, either motorhome or base vehicle.
- Insurance – no issues around insurance policy because they know the vehicle.
- Many of these upgrades come at a cost, you may find that the additional cost to buy your bigger vehicle may work out more cost efficient.
- Often these are longer with bigger habitation areas
- Handling – because they designed from ground up, they do not handle unpredictable.
- Your licence - in the UK to drive a vehicle above 3.5 tonne requires additional driving licence categories often not given to new drivers.
You may want to consider this as an option.
Upgrading your motorhome to above the 3.5-tonne category in terms of vehicle weight comes with its own set of advantages and disadvantages. Here are some pros and cons around this upgrade:
Pros:
-
Extra Load Capacity
The most obvious advantage of upgrading your motorhome to above 3.5 Tonnes would be its additional ability to take that extra load.
- Used for extra storage.
- Additional water supplies
- Additional gas supplies
- Additional passengers
- Extra towing capacity
-
Reduced Road Tax
Private HGV - (TC10)
A motorhome or campervan with a revenue weight above 3500kg is categorised as a private heavy goods vehicle. However, these private heavy goods vehicles are taxed based on weight, emissions, and the number of axles.
- A motorhome or campervan with a revenue weight between 3500-7500kg is taxed £165 per annum.
- Campers that weigh 7,500-11,999kg have an annual road tax cost of £200.
- Motorhome tax rates increase for vehicles with revenue weight of 12,000kg and above. However, the tax is based on CO2 emissions, and vehicles that weigh 12,000kg to 14,000kg with a Euro VI-compliant engine will have a road tax rate of £189.50 per year.
- Motorhomes with the same weight but Euro V-compliant will be charged £221 per annum.
Prices TBC on latest rates - Updated on April, 2024
-
Higher Towing capacity
The added weight of your motorhome will enhance its capacity to tow a heavier vehicle, adhering to the general rule that the towed vehicle should be approximately 85% of the weight of the towing vehicle.
However, it's essential to consider the structural capacity of the tow bar and mounting for any additional limitations.
-
Enhanced Stability
Increasing the gross weight of a motorhome can improve stability, especially in windy conditions or when driving on uneven terrain. The additional weight can help to counteract sway and improve overall handling.
However, this will only be the case when all other modifications have been done to meet with the increased weight i.e. suspension, tyres braking weight distribution etc.
Cons:
-
Driving License
In the UK, driving a motorhome over 3500kg requires specific licensing and may entail additional requirements.
Category C1 Driving License:
To drive a motorhome over 3500kg but not exceeding 7500kg (with a trailer of up to 750kg), you generally need a category C1 driving license. This license allows you to drive vehicles weighing between 3500kg and 7500kg.
Driver Training and Testing:
If you don't already hold a category C1 driving license, you'll need to undergo specialized training and pass a test to obtain it. This typically involves completing a theory test and practical examination focusing on driving skills, vehicle handling, and safety procedures specific to larger vehicles.
-
Vehicle Registration
Motorhomes over 3500kg must be properly registered with the DVLA (Driver and Vehicle Licensing Agency). This ensures that the vehicle meets safety and regulatory standards for its weight class.
-
Insurance
Insurance coverage for motorhomes over 3500kg may differ from standard vehicle insurance. Insurers may consider factors such as the vehicle's weight, size, and intended use when determining coverage and premiums.
Also because these modifications are outside of the standard build they may be increased insurance rates added
-
Road and Signage
In the UK, driving a motorhome over 3500kg may entail certain road restrictions due to the vehicle's size and weight.
- Weight Limits: Some roads, bridges, and tunnels have weight restrictions to ensure the safety of infrastructure and other road users. Vehicles exceeding a certain weight threshold may be prohibited from accessing these routes
- Low Bridges and Tunnels: Motorhomes over 3500kg may encounter weight restrictions when passing over bridges. It's essential to check weight limits before attempting to navigate these structures to avoid causing damage.
- Traffic Signs: Pay attention to traffic signs indicating weight limits
- Planning Routes: When planning your journey, consider the additional weight of your motorhome and choose routes that are suitable for larger vehicles. Use GPS navigation systems or maps specifically designed for motorhomes to avoid restricted areas and navigate safely.
-
Driving in the EU
When driving a motorhome over 3500kg on EUroads, it's essential to be aware of specific regulations and considerations.
- Speed Limits: The speed limits for motorhomes over 3500kg in the EU are generally lower than those for lighter vehicles. On highways (autoroutes), the speed limit for motorhomes weighing over 3500kg is 110 km/h, whereas it's 130 km/h for vehicles under 3500kg.
- Road Tolls: When driving on EU highways, you'll encounter toll booths. Motorhomes over 3500kg are classified as category 2 vehicles and are subject to higher toll charges than lighter vehicles. Be prepared to pay tolls based on your vehicle's weight and height.
- Environmental Zones: Some cities in EU, such as Paris and Lyon, have low-emission zones (Zones à Circulation Restreinte, ZCR) where access is restricted to vehicles meeting certain emission standards. Heavier motorhomes may be subject to additional restrictions or charges in these zones
- Parking and Overnight Stops: When parking or staying overnight in EU with a motorhome over 3500kg, look for designated motorhome parking areas (aires de services) or campsites that can accommodate larger vehicles. Many campsites offer facilities such as electrical hook-ups and waste disposal suitable for heavy motorhomes.
- Documentation: Ensure you have all necessary documentation for your motorhome, including vehicle registration, insurance papers, and proof of ownership. Carry your driving license and passport with you at all times when driving in the EU.
-
Smaller Pool Of Drivers
Selling a motorhome weighing over 3500 kg can pose challenges due to the smaller pool of drivers holding the necessary C1 classifications, especially among younger demographics. This limitation narrows the potential buyer base, potentially complicating future sales and potentially lowering the selling price.
Ultimately, the decision to upgrade your motorhome to over 3500kg depends on your specific needs, preferences, and budget. If you prioritize s payload and are willing to deal with the associated costs and requirements, a heavy motorhome could be the right choice for you.
Purchasing above the 3.5-tonne category in terms of vehicle weight and size comes with its own set of advantages and disadvantages. Here are some pros and cons around taking the hassle free approach:
Pros:
-
More Space
Generally, heavier motorhomes offer more space for living, sleeping, and storage. This extra space can make long trips or full-time living more comfortable.
-
Luxurious Amenities
Heavy motorhomes often come with more luxurious amenities such as larger bathrooms, kitchen appliances, entertainment systems, and more.
-
Higher Payload Capacity
With a higher weight rating, you have the capacity to carry more gear, equipment, and supplies without worrying about exceeding weight limits.
-
Stability
The additional weight can provide better stability and smoother rides, especially in windy conditions or when passing large vehicles.
-
Durability
Heavy motorhomes tend to be built on stronger chassis to support the weight, which can translate to increased durability and longevity.
Cons:
-
Cost
Heavy motorhomes typically come with a higher price tag both upfront and in terms of ongoing maintenance and fuel costs.
-
Driver's License Requirements
In many regions, driving a motorhome over a certain weight requires a special license or additional endorsements, which can be a hassle to obtain.
-
Fuel Consumption
Due to their weight, heavy motorhomes tend to have poorer fuel efficiency compared to lighter models, resulting in higher fuel costs.
-
Parking and Maneuverability
Heavy motorhomes can be more challenging to maneuver and park, especially in tight spaces or congested urban areas.
-
Road Restrictions
Some roads, bridges, and tunnels have weight restrictions, which may limit where you can travel with a heavy motorhome.
-
Maintenance Costs
Maintenance costs can be higher for heavy motorhomes due to the wear and tear associated with their weight, as well as the complexity of systems.
-
Smaller Pool Of Drivers
Selling a motorhome weighing over 3500 kg can pose challenges due to the smaller pool of drivers holding the necessary C1 classifications, especially among younger demographics. This limitation narrows the potential buyer base, potentially complicating future sales and potentially lowering the selling price.
Ultimately, the decision to purchase a motorhome over 3500kg depends on your specific needs, preferences, and budget. If you prioritize space, amenities, and payload capacity and are willing to deal with the associated costs and requirements, a heavy motorhome could be the right choice for you.
Road Tax
In the UK, the road tax for motorhomes is based on the vehicle's weight, emissions, and fuel type, among other factors. As of my last update, there isn't a blanket rule stating that road tax is necessarily less for motorhomes above 3500kg compared to those below this weight. However, there are some considerations:
-
Vehicle Excise Duty (VED) Rates: VED rates for motorhomes are calculated based on their CO2 emissions and weight. Generally, vehicles with lower emissions and/or lower weight attract lower road tax rates. However, motorhomes are often taxed at a flat rate rather than being based solely on emissions.
-
Alternative Fuel Discount: Some motorhomes that use alternative fuels such as electricity or hybrids may qualify for a discount on road tax.
-
Historic Vehicle Status: Motorhomes over a certain age (typically 40 years old or more) may qualify for Historic Vehicle status, which exempts them from road tax.
-
First Year Rate: For new motorhomes, there may be a first-year rate based on CO2 emissions. This rate could vary depending on the weight and emissions of the vehicle.
-
Weight-based Charges: There might be additional charges or fees for vehicles over certain weight thresholds, but these are often related to things like congestion charges in certain cities rather than the standard road tax.
It's essential to check the current regulations and tax rates with the Driver and Vehicle Licensing Agency (DVLA) or relevant authorities in the UK as these can change over time. Additionally, tax rules may vary for motorhomes used for personal versus commercial purposes.
Ferry or Tunnel Crossings
Ferry charges for motorhomes can vary based on several factors, including size, weight, length, height, and sometimes even the number of axles. While there isn't a universal rule that ferries charge less for motorhomes under 3500kg compared to slightly heavier ones, there are some considerations that may affect ferry pricing:
-
Size and Space: Ferries often charge based on the amount of space a vehicle occupies on the deck. Larger motorhomes, regardless of weight, may be charged more because they take up more space.
-
Weight-Based Charges: Some ferry operators do have weight-based pricing tiers. Motorhomes over certain weight thresholds might fall into a higher pricing category.
-
Length and Height: Motorhomes that are longer or taller may be subject to additional charges due to the space they occupy and any special accommodations required.
-
Special Vehicles: Some ferry operators may have specific pricing for oversized or heavy vehicles, which could apply to motorhomes above a certain weight regardless of whether they are under or over 3500kg.
-
Destination and Route: Ferry charges can also vary depending on the route, destination, time of year, and any additional services or amenities provided during the voyage.
It's essential to check with the ferry operator directly or consult their website for specific pricing details, as policies can vary between operators and even between different routes offered by the same operator.
What Stickers?
For a motorhome weighing over 3500 kg in the EU, including "angles morts" (French for "blind spots"), there are specific requirements to enhance safety, visibility, and compliance with regulations. Here's a list of stickers and markings commonly needed:
-
Maximum Allowable Mass (MAM) Plate: As mentioned earlier, this plate indicates the maximum weight the motorhome can legally carry.
Speed Limit Sign:
-
Some countries require motorhomes over a certain weight to display a speed limit sign indicating the maximum speed allowed for that vehicle.
Blind Spot Warning Stickers:
-
These stickers are placed on the motorhome to alert other road users about the vehicle's blind spots. They usually depict a warning symbol and may include text such as "Attention: Angles Morts" to indicate blind spots.
Reflective Markings:
-
Reflective tapes or markings on the sides and rear of the motorhome increase visibility, especially in low-light conditions. These markings help other drivers see the vehicle more clearly, reducing the risk of accidents.
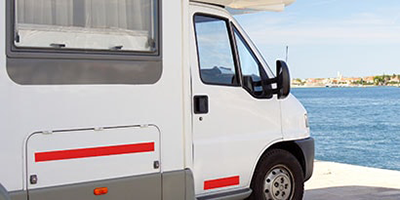
Warning Signs for Overhanging Loads:
-
If the motorhome has overhanging loads, such as bicycles or cargo carriers, warning signs indicating the protruding length are necessary for safety and compliance.
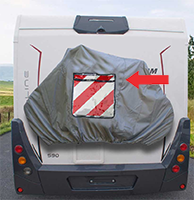
Towing Limitations (if applicable):
-
If the motorhome is equipped for towing, there may be stickers or signs indicating the maximum allowable towing capacity and any relevant limitations.
Emergency Exits and Safety Equipment Markings:
-
If the motorhome has emergency exits or safety equipment such as fire extinguishers, emergency hammers, or first aid kits, appropriate markings indicating their location may be required.
Country-Specific Requirements:
-
Depending on the country within the EU, there may be additional stickers or markings required for compliance with local regulations. It's essential to research the specific requirements of each country you plan to travel through.
By adhering to these requirements and ensuring that the motorhome is properly marked and equipped, you can enhance safety for yourself and other road users while complying with EU regulations.
Inconclusion
Hopefully this article will have helped with some pros and cons around either buying a preconfigured Motorhome with the additional capacity or to upgrade your previous 3500kg unit. Ultimately the choice is yours based on budget, space, and needs. What is important is that you have a wonderful time with your purchase making great memories.
- Details
- Written by: Ricky Clark
- Category: FAQ
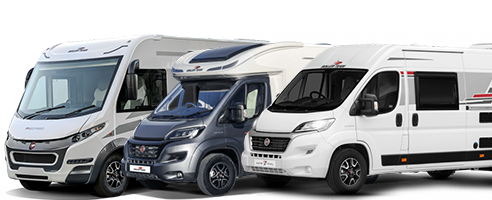
Fiat Ducato camper range, what's the difference?
The Ducato camper van range offers an array of extras that are frequently integrated into the vehicles, either as standard features or available as optional add-ons. These additions are designed to enhance the driving experience, ensuring a comfortable and enjoyable journey, and to assist with navigating through various road and terrain conditions encountered during your adventures.
Cruise Control
Fiat Ducato Cruise Control Operation Instructions:
-
Activating Cruise Control:
- Ensure the vehicle is traveling at a steady speed of at least 20 mph (30 km/h).
- Push the cruise control switch located on the steering wheel. The cruise control icon should illuminate on the dashboard to indicate that the system is active.
-
Setting a Speed:
- Once cruise control is activated, press the "+" or "-" buttons on the steering wheel to set your desired speed. The vehicle will then maintain this speed until you change it or deactivate cruise control.
-
Adjusting Speed:
- To increase or decrease the set speed, briefly tap the "+" or "-" buttons on the steering wheel.
-
Cancelling Cruise Control:
- To cancel cruise control temporarily, press the brake pedal or clutch pedal. The system will be turned off, but your set speed will be stored and can be easily reactivated by pressing the "RES" (resume) button on the steering wheel once you reach the desired speed again.
- To completely deactivate cruise control, press the "OFF" button on the steering wheel.
-
Resume Function:
- If cruise control was previously canceled, you can easily resume the previously set speed by pressing the "RES" button on the steering wheel once you reach the desired speed again.
-
Precautions:
- Remember to always stay alert and aware of your surroundings while using cruise control.
- Do not use cruise control in heavy traffic, on winding roads, or in adverse weather conditions.
- Always be prepared to take control of the vehicle by using the brake pedal or clutch pedal if necessary.
-
Additional Features (if applicable):
- Some Fiat Ducato models may have additional features related to cruise control, such as adaptive cruise control, lane-keeping assist, or intelligent speed assist. Refer to your vehicle's owner's manual for specific instructions on using these features.
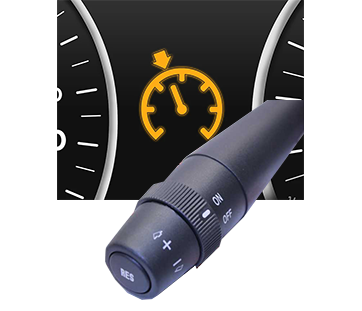
Payload Assist
Don't be confused about this button
Payload Assist:
The 'Up' button on the Fiat Ducato's dashboard might initially seem like a feature for launching cargo into orbit, but in reality, it serves a much more practical purpose. This button is specifically designed to assist the driver when the vehicle is heavily loaded, such as when it's being used as the base for a motorhome.
- Essentially, it modifies the transmission making the gear change at a higher rev than normal causing it to hold the gears longer. Increasing it's ability to climb or use the engine braking.
- This causes the transmission to hold lower gears longer, downshift automatically when going downhill (engine braking) and most importantly, severely delay upshifts from 1 to 2.
- This can be very useful when driving in extreme hill conditions for example: the Alps. As much as it might seem painful to hear the revs when using the engine to keep your decline down, it is far less concerning than losing your braking from riding them until they over heat.
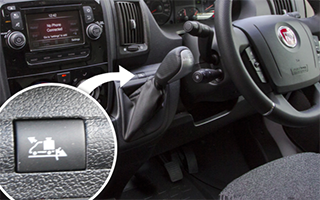
Comfort-matic gearbox
The Comfort-Matic Gearbox is an innovative automatic transmission system developed by Fiat for use in their vehicles. It provides a comfortable and convenient driving experience by automatically shifting gears, allowing for smoother acceleration and better fuel efficiency.
-
Operating the Comfort-Matic Gearbox:
- Start the engine. (with the selector in N and the brake pedle pressed)
- Shift the gear lever into "D" (Drive) or "A" (Automatic) mode.
- The Comfort-Matic gearbox will automatically shift gears based on driving conditions.
-
Shifting Modes:
The Comfort-Matic Gearbox has several shifting modes that can be selected using the gear lever:
- "D" (Drive) or "A" (Automatic) mode: The gearbox automatically shifts gears based on driving conditions.
- "M" (Manual) mode: The gearbox allows the driver to manually shift gears using the gear lever or paddle shifters.
- "N" (Neutral) mode: The gearbox disengages the transmission from the engine. Use this mode when towing the vehicle or when the vehicle is stationary with the engine running.
- "R" (Reverse) mode: The gearbox engages reverse gear for backing up the vehicle.
-
Parking and Stopping:
To park or stop the vehicle with the Comfort-Matic Gearbox:
- Bring the vehicle to a complete stop.
- Shift the gear lever into "P" (Park) mode.
- Apply the parking brake.
-
Emergency Procedures:
In the event of an emergency, such as the vehicle becoming stuck or the gearbox malfunctioning, follow these steps:
- Shift the gear lever into "N" (Neutral) mode.
- Apply the parking brake.
- Turn off the engine.
-
Troubleshooting:
If you encounter any issues with the Comfort-Matic Gearbox, such as unusual noises or difficulty shifting gears, consult your Fiat dealership or authorized service center for assistance.
-
Maintenance and Care:
To ensure the optimal performance and longevity of the Comfort-Matic Gearbox, follow these maintenance and care tips:
- Regularly check the transmission fluid level and quality.
- Follow the recommended maintenance schedule for the vehicle.
- Avoid towing heavy loads or exceeding the vehicle's towing capacity.
- Avoid harsh driving habits, such as rapid acceleration or sudden braking.
Traction Control Plus
Fiat's Traction Control Plus (Traction+) is an enhancement over the conventional traction control system, providing additional capability for challenging off-road conditions.
-
What does Traction Control Plus do?:
Fiat's Traction Control Plus (Traction+) is an enhancement over the conventional traction control system, providing additional capability for challenging off-road conditions.
In summary, while TC is suitable for on-road traction management, Traction+ offers enhanced capability, especially in off-road environments, by incorporating features like ELD (Electronic Locking Differential) and ASR (Anti-Slip Regulation).
-
Traction Control (TC):
- Traditional traction control is designed to prevent wheel spin by applying brake pressure to the wheel that is slipping, thereby transferring power to the wheels with better traction.
- TC is typically optimized for on-road conditions and helps maintain stability and control during acceleration on slippery surfaces.
-
Traction Control Plus (Traction+):
- Traction+ goes beyond the basic TC functionality by incorporating an Electronic Locking Differential (ELD) and Anti-Slip Regulation (ASR).
- The ELD helps distribute power evenly between the front and rear axles, improving off-road traction (on 4 wheel drive).
- ASR limits engine torque when necessary, reducing wheel spin and enhancing grip on challenging terrains.
- Traction+ is particularly beneficial for off-road driving, where maintaining traction on loose surfaces is crucial.
Fiat Downhill Assist Control (DAC)
Down Hill assist is an electronic system designed to help vehicles maintain a safe and controlled descent on steep or slippery slopes. DAC works by automatically controlling the vehicle's speed without the driver having to use the brakes excessively.
Only operates below 25kph (15mph) and will deactivate if your speed goes over this.
-
How does it work?:
The DAC system uses the vehicle's ABS (anti-lock braking system) to monitor the speed of each wheel and adjust the brake pressure accordingly. This helps the vehicle maintain a slow and steady speed, preventing it from accelerating too quickly or losing traction on the descent.
-
How to activate it?:
The DAC system is typically activated by pressing a button. Once activated, the system will maintain a constant speed on the descent until the driver deactivates it or the vehicle reaches a flat or uphill section of the road.
Please note that it can only be activated when below 25kph (15mph) and if your speed goes above this then it will deactivate.
-
When is it often required?:
When this is required is solely down to yourself, however such conditions may be:
DAC is especially useful in off-road driving situations where maintaining control of the vehicle on steep inclines is critical for safety. It helps reduce the risk of skidding or sliding, allowing the driver to focus on steering and maintaining a safe path down the slope.
-
Warning:
It's important to note that while DAC can help improve safety and control, it is not a substitute for careful driving and good judgment. Drivers should always exercise caution and use DAC in conjunction with other safe driving practices.
Fiat Ducato daytime running lights
Daytime running lights (DRLs) have become increasingly common as a safety feature on modern vehicles, including motorhomes. The use of DRLs, including those on the Fiat Ducato motorhome, has been encouraged or mandated by various regulations in different regions.
It is worth noting that in most cases daytime running lights only operate at the front and in low light conditions should not be a substitute for side or full lights.
-
European Union regulations:
In the European Union, for example, all new vehicles (including motorhomes) have been required to have DRLs since February 7, 2011. This requirement was made under EU Directive 2008/89/EC, which amended Directive 76/756/EEC.
-
United States and other nations:
In the United States, there is no specific nationwide requirement for DRLs on motorhomes or other vehicles. However, some states, such as California, have laws that require DRLs on vehicles. Additionally, many vehicle manufacturers include DRLs as standard equipment on their vehicles, including motorhomes, even if they are not legally required in a particular region.
It is important to check the specific regulations in the region where the vehicle will be used to determine if DRLs are required and when they became mandatory.
-
Auto Lights:
In the UK market, the Fiat Ducato base models typically come with manual daytime running lights (DRLs) as standard, and higher trim levels might include automatic headlights, but is often only fitted as an extra or on high end models.
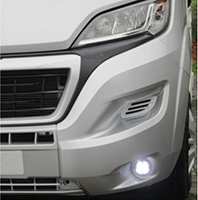
Fiat Ducato auto rain sensor
Fiat Ducato did not come with an auto rain sensor feature as a standard option. However, this could be added as an optional extra or was added to some higher end versions.
-
Locate the Auto Rain Sensor:
The rain sensor is usually located on the windshield near the rearview mirror. It is a small, rectangular sensor with a lens.
-
Setting them to auto mode:
Start your Fiat Ducato and let it run. Turn on the windshield wipers to the intermittent setting (usually the first or second setting on the wiper control stalk).
-
Adjust the Sensitivity:
Some rain sensors have a sensitivity adjustment dial. If your Fiat Ducato has this feature, you can use the dial to adjust how sensitive the sensor is to rain. This is usually located near the rearview mirror or on the dashboard.
-
Let the Sensor Work:
The sensor will automatically detect rain and adjust the wiper speed accordingly. The wipers will speed up or slow down based on the amount of rain detected by the sensor.
-
Turn Off the Auto Rain Sensor:
If you wish to turn off the auto rain sensor feature, simply adjust the wiper speed to a different setting (such as low, high, or off). The auto rain sensor will deactivate until you switch back to the intermittent setting.
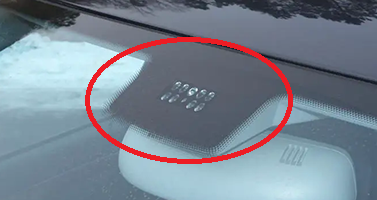
Rear parking sensors
These can be very useful when trying to manoeuvre your vehicle, especially when they often have little to no rear vision.
What are rear sensors:
Rear parking sensors are a safety feature used in vehicles to help drivers while they are reversing or parking. These sensors are usually mounted in the rear bumper of the vehicle and use ultrasonic or electromagnetic technology to detect objects that are behind the vehicle. When an object is detected, the sensors emit a warning sound or visual signal, such as a series of beeps or a flashing light, to alert the driver. This helps the driver avoid hitting objects such as other vehicles, pedestrians, or obstacles while backing up. Rear parking sensors are especially useful in motorhomes/camper vans with large blind spots.
Rearview camera,
These can be very useful when trying to manoeuvre your vehicle, especially when they often have little to no other rear vision.
-
What is a rear view camera:
A rearview camera, also known as a backup camera, is a safety feature found in many modern motorhomes. It consists of a small camera mounted on the back of the motorhome, typically as high up as possible, that sends a video feed to a display screen located in the dashboard or rearview mirror of the vehicle. The camera is activated when the car is shifted into reverse or by manual switch, providing the driver with a clear view of what is behind the vehicle. This helps the driver to avoid accidents, particularly when backing up in tight spaces or while parallel parking. Rearview cameras can come equipped with additional features such as guidelines to help the driver gauge distance.
-

Single Camera Mount Upgrade.
With the standard unit fitted to the Roller Team it either has a fixed angle or limited adjustment. However this can be upgraded.
Click here. Single Camera Upgrade
-
Twin Camera Mount Upgrade.
With the standard unit fitted to the Roller Team it either has a fixed angle or limited adjustment. However this can be upgraded.
Click here. Twin Camera Upgrade
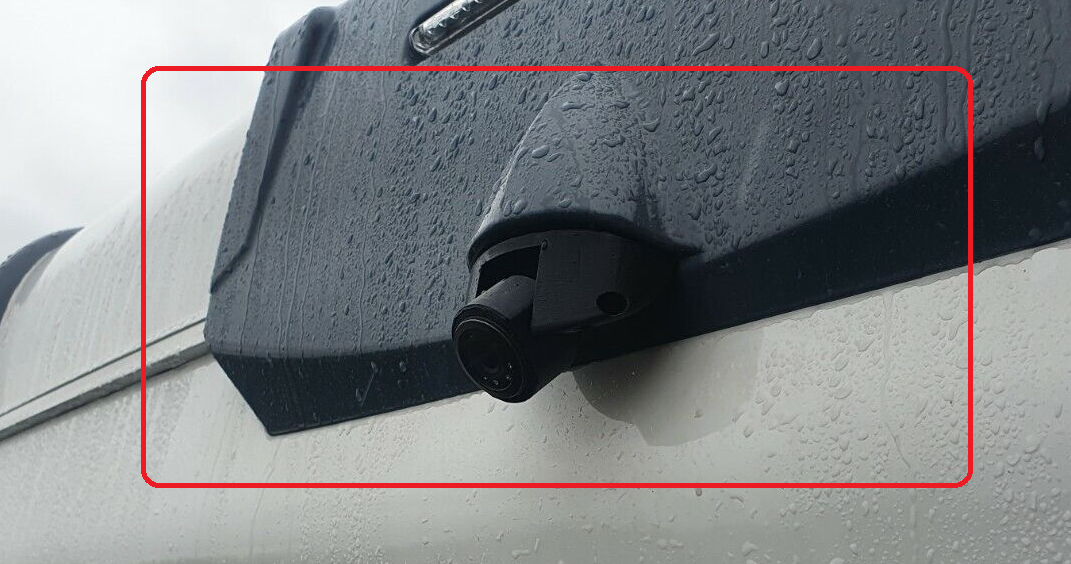
Audio,
The Fiat Ducato camper van audio system can vary depending on the specific model and trim level, and the instructions for using the audio system may differ slightly. However, here are some general instructions for using the audio system that should apply to most models:
-
Power On/Off:
To turn the audio system on, press the "Power" button. Press the same button again to turn it off.
-
Volume Control:
There are usually buttons or knobs for adjusting the volume. You can increase or decrease the volume by pressing the "+" or "-" buttons or by turning the knob clockwise or counterclockwise.
-
Source Selection:
Most audio systems have multiple sources, such as FM radio, AM radio, CD player, USB, Bluetooth, and AUX. Use the "Source" or "Mode" button to cycle through the available sources until you reach the one you want to use.
-
Tuning:
For FM and AM radio, you can usually tune to a specific station by pressing the "Tune/Seek" buttons or by turning the "Tuning" knob. Some models may have an automatic scan feature that will search for and save all available stations.
-
CD Player:
If your audio system has a CD player, insert a CD into the slot with the label facing upwards. The system should automatically start playing the CD.
-
USB:
If your audio system has a USB port, you can connect a USB device (such as a flash drive or smartphone) to play music stored on the device. Use the "Source" button to select the USB source.
-
Bluetooth:
If your audio system has Bluetooth connectivity, you can pair your smartphone or other Bluetooth-enabled device to the system to play music wirelessly. Refer to the owner's manual for instructions on how to pair devices.
-
AUX Input:
If your audio system has an AUX input, you can connect an external audio device (such as an MP3 player or smartphone) using a 3.5mm audio cable. Use the "Source" button to select the AUX source.
-
Settings:
-
Depending on the model, you may have access to additional settings such as bass, treble, balance, and fade. These settings can usually be adjusted using buttons or knobs on the audio system.
It's important to refer to the owner's manual for your specific model and trim level for detailed instructions on how to use the audio system, as there may be additional features and functions that are not covered here.
-
Break Down,
With many motorhomes weighing around or above 3,500kg, a breakdown can be more challenging to handle than with a standard car. The main issue arises if you're unable to fix the problem yourself and need to transport the vehicle to a garage, as towing without a specialist vehicle is often impossible. Therefore, it's highly recommended to have additional breakdown cover. When choosing a service, ensure it not only covers the weight of your motorhome but also its large size.
How to Jump-Start a Fiat Ducato
Locate the Jump-Start Points
-
Open the Bonnet: Use the bonnet release (inside the passenger door area) and lift the bonnet.
-
Positive Terminal: On the right-hand side under the bonnet, open the small cover with your key to access the positive connection point.
-
Negative Terminal (Earth): Find the grounding bolt in the middle, just in front of the windscreen panel.
Connect the Jumper Cables
-
Red Cable (Positive):
-
Attach one end to the Ducato’s positive terminal.
-
Connect the other end to the positive terminal of the donor vehicle.
-
-
Black Cable (Negative):
-
Attach one end to the Ducato’s negative terminal (earth).
-
Connect the other end to a metal part of the donor vehicle, away from its battery.
-
Start the Vehicles
-
Start the donor vehicle and let it run.
-
Start the Ducato and let it run for a few minutes.
-
Disconnect the cables in reverse order (black first, then red).
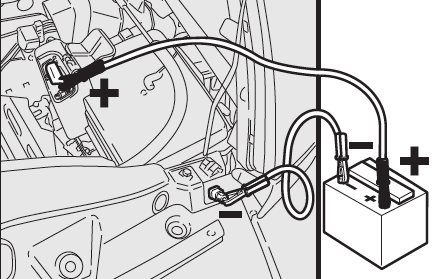
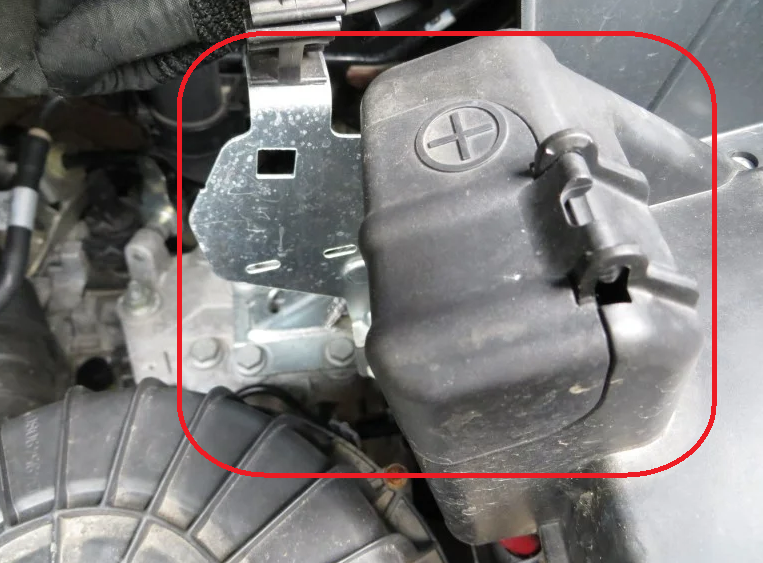
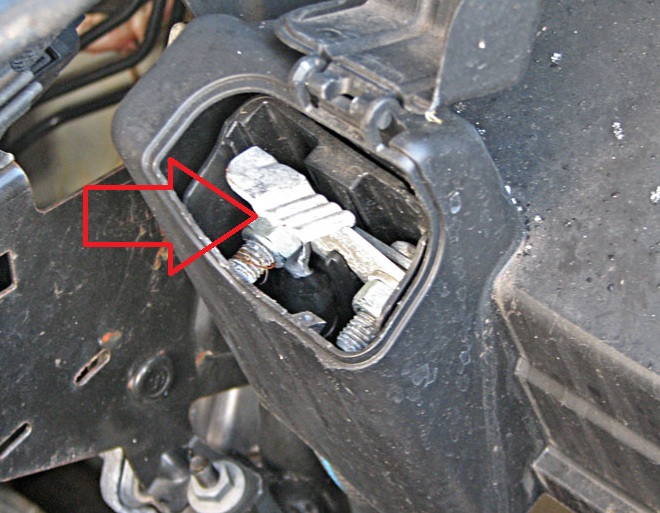
Important Notes
-
Use the designated jump-start points, not the battery terminals.
-
Ensure correct polarity (red = positive, black = negative/earth).
-
Make firm connections to prevent loose cables.
-
Avoid sparks by keeping cables away from the battery.
How to tow your Fiat Ducato out of mud
Towing a Fiat Ducato out of the mud requires careful planning to avoid damage. Here are some steps to do it safely:
Assess the Situation
-
Check how deep the van is stuck. If the wheels are spinning without traction, stop to prevent digging deeper.
-
See if you can improve grip before resorting to towing.
Improve Traction First (If Not Deeply Stuck)
-
Reduce tyre pressure slightly for more surface area.
-
Use traction aids like mats, gravel, sticks, or even carpets under the driving wheels.
-
Rocking motion (forward and back) by gently accelerating and reversing.
Use a Tow Vehicle Properly
-
A 4x4 or another van with a high towing capacity is best.
-
Attach a proper-rated tow strap or kinetic rope to the towing points (NOT suspension parts or bumper).
-
Pull gently to avoid sudden jolts. Slow and steady force is better than jerking.
Winching as an Alternative
-
If available, a winch with a ground anchor (or attached to another vehicle) can provide controlled recovery.
Prevention Tips for Next Time
-
Use all-terrain or mud/snow tyres if you often park on soft ground.
-
Carry traction boards or sand ladders in your motorhome.
-
Consider air suspension adjustment if your Ducato has it, to lift slightly.
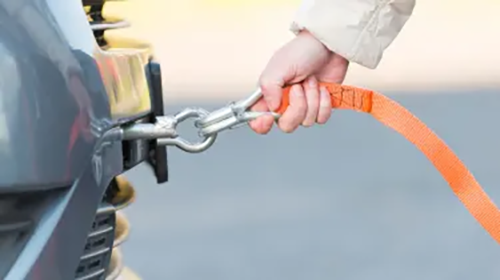
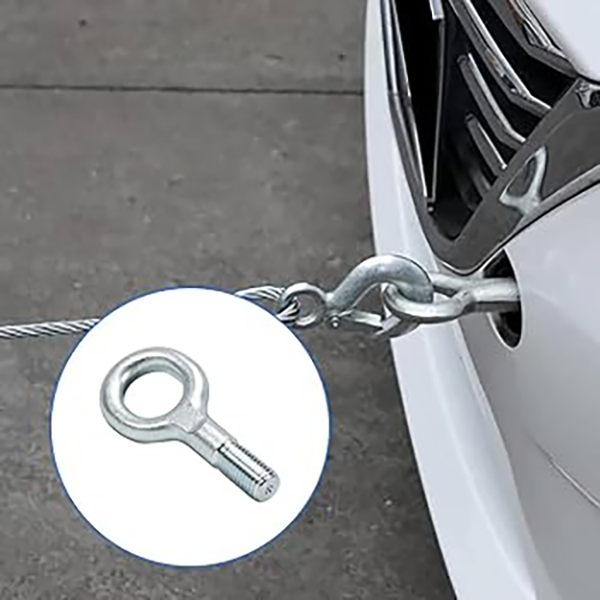
Important Notes
If it's badly bogged, you may need assistance from a breakdown service with recovery equipment. Sometimes your only course of action is to wait if it's due to adverse weather and remember that friendly tractor offering to pull you out can also have the strength to cause unmeasurable damage
MOST IMPORTANTLY - NEVER USE SUSPENSION POINITS OR BUMPERS.
- Details
- Written by: Ricky Clark
- Category: FAQ