Truma Frost Control Valve Guide for Roller Team Motorhomes
Truma Frost Control Valve Guide
-
What is the purpose of the frost control valve?
The Truma FrostControl valve serves as an automatic safety and drain mechanism for boilers in cold temperatures. Its primary purpose is to prevent freezing and potential damage to the boiler and water system by opening and emptying the boiler when temperatures drop to around 3°C. This action helps to prevent the water inside the boiler from freezing, which could lead to expansion and potentially cause cracks or other damage to the system.
In essence, the Truma FrostControl valve helps to ensure the proper functioning and longevity of the boiler by safeguarding it against the harmful effects of freezing temperatures. This can be particularly important in motorhomes or other applications where boilers are used for heating or hot water, as freezing can cause significant disruptions and costly repairs.
-
Does the Truma frost protection valve require electricity?
The Truma FrostControl valve is designed to operate without electricity. It is a mechanical device that utilizes temperature-sensitive components to open and drain the boiler when temperatures drop to a certain level, typically around 3°C. This means that the valve's operation is based on the physical properties of its components and does not rely on an external power source.
The absence of electricity in its operation makes the Truma FrostControl valve a reliable and energy-efficient solution for protecting boilers from freezing in cold temperatures. It offers a simple and effective way to safeguard your boiler and water system without the need for constant power consumption.
-
Can I just cover the frost valve to avoid it opening in the cold weather?
Covering the Truma FrostControl valve to prevent it from activating is not recommended. The valve is designed to provide essential frost protection for your boiler and water system by automatically opening and draining the boiler when temperatures drop to a certain level (usually around 3°C). This action is crucial for preventing freezing and potential damage to the system.
Blocking or covering the valve could compromise its ability to function properly and may lead to freezing and damage. It's important to allow the valve to operate as intended to ensure the safety and functionality of your boiler, especially in cold weather conditions.
If however you find that in very cold conditions it will not reset then you could preheat the habitaion area to around 4°C to avoid this.
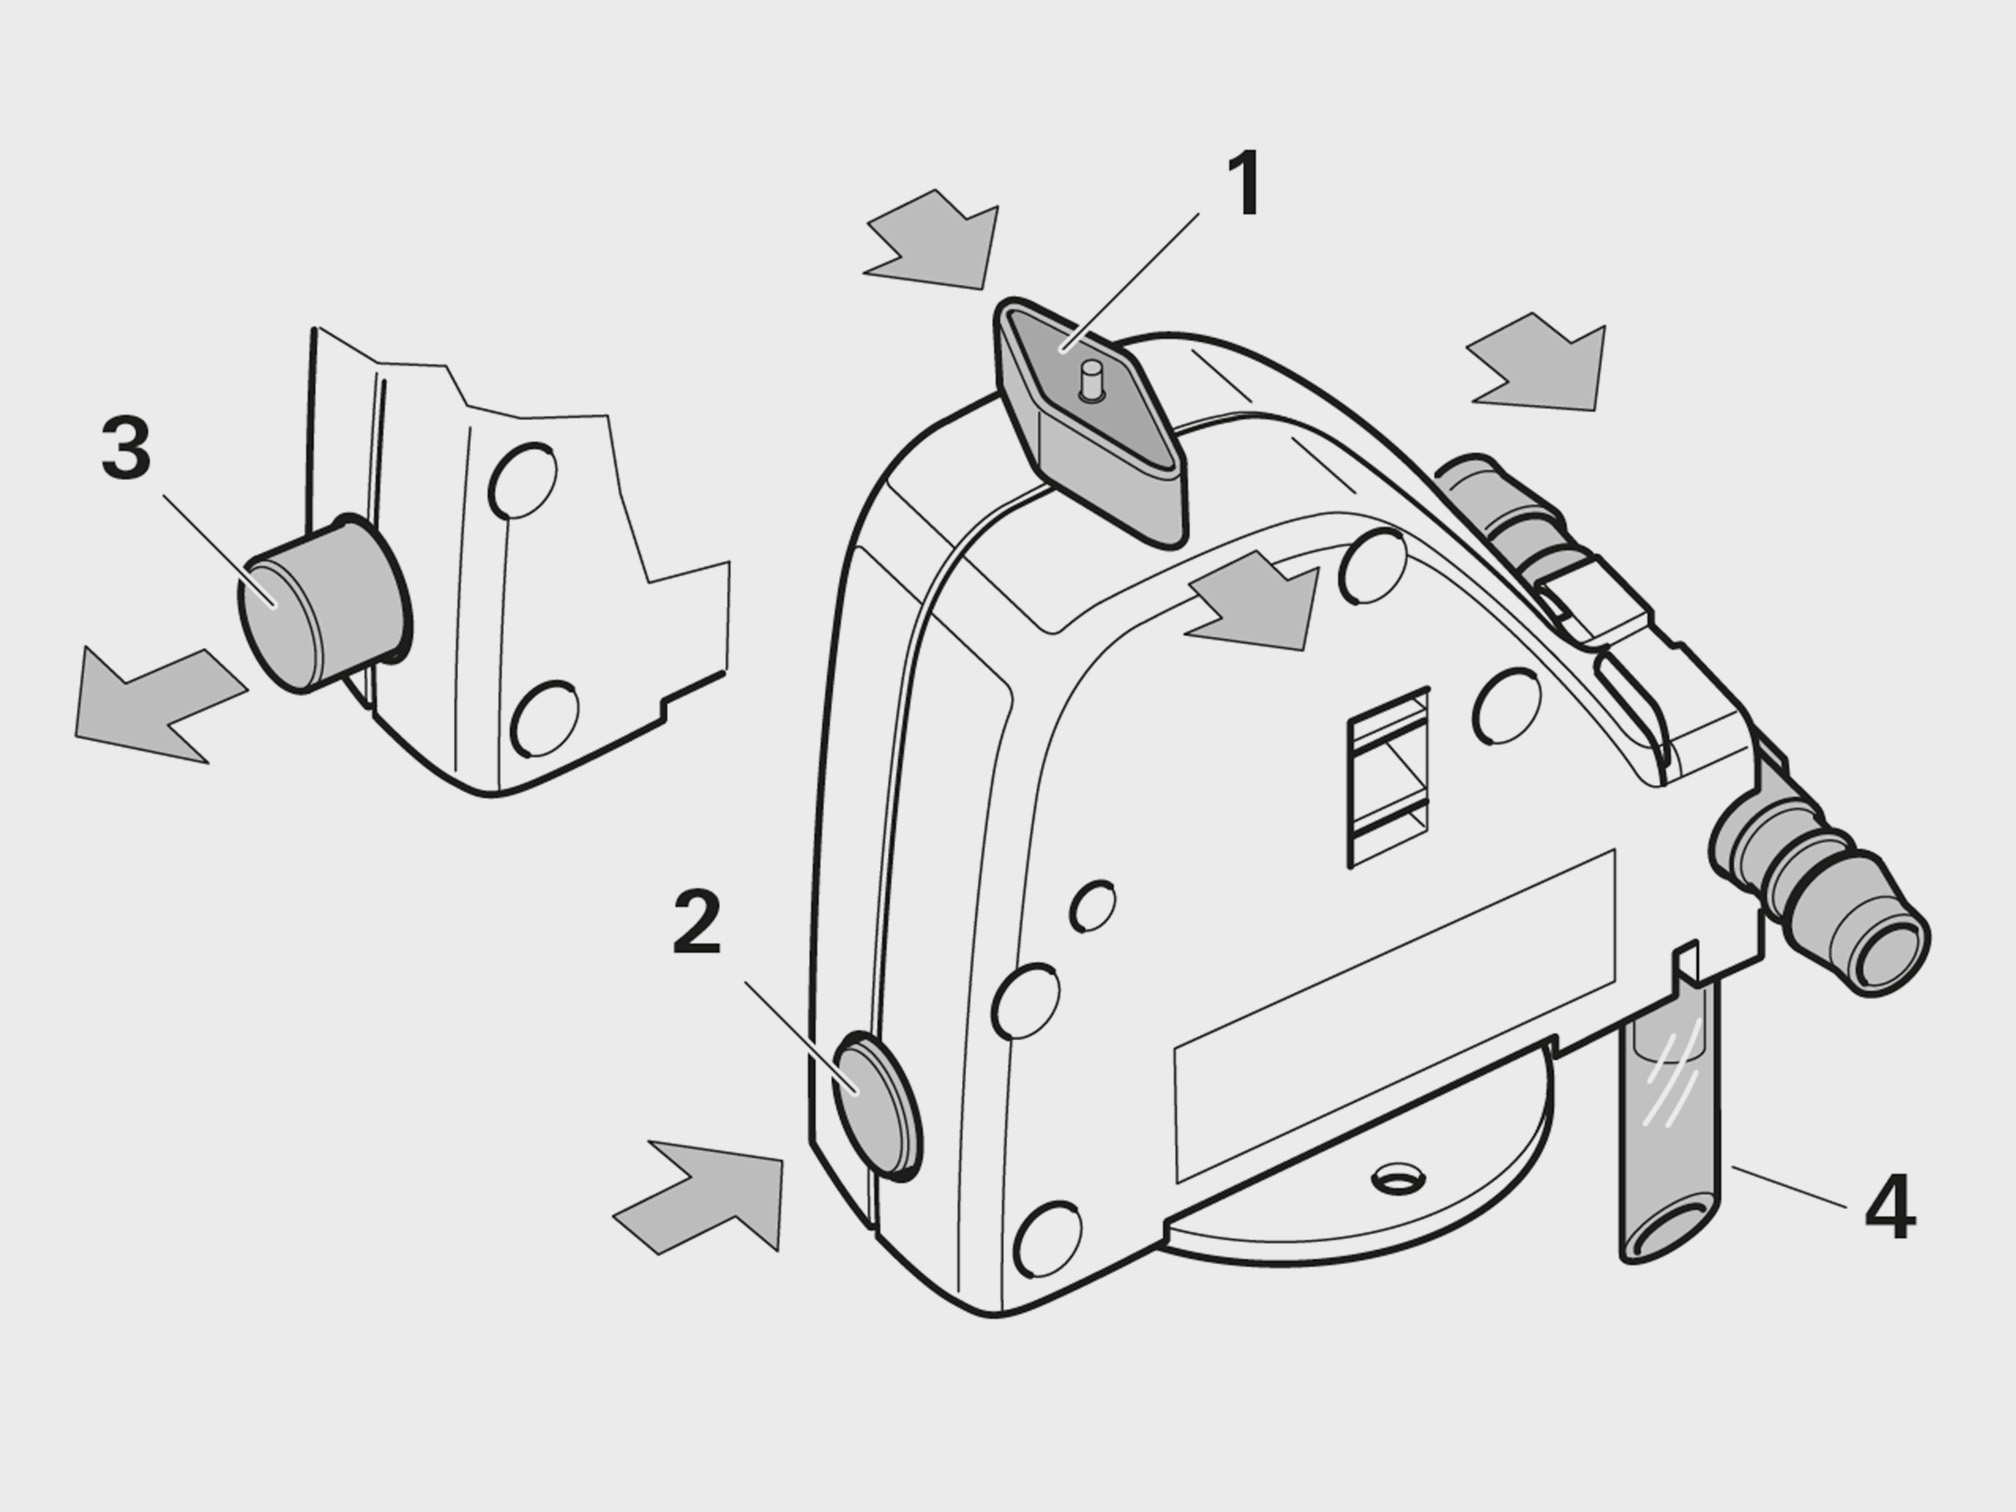
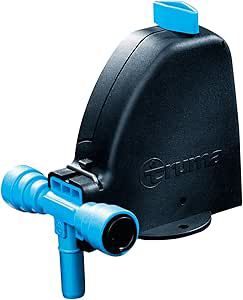
- Rotary switch position “Normal Operation”
- Pushbutton position “Closed”
- Pushbutton position “Drain”
- Drainage socket (routed outside through floor of vehicle)

I have water coming out below my Motorhome?
- Find your Truma frost control valve (see image above)
- Check to see if the blue button is pushed in.
- if the button is out it will require a reset
To reset the frost valve.
- Twist rotary switch (Position 1) is set to “Operation” and is engaged.
- Close the drain valve by pressing the pushbutton (Position 2). The pushbutton must engage in the “closed” position.
- You should now be able to fill normally
Only when the temperature at the drain valve is above approx. 7 °C can it be closed manually with the pushbutton (Position 2)and the boiler be filled. At temperatures below 7 °C, it is recommended to switch on the vehicle heater in order to warm up the interior.
Automatic opening of the drain valve
If the temperature at the drain valve is below about 3 °C, it opens automatically and the pushbutton pops out (Position 3). The water from the boiler drains out through the drainage socket (4).
Various ambient influences can interfere with the opening of the drain valve and the free run-off of the water, and Truma therefore cannot provide a warranty for frost damage.
Manual drain valve opening
Turn the rotary switch through 180° until it engages, where by the pushbutton pops out (Position 3). The water from the boiler drains out through the drainage socket (4).
Closing the drain valve
Check whether the rotary switch is set to “Operation” (Position1), i.e. parallel to the water connection and engaged. Close the drain valve by pressing the pushbutton. The pushbutton must engage in the “closed” position (2).Only when the temperature at the drain valve is aboveapprox.7 °C can it be closed manually with the pushbutton (Position 2) and the boiler be filled.
Maintenance
The FrostControl drainage socket (4) must be free of contamination (slush, ice, leaves, etc.) at all times so that the water can drain out easily! No claims may be made under the warranty for frost damage!
The safety/drain valve must be operated regularly (at least twice annually) to remove limescale deposits and to be certain that it is not blocked.
Technical data
- Pump pressure: max. 2.8 bar
- System pressure: max. 4.5 bar
- Closing temperature: over approx. 7 °C (ambient temperature)
- Opening temperature: below approx. 3 °C (ambient temperature)
- Operating temperature: -30 °C – +80 °C
- Weight: 200 g Version with connections for flexible hoses Ø 10 mm - 250 g Version with connections for fixed pipes Ø 12 mm (John Guest system)
Troubleshooting
Drain valve (FrostControl) is opening.
Cause:
Temperature at drain valve below approx. 3 °C. (the drain valve opens automatically at temperatures below approx. 3 °C!)
Remedy:
Switch on vehicle heater if necessary. At temperatures above approx. 7 °C at the drain valve, it can be closed again
The drain valve (FrostControl) can no longer be closed.
Cause:
Temperature at drain valve is below approx. 7 °C.
Remedy:
Switch on vehicle heater if necessary. At temperatures above approx. 7 °C at the drain valve, it can be closed again.
Water flows intermittently from the FrostControl discharge nozzle.
Cause:
Water pressure too high
Remedy:
Check pump pressure (max. 2.8 bar). If the boiler is connected to a central water supply(rural or urban connection), a pressure reducer must be used, which will prevent pressures higher than 2.8 bar from occurring.
- Details
- Written by: Ricky Clark
- Category: Support
Roller Team Motorhome Control Panel Guide
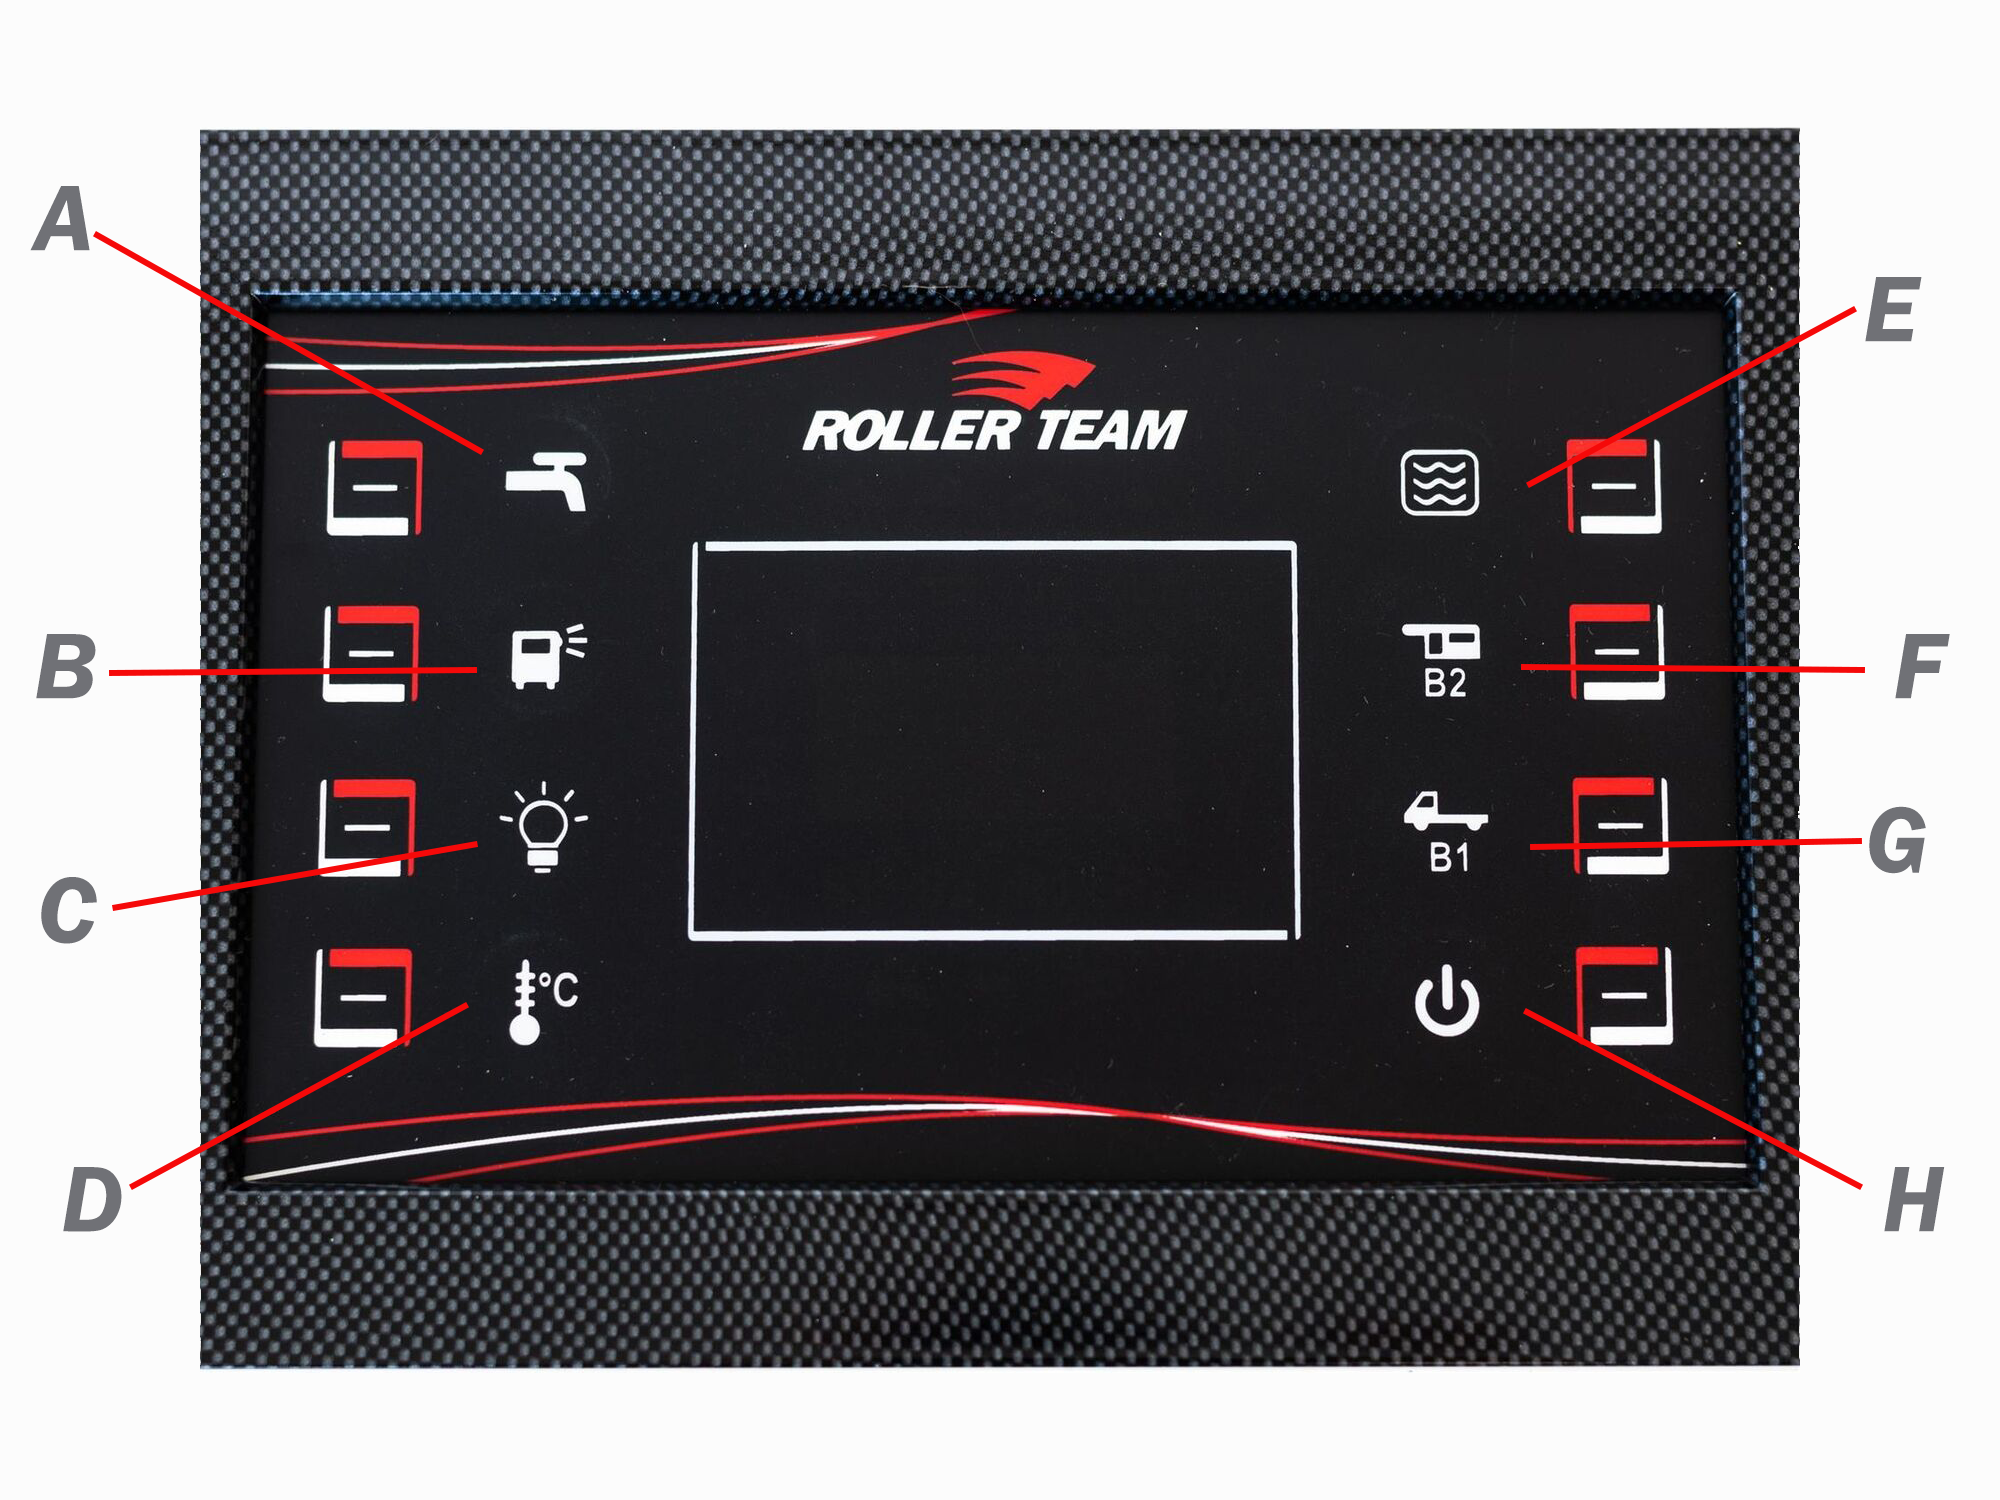
Roller Team Control Panel (SWLS488)
-
A - (Water Pump)
Water pump on/off
When it comes to managing resources in a motorhome, the decision of whether to leave the water pump on or off is an important consideration, each with pros and cons.
Pros
-
Immediate Access to Water: Keeping the water pump on ensures that you have instant access to running water whenever you need it. This is particularly useful for activities such as washing hands, cooking, and cleaning dishes.
-
Convenience: With the water pump on, you won't have to repeatedly switch it on and off each time you require water. This can make daily tasks more efficient and reduce the hassle of constant adjustments.
-
Prevention of Contamination: Leaving the pump on can prevent the growth of bacteria and mold in the water lines. The constant circulation of water discourages stagnation and helps maintain better water quality.
Cons
-
Power Consumption: Keeping the water pump running continuously can lead to increased power consumption, potentially draining the motorhome's battery more quickly. This could be a concern, especially if you're wildcamping or camping without access to electrical hookups.
-
Noise: Water pumps can be noisy, and leaving it on might contribute to a constant background noise inside the motorhome. This could be a nuisance, particularly during quiet times or while sleeping.
- Possible flooding: In the event of a burst pipe or water leak the pump will be able leak all available water
-
-
B - (External Light)
This is just an on / off switch for the outside light, normally positioned just above the habitation door to allow an inviting entrance or often used to illuminate under the awning area in the evening.
-
C - (Internal Lights)
This is just an on / off switch for the inside lights. Please note that this also activates the 12-volt supply used in many other power sully points within the habitation area, for example the TV points, if running on 12-volts. In many cases this is left on well using your motorhome and the lights would be controlled by their own switches.
-
D - (Internal / external Temperature)
- Press button to display the internal temperature (IN).
- Press it once again to display the external temperature (OUT).
- If "OPT" (optional) appears, the extenal sensor is not present. If the temperature sensor is faulty, "-" will appear.
- The display will remain visable for about 30 seconds
-
E - (Fresh - Waste Water Levels)
- Press the button several times to display in % the levels of the relitive tank identified by symbols S1, R1, R2.
- If S1 is empty or R1, R2 are full, the display will flash. If the connection to the tank is faulty, "--" will be displayed
- S1 = Fresh Water
- R1 = Waste Tank 1
- R2 = Waste Tank 2 (not on all motorhomes)
- The display will remain visable for about 30 seconds
-
F - (Habitation Battery)
- Push this button once to display the service (habitation) battery voltage
- Press again to display in % remain charge
- The display will remain visable for about 30 seconds
-
G - (Vehicle Battery)
- Push this button once to display the start-up (vehicle) battery voltage
- Press again to display in % remain charge
- The display will remain visable for about 30 seconds
-
H - (On/Off)
- Press once to turn on
- Press again to turn off
Roller Team Control Panel (SWLS1123)
-

This symbol appears when the motorhome is traverlling with two batteries coupled
-

This symbol turns on when a diverter NE 185 fuse has blown
-

The symbol appears when the 230V supply is present (connected to EHU and you have power)

-
A - (Water Pump)
Water pump on/off
When it comes to managing resources in a motorhome, the decision of whether to leave the water pump on or off is an important consideration, each with pros and cons.
Pros
-
Immediate Access to Water: Keeping the water pump on ensures that you have instant access to running water whenever you need it. This is particularly useful for activities such as washing hands, cooking, and cleaning dishes.
-
Convenience: With the water pump on, you won't have to repeatedly switch it on and off each time you require water. This can make daily tasks more efficient and reduce the hassle of constant adjustments.
-
Prevention of Contamination: Leaving the pump on can prevent the growth of bacteria and mold in the water lines. The constant circulation of water discourages stagnation and helps maintain better water quality.
Cons
-
Power Consumption: Keeping the water pump running continuously can lead to increased power consumption, potentially draining the motorhome's battery more quickly. This could be a concern, especially if you're wildcamping or camping without access to electrical hookups.
-
Noise: Water pumps can be noisy, and leaving it on might contribute to a constant background noise inside the motorhome. This could be a nuisance, particularly during quiet times or while sleeping.
- Possible flooding: In the event of a burst pipe or water leak the pump will be able leak all available water
-
-
B - (External Light)
This is just an on / off switch for the outside light, normally positioned just above the habitation door to allow an inviting entrance or often used to illuminate under the awning area in the evening.
-
C - (Internal Lights)
This is just an on / off switch for the inside lights. Please note that this also activates the 12-volt supply used in many other power sully points within the habitation area, for example the TV points, if running on 12-volts. In many cases this is left on well using your motorhome and the lights would be controlled by their own switches.
-
D - (Internal / external Temperature)
- Press button to display the internal temperature (IN).
- Press it once again to display the external temperature (OUT).
- If "OPT" (optional) appears, the extenal sensor is not present. If the temperature sensor is faulty, "-" will appear.
- The display will remain visable for about 30 seconds
-
E - (Fresh - Waste Water Levels)
- Press the button several times to display in % the levels of the relitive tank identified by symbols S1, R1, R2.
- If S1 is empty or R1, R2 are full, the display will flash. If the connection to the tank is faulty, "--" will be displayed
- S1 = Fresh Water
- R1 = Waste Tank 1
- R2 = Waste Tank 2 (not on all motorhomes)
- The display will remain visable for about 30 seconds
-
F - (Habitation Battery)
- Push this button once to display the service (habitation) battery voltage
- Press again to display in % remain charge
- The display will remain visable for about 30 seconds
-
G - (Vehicle Battery)
- Push this button once to display the start-up (vehicle) battery voltage
- Press again to display in % remain charge
- The display will remain visable for about 30 seconds
-
H - (On/Off)
- Press once to turn on
- Press again to turn off
-
This symbol appears when the motorhome is traverlling with two batteries coupled
-
This symbol turns on when a diverter NE 185 fuse has blown
-
The symbol appears when the 230V supply is present (connected to EHU and you have power)
Other Roller Team Control Unit Information
-
Control Panel - NE268, NE269, NE185
Control Panel NE 268,NE 269,NE 185_11 T, these control panels are very commonly used on the Roller Team Range.
-
Control Panel - NE100
Control Panel NE 100, these control panels are very commonly used on the early Roller Team Range
-
Control Panel - NE196
Control Panel NE 196, these control panels are very commonly used on the early Roller Team Range.
-
Control Panel - NE185, 154, 152, 188, 148, 185, 143 - Wiring Diagram
Control Wiring NE NE185, 154, 152, 188, 148, 185, 143, these control panels are very commonly used on the early Roller Team Range. Wiring Diagram.
-
Control Panel - NE268, 269, 185 Manual
Control Panel NE NE268, 269, 185, these control panels are very commonly used on the early Roller Team Range. Wiring Diagram.
- Details
- Written by: Ricky Clark
- Category: Support
Truma Heating & Water Controls – Roller Team Motorhome Guide
Truma Heating and Water Controls
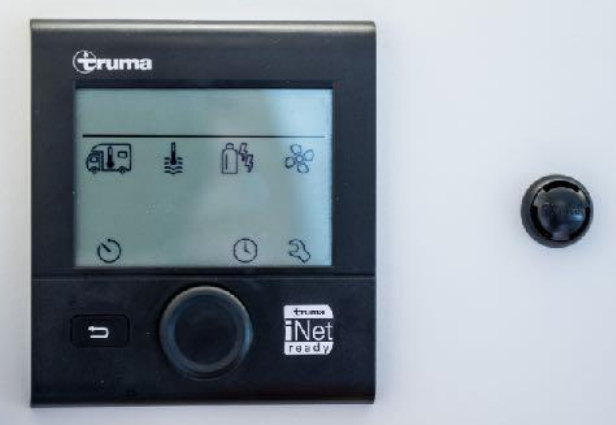
What is a Truma CP Plus?
The Truma CP Plus is a digital control panel used in conjunction with Truma heating and air conditioning systems for Motorhomes and caravans. Truma is a reputable manufacturer of various comfort systems designed for mobile living, particularly in the camping and Motorhome industry.
The Truma CP Plus control panel serves as the user interface for controlling and monitoring the Truma heating system installed in your Motorhome. It offers a range of functions and features to enhance the comfort and convenience of your mobile living space. Here's what the Truma CP Plus typically does:
**Temperature Control:** The CP Plus allows you to set and adjust the desired temperature for your Motorhome's interior. You can specify the temperature you want the heating system to maintain, ensuring a comfortable environment regardless of the outdoor conditions.
**Operating Modes:** The control panel lets you switch between different operating modes, such as heating, cooling (if your system includes air conditioning), and automatic mode. This allows you to adapt to changing weather conditions and your preferences.
**Fan Speed Control:** You can adjust the fan speed to regulate the distribution of heated or cooled air throughout your motorhome. This helps maintain an even and consistent temperature throughout the space.
**Energy Source Selection:** If your Truma system supports multiple energy sources (such as electricity and propane), the CP Plus enables you to choose the desired source based on availability or preference.
**Timer and Programming:** Some Truma systems offer timer and programming functionalities, allowing you to set specific times for heating or cooling to optimize energy usage and comfort.
**System Monitoring:** The CP Plus provides real-time information about the status of your heating or cooling system, including diagnostic codes and alerts in case of issues. This helps you troubleshoot and address any potential problems.
**Integration and Connectivity:** Depending on the model and features, the Truma CP Plus may offer connectivity options, such as smartphone apps or remote control capabilities, allowing you to manage your motorhome's climate control remotely.
**User-Friendly Interface:** The control panel is designed to be user-friendly and intuitive, with easy-to-understand buttons, icons, and menus, making it accessible for both beginners and experienced motorhome enthusiasts.
In summary, the Truma CP Plus is a central control unit that empowers you to personalize and manage the indoor climate of your motorhome with ease. It provides control over temperature settings, fan speeds, energy sources, and operating modes, enhancing your comfort and convenience while on the road or at your favorite camping site. Keep in mind that the specific features and functionalities may vary depending on the Truma system model and configuration you have in your motorhome.

| Label | Description | Function |
|---|---|---|
| 1 | Control Panel | The main display to give the user a graphical interface |
| 2 | Status line | Display that provides information about the current operating state or condition of the heating system. It might show whether the heater is on or off, the temperature setting, any error codes or messages |
| 3 | Menu line (top) | On a Truma heating control likely refers to the primary display area where key information or settings are shown. This could include details such as the current temperature, operating mode (e.g., heating, cooling, standby), fan speed, timer settings. |
| 4 | Menu line (bottom) | On a Truma heating control is typically a secondary display area that provides additional information or options related to the heating system. This area might show secondary settings, alerts, maintenance reminders, or other relevant details. |
| 5 | Power supply display (mains supply) | The "mains supply icon" on a Truma heating control typically refers to an indicator that shows whether the heating system is currently connected to an external electrical power source, often referred to as "mains power" |
| 6 | Time switch display | This will show you the start and end times of your program |
| 7 | Settings / Values | This will show you what settings your making in the various functions. |
| 8 | Rotary push button | This button allows you to move to the disired part of the application, select and change the settings by pushing to select and rotating to change or move around the screen |
| 9 | Back button | This back button returns you back to the home screen or exits and menu you are currently in. |
An error code is shown on the display of my digital CP plus control panel – how do I find out what it means?
An error code is shown on the display of my digital CP plus control panel – how do I find out what it means?
Troubleshooting guide (Combi gas heater)
Troubleshooting guide (Combi gas heater)
| Fault Code | Cause | Remedy |
|---|---|---|
| #17 | Summer mode with empty water container | Switch heater off and allow to cool. Fill boiler with water |
| #18 | Warm air temperature exceeded: - Not all warm air ducts are connected - Warm air outlets blocked - Circulated air intake blocked | - Check whether the 4 warm air ducts are connected |
| #21 | Room temperature sensor or cable faulty | Inspect the room temperature sensor cable, replace if faulty |
| #24 | Risk of low voltage. Battery voltage is too low < 10.4 V | Charge battery |
| #29 | Frost Control heating element has a short circuit | Disconnect heating element plug from electronic control unit. Replace heating element |
| #42 | Open window above cowl (window switch) | Close window. |
| #43 | Overvoltage > 16.4 V | Check battery voltage / voltage sources such as the charger |
| #44 | Low voltage. Battery voltage is too low < 10.0 V | Charge battery. If necessary replace old battery |
| #45 | No 230 V operating voltage, 230 V fuse defective, Overheating protection has been triggered | Restore 230 V operating voltage |
| #112 | Gas cylinder empty | Replacing a gas cylinder |
All the following can be linked to Gas flow issues
| #112, #121, #122, #202, #211, #212 |
Gas cylinder empty Gas cylinder or quick-acting valve in the gas supply line closed Gas pressure regulation system iced up Butane content in the gas cylinder too high Combustion air infeed or exhaust outlet is sealed Gas pressure regulation system faulty |
Replacing a gas cylinder Check gas supply and open valves Use regulator heater (EisEx) Use propane. Butane is unsuitable for heating, particularly at temperatures lower than 10 °C. Inspect openings for obstructions (slush, ice, leaves, etc.) and remove any obstructions Inspect / replace gas pressure regulation system |
| Fault Code | Cause | Remedy |
|---|---|---|
| #255 | Heater has no 12 V power supply No connection between heater and control panel | Ensure 12 V power supply |
Troubleshooting guide (Combi Gas heater) from year of construction 04/2018
| Fault Code | Cause | Remedy |
|---|---|---|
| #255 | Heater has no 12 V power supply No connection between heater and control panel | Ensure 12 V power supply |
| #301 | Overvoltage > 16.4 V | Check battery voltage / voltage sources such as the charger |
| #417 | Overvoltage > 16.4 V | Check battery voltage / voltage sources such as the charger |
| #302 | Low voltage. Battery voltage is too low < 10.0 V | Charge battery. If necessary replace old battery |
| #418 | Low voltage. Battery voltage is too low < 10.0 V | Charge battery. If necessary replace old battery |
| #303 | Risk of low voltage. Battery voltage is too low < 10.4 V | Charge battery |
| #411 | Risk of low voltage. Battery voltage is too low < 10.4 V | Charge battery |
| #401 | Summer mode with empty water container | Switch heater off and allow to cool. Fill boiler with water |
| #402 | Warm air temperature exceeded: - Not all warm air ducts are connected - Warm air outlets blocked - Circulated air intake blocked | - Check whether the 4 warm air ducts are connected |
| #407 | No 230 V operating voltage 230 V fuse defective Overheating protection has been triggered | Restore 230 V operating voltage |
| #412 | Open window above cowl (window switch) | Close window. |
All the following can be linked to Gas flow issues
| #507, #516, #517 |
Gas cylinder empty Gas cylinder or quick-acting valve in the gas supply line closed Gas pressure regulation system iced up Butane content in the gas cylinder too high Combustion air infeed or exhaust outlet is sealed Gas pressure regulation system faulty |
Replacing a gas cylinder Check gas supply and open valves Use regulator heater (EisEx) Use propane. Butane is unsuitable for heating, particularly at temperatures lower than 10 °C. Inspect openings for obstructions (slush, ice, leaves, etc.) and remove any obstructions Inspect / replace gas pressure regulation system |
| Fault Code | Cause | Remedy |
|---|---|---|
| #607 | Max. number of fault resets reached | Wait 15 minutes and reset fault |
| #621 | Room temperature sensor or cable faulty | Inspect the room temperature sensor cable, replace if faulty |
| #624 | Frost Control heating element has a short circuit | Disconnect heating element plug from electronic control unit. Replace heating element |
Troubleshooting guide (Combi Diesel heating system)
| Fault Code | Cause | Remedy |
|---|---|---|
| #111 | Room temperature sensor or cable faulty | Inspect the room temperature sensor cable, replace if faulty |
| #122 | Lack of fuel due to insufficient fuel tank filling, tank has run empty and / or vehicle is on a slope | Fill tank with fuel. Then fill the fuel line as described in “Initial startup” (see Combi Diesel operating instructions). |
| #132 | Frost Control heating element has a short circuit | Disconnect heating element plug from electronic control unit. Replace heating element |
| #150 | Warm air temperature exceeded: - Not all warm air ducts are connected - Warm air outlets blocked - Circulated air intake blocked | - Check whether the 4 warm air ducts are connected |
| #151 | Water temperature exceeded in winter mode: Water temperature sensor excessive temperature Warm air outlets blocked Circulated air intake blocked | Switch off appliance and allow it to cool down. Fill boiler with water |
| #152 | Water temperature exceeded in summer mode: Water temperature sensor excessive temperature Warm air outlets blocked Circulated air intake blocked | Switch off appliance and allow it to cool down. Fill boiler with water |
| #160 | Undervoltage < 10.2 V | Check battery voltage, charge if necessary |
| #161 | Overvoltage > 16.4 V | Check battery voltage / voltage sources such as the charger |
| #162 | Open window above cowl (window switch) | Close window. |
| #164 | No 230 V operating voltage 230 V fuse defective Overheating protection has been triggered | Restore 230 V operating voltage |
| #255 | Heater has no 12 V power supply No connection between heater and control panell | Ensure 12 V power supply |
Troubleshooting guide (air conditioning system)
| Fault Code | Cause | Remedy |
|---|---|---|
| #1 | Failure (short circuit or broken cable), room temperature sensor | Contact Truma Service |
| #2 | Ice sensor (inside) triggered | Inspect the filter and replace it if necessary |
| #4 | Ice sensor (outside) triggered | Keep the air inlets / outlets on the roof free of obstructions such as leaves |
| #8 | IR receiver unplugged or cable broken | Check the connection of the IR receiver |
| #17 | Voltage drop at 230 V power supply | Check 230 V power supply |
Truma Data Sheets
-
Truma CP Plus (UK)
This is currently the most common heating control unit fitted. This can also be controlled via the iNet App
-
Truma Heating Combi Manual 4 / 6 (UK)
This is currently the most common heating combi unit fitted. This can also be controlled via the iNet App
-
Truma Heating Combi Manual E Classic (UK)
This is currently the most common heating combi unit fitted. This can also be controlled via the iNet App
-
Truma iNet Manual (UK)
The iNet system which allows external access to your climate control either by bluetooth or mobile network
-
Truma CP Classic - 34030_11900 Manual
Truma CP Classis, this controller unit is no longer used but is still common in older Roller Team mmotorhomes
- Details
- Written by: Ricky Clark
- Category: Support
Historical Roller Team Brochures Archive
Historical Roller Team Brochures
-
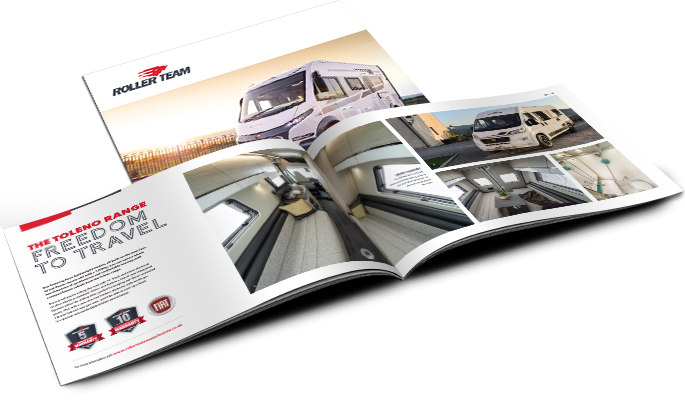
Roller Team 2025 Brochure

-
Roller Team 2025 User Manual
-
Roller Team 2024 Brochure

-
Roller Team 2023 News Letter
-
Roller Team 2023 Technical Spec
-
Roller Team 2022 News Letter

-
Roller Team 2022 Technical Spec

-
Roller Team 2021 News Letter
-
Roller Team 2021 Technical Spec
-
Roller Team 2020 Brochure
-
Roller Team 2019 Brochure

-
Roller Team 2018 Brochure
-
Roller Team 2017 Brochure
-
Roller Team 2016 Brochure
-
Roller Team 2015 Brochure
-
Roller Team 2014 Brochure
-
Roller Team 2013 Brochure
-
Roller Team 2012 Brochure
-
Roller Team 2011 Brochure
- Details
- Written by: Ricky Clark
- Category: Support
Roller Team Archive Data – Knowledge Base
Roller Team Archive Data -Knowledge Base
Roller Team Technical Data
Roller Team Technical Data
-
Control Panel - NE268, NE269, NE185
Control Panel NE 268,NE 269,NE 185_11 T, these control panels are very commonly used on the Roller Team Range.
-
Control Panel - NE100
Control Panel NE 100, these control panels are very commonly used on the early Roller Team Range
-
Control Panel - NE196
Control Panel NE 196, these control panels are very commonly used on the early Roller Team Range.
-
Control Panel - NE185, 154, 152, 188, 148, 185, 143 - Wiring Diagram
Control Wiring NE NE185, 154, 152, 188, 148, 185, 143, these control panels are very commonly used on the early Roller Team Range. Wiring Diagram.
-
Control Panel - NE268, 269, 185 Manual
Control Panel NE NE268, 269, 185, these control panels are very commonly used on the early Roller Team Range. Wiring Diagram.
-
Motorhome Sample PDI Inspection Sheet
This sample is here to give owners the understanding of what should be inspected prior to hand over.
-
Motorhome Sample Annual Habitation Check sheet
This sample habitation checksheet, this will help to establish whats needs to be done.
-
Roller Team Wiring Example Drawing
This example of the wiring diagram. This one is for Autoroller 695 FP
-
Truma CP Plus (UK)
This is currently the most common heating control unit fitted. This can also be controlled via the iNet App
-
Truma Heating Combi Manual 4 / 6 (UK)
This is currently the most common heating combi unit fitted. This can also be controlled via the iNet App
-
Truma Heating Combi Manual E Classic (UK)
This is currently the most common heating combi unit fitted. This can also be controlled via the iNet App
-
Truma iNet Manual (UK)
The iNet system which allows external access to your climate control either by bluetooth or mobile network
-
Solar Panel Control Unit (UK) LM Series
Information around the LM Series Solar panel PV controller
-
Truma CP Classic - 34030_11900 Manual
Truma CP Classis, this controller unit is no longer used but is still common in older Roller Team mmotorhomes
-
T-line 590 Bed fitting
This is how the bed is made up using the various filler boards and seats
-
Thetford N 300 - Service Mode
This allows you to get the error codes from your Thetford N 300 Fridge
Other - None Roller Team Data
-
Pub Stop Overs
List of popular stopover points, often small pubs, where you can stay for free or a nominal fee, typically with the expectation that you'll patronize their establishment.
(Alway phone before arriving)
- Choose an option View PDF Download PDF
-
Xcent Controller Manual X 422
The Xcent X 422 controller manual which is often installed into most Roller Team motorhomes between 2020 - 2023.
- Choose an option View PDF Download PDF
-
Xcent Controller Manual F 285
The Xcent F 285 controller manual which is often installed into most Roller Team motorhomes between 2020 - 2023.
- Choose an option View PDF Download PDF
-
Cobra 4600 Manual
The Cobra 4600 manual is a frequently utilized reference guide found in numerous motorhomes.
- Choose an option View PDF Download PDF
-
Cobra 4600 Installation
The Cobra 4600 installation manual.
- Choose an option View PDF Download PDF
-
Cobra 4600 Function Table
The Cobra 4600 Function Table.
- Choose an option View PDF Download PDF
-
Cobra quick reference
The Cobra quick reference.
- Choose an option View PDF Download PDF
-
Ficosa Mirror Supplier
Ficosa Mirror supplier - as much as these do not mention Roller Team by name, they do a wide range and a simular unit may be found.
- Choose an option View PDF Download PDF
-
Gemini 931T MH Alarm Installation & Manual
Gemini 931T MH Alarm system manual, often fitted to motorhomes.
- Choose an option View PDF Download PDF
- Details
- Written by: Ricky Clark
- Category: Support
Roller Team Motorhome Tips & Tricks
Choosing the Perfect Motorhome – A Complete Beginner’s Guide

The Gadget Shop
Gadgets
Throughout the years, I've cultivated a delightful collection of travel gadgets that have significantly enhanced my journeys. Interestingly, these handy companions have not only elevated my own adventures but have also proven to be incredibly beneficial to fellow travelers who discovered their value. If you're curious to explore some of these ingenious travel aids the click button below
Kitchen
Cutlery (Stop that rattle)
If you discover that you can hear those knives, forks, and spoons rattling about as you drive, give these little tricks a try.
- Wrap a napkin around each place setting, creating individual packages prepared for dinner later.
- Placing one or two tea towels snugly over the top of your cutlery drawer will minimize any rattling noises.

Plates (No more chatter)
If you find those plates annoying, give this a try.
- Placing paper plates between your dishes will prevent this issue.
- A single sheet of kitchen towel will help keep it under control.
- Perhaps consider investing in felt plate separators.
Glasses (stop them breaking)
Glasses can not only rattle but also risk breaking.
- Avoid stacking too many glasses, but if you must, consider using a plastic band around them to prevent the glass from coming into contact with each other.
- Consider using plastic drinkware; some of the newer plastic alternatives closely resemble the look and feel of glass.
- Placing a food storage bag between each cup will not only protect them but also provide a useful option if needed.

Draw (Noise Reducer)
- Drawer liners not only reduce much of the noise but also offer protection for your the stuff inside.
- In many motorhomes, there are buttons designed to secure the drawers while traveling. It's important to regularly adjust and keep them tight. Additionally, consider placing small rubber feet, approximately 5mm in diameter, between the drawer and the unit to provide a buffer
- Using a tea towel to wedge the door can help prevent movement, but be cautious not to make it too tight, as this could lead to it becoming too loose or even causing a jam.

Organized is always best
- Always designate a specific place for everything; not only will this aid in finding items quickly, but it will also enable you to optimize your storage space to near-military standards, utilizing every available inch effectively.
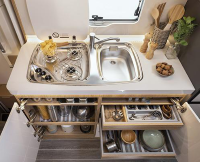
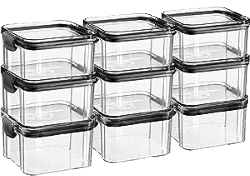
Storage Boxes / Containers - your best friend
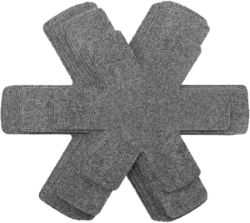
- Utilizing storage containers is a fantastic idea. With a multitude of options available, it's important to carefully consider their purpose, required sizes, and placement before purchasing. Avoid filling a cupboard with numerous small boxes containing very little, or using shoebox-sized containers for a small portion of rice. In general, square containers tend to work better in cupboards, offering greater volume and flexibility compared to round ones.
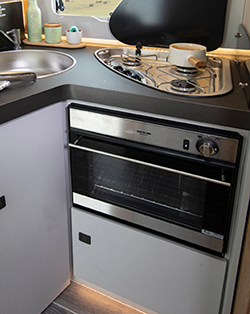
Cooker (tricks to help bring out the chef in you)
Heat:
The cookers in motorhomes tend not to get as hot as your cooker at home, so give your cooking about 10% extra time.
Plan Simple Meals:
Keep your meals simple and easy to prepare. One-pot dishes, stir-fries, and grilled items are great options. Preparing ingredients in advance can save time.
Use Compact Cookware:
Invest in compact and stackable cookware to save space. Look for pots, pans, and utensils designed for Motorhomes or small kitchens.
When traveling:
Put some of that foam pipe lagging on the ends of the cooking shelves, this will avoid them rattling when you travel.
Kitchen Cupbards
When arranging items in your motorhome cupboards, prioritize placing the lightest objects at higher levels. However, exercise caution to ensure that nothing shifts during travel and later falls out, potentially causing harm or damage.
Elctrical goods
Top tip to avoid the trip (switch)
Before using power-hungry appliances like kettles, toasters, or air fryers (especially when on electric hook-up), turn down or temporarily switch off the heating and hot water. You don’t want everything kicking in at once and tripping the system. And don’t try to boil the kettle while making toast—it’s a recipe for a power cut. That “walk of shame” in your PJs to reset the EHU isn’t how anyone wants to start their morning!
Once its' right repeat it
Photograph Your Perfect Packing Setup
After you've spent all that time carefully sorting where everything goes—fine-tuning the space, arranging each tin, box, or gadget to fit just right—take a moment to sit back, grab a cup of tea, and snap some photos of your setup. These pictures are a great reference for future trips or for making sure everything goes back in the right place after use. It saves time, avoids guesswork, and helps you keep your motorhome organized just the way you like it!
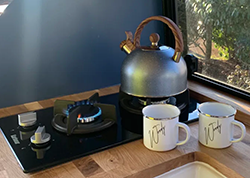
Kettle (Don't over do it)
We do like our tea.
The initial decision to make is whether to opt for a gas or electric kettle. This choice will primarily depend on whether you plan to camp at sites with electric hook-up (EHU) or prefer a more off-grid, wild camping approach.
Regardless of your choice, it's advisable not to purchase an oversized kettle. Keep in mind that the average cup of tea is around 300ml, so a kettle with a capacity greater than 1 litre should suffice. Using a larger kettle, whether heated by gas or electric, will consume more energy than necessary.
- When opting for a gas kettle, make sure it comes equipped with a whistle. This safety feature helps prevent the kettle from boiling dry, which could potentially lead to a fire or an uncomfortably hot interior in your motorhome. Nevertheless, it's essential to keep in mind that when camping on a site, the electric hookup (EHU) is typically available and has already been paid for, making it not only convenient but also a more environmentally friendly choice.
- When opting for an electric kettle, it's advisable to choose one with a power rating of no more than 8 amps. Many campsites have somewhat limited electrical outputs, often with 10-amp circuits. Opting for a lower-amperage kettle is a prudent choice, as it prevents overloading the circuit and avoids tripping the circuit breaker. This ensures you have a reliable power supply for your morning cup of tea without any hassle
Always bear in mind that you'll need to find a suitable storage solution for these items while traveling. In this regard, it's a good idea to either locate a soft bag or use drawer lining, as mentioned earlier, to protect and secure your kettle during transit.
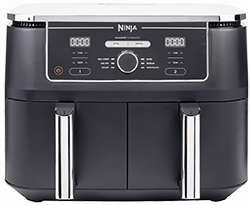
Air Fryer (The new way to cook)
The new way to cook.
Air fryers can be a fantastic addition to your travel equipment. They are highly versatile and can help you save money by reducing reliance on a gas-hungry cooker. It's important to note that air fryers need access to electricity, typically on campsites with electric hook-ups (EHU).
- Air fryers come in a wide range of types and sizes to suit various preferences. Personally, I prefer the dual compartment version, as it enables you to prepare almost an entire meal simultaneously, making it a convenient choice for cooking.
Always bear in mind that you'll need to find a suitable storage solution for these items while traveling. In this regard, it's a good idea to either locate a soft bag or use drawer lining, as mentioned earlier, to protect and secure your kettle during transit.
Toaster (Small is good)
Beans on bread is not the same.
The initial decision to make is whether to choose a gas-powered or electric-powered appliance. This choice will largely depend on whether you plan to camp at sites with electric hook-up (EHU) or prefer a more off-grid, wilderness camping approach.
- When it comes to using gas for toasting in a motorhome, it's worth noting that you can often utilize the top part of the oven for this purpose. However, it can be inconvenient, especially if you're simultaneously trying to cook something else, as you can typically only do one or the other effectively. Additionally, the toaster in the top oven may work well for making cheese on toast but can result in uneven toasting for regular bread. Consequently, many people, including myself, prefer to use it as a last resort or when camping off-site without access to electric hook-up (EHU).
- When opting for an electric toaster for your motorhome, it's wise to select one with a power rating of no more than 8 amps. Many campsites have somewhat limited electrical outputs, typically providing 10-amp circuits. Choosing a lower-amperage, two-slice toaster not only helps with storage but also ensures compatibility with most campsite electrical supplies. Another advantage of using an electric toaster is that you can take it outside, preventing the burnt smell from lingering inside your motorhome for extended periods.
Always keep in mind that you will need to store these somewhere when traverling. On this I tend to either find a soft bag or wrap with draw lining see above
TV (Big is not always best)
When selecting a TV for your motorhome, it's crucial to think about your viewing preferences and habits. In today's digital age, you have various ways to access content, such as streaming, terrestrial channels, satellite, or media players. Additionally, consider whether you want the option to watch TV when not connected to electric hook-up (12v capability). Finally, think about the size of the TV, as it should be proportionate to your available space and viewing comfort. Taking all these factors into account will help ensure an enjoyable and convenient TV viewing experience in your motorhome.
- Streaming will require Wifi
- Media will require either DVD player or USB input, or both
- Terrestrial will require an arial
- Satelite will require a satelite reciever or a seperate reciever
- Mains only or 12v and mains
Indeed, if you opt for a traditional TV setup with an antenna, it can work well in many situations. However, before proceeding with this approach, it's wise to take the following factors into account:
Terrestrial and satellite TV options may not always be available or reliable in every country or location, while mobile and Wi-Fi coverage is steadily improving. It's important to acknowledge that terrestrial TV is still valuable and will remain relevant for years to come. However, in an era where most content is accessible via the internet, investing in a high-quality, internet-enabled TV can be a wise decision for a more versatile and future-proof entertainment experience.
The adage "buy good, buy once" holds true when selecting technology for your motorhome.
-
Opting for a well-known brand is a sound strategy when selecting a TV for your motorhome. Some lower-end models may have limited smart connectivity and infrequent updates, which can limit your access to various app services. As of my last knowledge update, brands like Avtex, Sharp, Ferguson, and Cello are among the top contenders for motorhome TVs. In particular, the Sharp TV stands out for its robust smart view menu, offering access to a wide range of content. I found a personal favorite in the Sharp TV for my motorhome and entertainment needs.
Remote Control (Keep it organized)
As a general rule, being organized in a living space so small is the most important thing.
Using Velcro to attach a remote control to an appliance, such as a TV, can be a convenient and practical way to keep it accessible and organized. Velcro strips provide a secure and easily adjustable method for mounting the remote control, and it can indeed help prevent misplacement or loss. Here's a breakdown of the advantages and considerations:
- Attaching the remote with Velcro near the appliance ensures it's always within reach when you need it. You won't have to search for it around the room.
- It helps keep your living space tidy and organized by preventing remote controls from cluttering your furniture or getting lost.
- Having an additional remote control near the bed is a great idea, especially if you share the TV between the living space and the bedroom. It saves you from constantly moving the remote back and forth.
In conclusion, using Velcro to attach remote controls to appliances can be a practical and versatile solution for keeping them organized and accessible. It's particularly useful for maintaining multiple remotes in different locations, such as next to the bed or while traveling. Just be mindful of the aesthetic and maintenance considerations associated with using Velcro.

Cheap Mobile Router Hack
If you have an old mobile phone (not that old Nokia 3110), don't throw it away or sell it for peanuts, there is still life in the old dog.
Using an old mobile phone as a mobile router with a data SIM card is indeed a creative and cost-effective way to repurpose old technology. While it may not offer the same features and performance as high-end mobile routers, it can still be a useful solution in certain situations, such as when traveling in a motorhome or in areas with limited internet access.
This allows everyone to share the same data plan and with a bit of creative setup it can allow you to transition seamlessly from your home to your motorhome with wireless connectivity, without the need to re-setup.
Alternatively
Using Your Mobile For Tethering
These days it has become standard for nearly all mobile phone networks to allow tethering within there contract. Obviously you need to check your data plan and make certain you will not run out of data or be charged for this, but assuming that you have this part covered. It can be a great way to connect all those devices to the internet without having to take out another data plan and if your lucky to be in a good 5G area you will be amazed at the speeds you can get (assuming you have a 5G device and contract).

Leveling your Motorhome
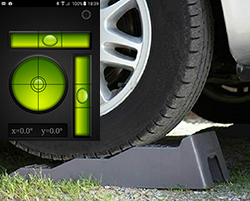
There are two ways to leveling your motorhome:
Levelling Ramp
If it's your first time at using these your soon know that they can be a absolute nightmare to get up and the fear of going too far is looming. So, between the wheel spins to get up to the shooting over the top, I have put together a few tips.
Don't buy cheap, a good set will last years, Fiamma are a proven name.
Anti-slip plates can help to avoid them sliding away.
Don't be too afraid, you need to drive up to them, don't try to just climb them.
Always try to have someone watching. This will really help.
My final and best tip. Download a levelling app on your phone. Find a level place to sit your phone on the dash, then as you’re going up the ramps you will know at what point is best for level, it will save you stopping and starting several times.
Find the ramp for you read more. Levelling Block Types
-
Hydraulic Levelling
These are by far the easiast way to level, but come with a big price tag.
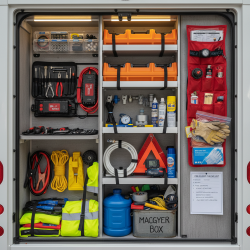
Motorhome Survival Kit: Essentials That Get You Out of Trouble
-
Basic Tool Kit (your foundation)
eep this compact but useful — no point carrying half a garage.
- Screwdrivers (flat + Phillips)
- Adjustable spanner
- Socket set (small set is fine)
- Pliers (normal + needle nose)
- Allen keys
- Hammer
- Multi-tool (super handy for quick fixes)
-
Electrical & Power Fixes
These save you more often than you’d think.
- Spare fuses (12V + 240V if you use hookups)
- Electrical tape
- Small wire cutters/strippers
- Crimp connectors
- Spare bulbs (interior & exterior)
- Portable power bank / jump starter (absolute lifesaver)
-
Vehicle Recovery & The Gear
This is the stuff that gets you moving again.
- Jump leads (even if you have a jump pack)
- Tow rope
- Wheel chocks - Traction Mats
- Tyre inflator (12V compressor)
- Tyre pressure gauge
- Puncture repair kit (temporary but useful)
- Warning triangle & hi-vis jackets
-
Motorhome-Specific Essentials
These are the ones people forget.
- Levelling blocks
- Spare water hose connectors
- Hose repair kit (leaks happen… always at the worst time)
- Duct tape (fixes everything temporarily)
- Cable ties (you’ll use these constantly)
- WD-40 or similar lubricant
- Sealant (for quick exterior fixes)
-
Water & Plumbing “Savers”
Water issues can ruin a trip fast.
- Collapsible water container
- Spare pump (if you’re prepared like a pro)
- Food-safe hose
- Drain down key (if your van uses one)
- Rubber washers (tiny but critical)
-
Heating & Gas Backup
Especially important if you travel off-grid or shoulder seasons.
- Spare gas regulator (if space allows)
- Gas leak detector spray
- Matches/lighter (even if you’ve got ignition)
-
Box - The Real Heros
Honestly, this is what saves the day most often.
- Gaffer tape
- Bungee cords
- Spare rope/paracord
- Old rags
- Gloves (heavy duty + disposable)
- Super glue
- Zip-lock bags (for parts, leaks, anything)
-
Safety & Emergency Bits
Not exciting… but you’ll be glad you packed them.
- First aid kit
- Torch/headlamp (with spare batteries)
- Fire extinguisher
- Fire blanket
- Emergency contact numbers written down (not just on phone)
-
One thing most people miss…
A printed checklist + basic motorhome manual notes.
If something goes wrong, you don’t want to be guessing:
- Fuse locations
- Water pump reset
- Battery isolation switch
- (gas) shut-off location
- Details
- Written by: Ricky Clark
- Category: Support