A Complete Beginner’s Guide To Finding The Right Motorhome
Choosing the Perfect Motorhome – A Complete Beginner’s Guide
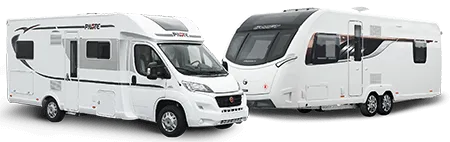
Caravan or Motorhome?
That good old question. What is best?
I thought before we dive into complexities of Motorhome - Campervans I would give you my overview of this old question.
Motorhome or Caravan Handover Checklist
Make certain the layout fits
Believe me, you'd be surprised at how many people purchase their first motorhome only to trade it in within six months because they realize the layout or size doesn't suit their needs. I want to help you avoid making the same mistake.
Here are some tips which is always a good starting point
-
Hire first before buy
Hiring a motorhome or campervan before making a significant purchase is indeed a wise and practical approach. Here are some advantages to renting before committing to buying:
Test the Waters:
Renting allows you to test the motorhome or campervan lifestyle to see if it suits your needs and preferences. It's a great way to determine if you enjoy the experience of traveling in a mobile home and if it aligns with your travel style.
Cost Savings:
Purchasing a motorhome or campervan is a substantial investment. Renting first helps you avoid the financial commitment and potential depreciation that comes with ownership. It's a cost-effective way to assess whether this lifestyle is right for you.
Variety:
Renting gives you the opportunity to try different types and models of motorhomes or campervans. This helps you understand what features and layouts work best for your needs, allowing you to make an informed decision when you decide to buy.
Learning Experience:
Your maiden voyage in a rented motorhome or campervan is a valuable learning experience. You can discover what you like and dislike, pick up essential RVing skills, and figure out what accessories or modifications you might want in your own vehicle.
Overall, renting a motorhome or campervan before making a significant purchase is a prudent step that can save you both money and potential regrets while allowing you to explore the world of motorhoming with greater confidence.
-
List your top things you are looking for
When looking for a motorhome, your preferences may vary based on your needs and lifestyle. Here's a list of features and qualities that people commonly desire in a motorhome:
Size:
Determine the right size of the motorhome, considering the number of travelers and how much space you need for comfort.
Layout:
Choose a layout that suits your preferences, whether it's a rear bedroom, side kitchen, or other configurations.
Sleeping Capacity:
Ensure there are enough sleeping berths for everyone traveling with you, whether it's a bed, pull-out sofa, or bunk beds.
Bathroom:
A functional bathroom with a toilet, shower, and sink is essential for convenience.
Kitchen:
Look for a well-equipped kitchen with a stove, oven, refrigerator, and ample storage space.
Storage:
Adequate storage for clothes, kitchen supplies, and outdoor equipment is important for long trips.
Comfort:
Comfortable seating and sleeping arrangements, as well as climate control (heating and cooling), are crucial.
Entertainment:
Consider entertainment options such as a TV, stereo system, and Wi-Fi connectivity.
Safety Features:
Ensure the motorhome has safety features like seatbelts, airbags, and a reliable braking system.
Motorhome Systems:
Check for functioning motorhome systems, including electrical, plumbing, and sewage systems.
Water and Waste Tanks:
Sufficient freshwater and wastewater tank capacities for your needs.
Power Source:
Decide if you want a motorhome with a generator, solar panels, or both for power independence.
Awnings and Outdoor Space:
Awnings or outdoor living spaces can enhance your camping experience.
Fuel Efficiency:
Consider the fuel efficiency of the motorhome's engine for cost-effective travel.
Driving Comfort:
Assess the driver's area for comfort and visibility, especially on long drives.
Towing Capacity:
If you plan to tow a car or trailer, make sure the motorhome has the necessary towing capacity.
Four-Season Capability:
For year-round travel, look for insulation and climate control that can handle various weather conditions.
Leveling Systems: Motorhomes with automatic leveling systems can save you time and effort when setting up at campsites.
Maintenance Records:
If buying a used motorhome, review maintenance records to ensure it's been well cared for.
Warranty:
Consider the availability of a warranty if you're buying new or certified pre-owned.
Price and Budget:
Set a clear budget and stick to it, considering not just the purchase price but also ongoing costs like insurance and maintenance.
Resale Value:
Think about the potential resale value of the motorhome when you decide to upgrade or change your motorhome.
Brand Reputation:
Research the reputation of the manufacturer and read reviews to ensure a reliable and quality product.
Dealer Support:
Consider the proximity of authorized service centers and dealer support for your chosen brand.
Customization Options:
Determine whether you want the option to customize the motorhome to your specific needs.
Remember that finding the perfect motorhome often involves trade-offs and prioritizing what features are most important to you. Tailor your search to your personal preferences and requirements to find the motorhome that best suits your lifestyle and travel plans.
-
Your most important additions.
When in search of a motorhome or campervan, you often encounter the need to make trade-offs. However, creating a prioritized checklist can help you find the ideal features and amenities. Consider the following:
Microwave:
A valuable addition to any kitchen, saving time and energy.
Window Blinds:
Not only do they offer privacy, but they also regulate light and temperature effectively.
Air Conditioning:
A welcome relief during scorching summer getaways.
Carpets:
For that added touch of warmth and comfort.
Satellite Navigation:
An indispensable tool for finding destinations, especially when it can guide you along routes suitable for larger vehicles.
Gas and Electric Hob:
Some motorhomes come with both gas and electric hobs, which can conserve gas when connected to electric hook-ups at campsites.
Roof Fan:
Enhances air circulation, whether for extraction or bringing in fresh air.
TV:
Even the most intrepid traveler appreciates entertainment on rainy evenings.
Separate Toilet:
Particularly useful for extended stays in a confined space, offering more convenience.
Separate Living and Bedroom Area:
Great for early bedtimes or late-night movie watching, especially if there's a dividing curtain.
Wardrobe:
Provides a tall storage space for hanging coats and clothes.
Automatic Transmission:
Elevates the driving experience with effortless gear shifts.
Cruise Control:
A bonus when combined with automatic transmission, letting you relax and simply steer.
Smart Tech Audio:
Elevates the journey with Bluetooth audio and phone connectivity, potentially integrating useful apps for a smarter experience.
Leather Seats & Steering Wheel:
Adds a touch of sophistication and durability.
Cup Holders:
May seem trivial but proves incredibly convenient for both driver and co-pilot during lengthy drives.
These are just a few considerations from my list, but you may have additional preferences to personalize your perfect motorhome."
Ask yourself important Questions
-
How Will You Use Your Motorhome?
- How often will you use it?
-
What kind of trips do you plan – weekend breaks, long holidays, or full-time touring?
-
Will you stick to campsites or go off-grid?
Maybe:
-
“We plan to use it for weekend trips and one or two long holidays per year.”
→ A mid-sized, low-profile coachbuilt model offers comfort without being too bulky. -
“We’re retiring soon and plan to tour Europe for a few months at a time.”
→ A larger A-Class or tag-axle motorhome with ample storage and comfort features may suit better. -
“We’ll use it mainly for wild camping and off-grid weekends.”
→ You’ll want a compact motorhome or campervan with good insulation, solar panels, and large water tanks.
-
Who Will Be Travelling With You?
-
How many people will regularly travel and sleep in it?
-
Will you be taking children, pets, or guests?
-
Do you need fixed beds or are you happy converting sofas each night?
Maybe:
-
“It’ll just be the two of us and our dog.”
→ A 2-berth low-profile motorhome with a fixed bed and spacious lounge could be ideal. -
“We’re a family of four with young kids.”
→ Look for an overcab motorhome with multiple sleeping areas and extra travel seats. -
“Sometimes it’s just me, other times I bring a mate or my partner.”
→ A campervan with a pop-top roof or a compact 3-berth model with flexible beds might work.
-
-
What Features Do You Want Inside?
-
Do you want a full kitchen with oven and fridge?
-
Is a separate shower and toilet important?
-
Would you prefer fixed beds, or do you mind setting up the bed each night?
Maybe:
-
“I love cooking, so I want a proper kitchen with an oven.”
→ Go for a motorhome with a full kitchen layout – likely a mid-sized to large coachbuilt. -
“We’ll mostly use campsite showers, so a small washroom is fine.”
→ You can consider more compact layouts and save space for living or storage. -
“I want a fixed bed – I don’t want to faff around making beds every night.”
→ Island beds or French beds are common in motorhomes 7m and up.
-
-
What Size Motorhome Can You Handle and Store?
-
Where will you keep the motorhome when not in use?
-
Are you comfortable driving something large?
-
Do you want to stay under the 3.5-tonne weight limit?
Maybe:
-
“I’ll store it on my driveway and prefer something under 7m long.”
→ A compact low-profile or van conversion might be a better fit. -
“We have secure storage space, and I’m used to driving vans.”
→ You have more flexibility and could consider 7.5m+ A-Class or overcab models. -
“I don’t want to go over 3.5 tonnes due to licence and toll costs.”
→ Stick to lighter models, being careful with payload if you want bikes, water, and extras.
-
-
What Type of Motorhome is Right for You?
-
Campervans – Compact, easy to drive and park, good for solo travellers or couples.
-
Low-profile coachbuilts – A popular all-rounder; more space, yet still manoeuvrable.
-
Overcab motorhomes – Ideal for families, offering extra sleeping space above the cab.
-
A-Class motorhomes – Luxurious, roomy, and built for long-term comfort.
-
Tag axle motorhomes – Heavy-duty, ultra-spacious, suited for long-term touring and large storage needs.
Maybe:
-
“We want something small enough for towns but big enough to sleep comfortably.”
→ A 6m van conversion with a fixed bed could be the answer. -
“We’re a family of five who need space and storage.”
→ Overcab or larger coachbuilt motorhomes with bunks and garage space work well. -
“Comfort is our top priority, even if it’s harder to park.”
→ Consider an A-Class motorhome with a spacious lounge and island bed.
-
-
Will You Be Going Off-Grid or Sticking to Sites?
-
Do you plan to camp off-grid or always use serviced campsites?
-
Is solar power, large water tanks, or gas storage important?
Maybe:
-
“We’ll mostly use campsites with hookups.”
→ Onboard battery and gas requirements will be minimal. -
“We love wild camping in remote areas.”
→ Look for models with solar panels, large batteries, 2+ gas bottles, and good water/waste capacities. -
“A mix of both – we want the flexibility.”
→ Choose a model with moderate off-grid capabilities and add extras like solar and inverters.
-
-
What’s Your Budget?
-
What’s your total purchase budget?
-
Do you want to buy new or used?
-
Have you considered insurance, servicing, and running costs?
Maybe:
-
“I’ve got £30,000 to spend.”
→ Consider a well-kept used motorhome, possibly a panel van or older coachbuilt. -
“We want a brand-new model with warranty.”
→ You’ll need £60,000–£90,000 for most new mid-sized motorhomes. -
“Running costs are a concern.”
→ Go for something under 3.5 tonnes and under 7m for lower insurance, tax, and fuel use.
-
-
What About Resale Value and Support?
-
Is it a popular and reputable brand?
-
Can you get spare parts easily?
-
Are there active online communities or support groups?
Maybe:
-
“I want a known brand so it’s easier to sell on later.”
→ Look at Roller Team, Swift, Auto-Trail, Bailey, or Hymer – well-supported and resellable. -
“I want strong community support.”
→ Popular brands tend to have Facebook groups, forums, and good dealer networks. -
“I’ll keep it long-term but want easy servicing.”
→ Fiat-based models are widespread and easy to service across Europe.
-
Summary:
There’s no one-size-fits-all solution when it comes to motorhomes. The key is to ask the right questions, understand your real needs, and weigh up the trade-offs. While the “perfect” motorhome might not exist, this guide can help you find a great compromise—one that suits your lifestyle and travel plans. With careful consideration, you’ll avoid making a purchase that turns out to be totally impractical and instead invest in a vehicle that brings you years of enjoyable adventures, whether it’s a peaceful weekend escape or an extended European tour.
Which is best for me? Motorhome - Campervan
Campervans and motorhomes are both popular options for recreational travel, each with its own set of advantages and disadvantages
-
Campervan Pros
Maneuverability:
Campervans are typically smaller and more maneuverable, making them easier to drive and park, even in urban areas.
Versatility:
They can double as a daily vehicle, eliminating the need for a separate car, which can be convenient for short trips and errands.
Fuel Efficiency: Campervans are generally more fuel-efficient than larger motorhomes, which can lead to lower operating costs.
Simplicity:
Campervans are more straightforward, often coming with basic amenities, making them easy to use and maintain.
Affordability:
They tend to be less expensive upfront than motorhomes, making them a more budget-friendly option.
-
Campervan Cons
Limited Space:
Campervans are smaller, which means less interior living space, making them less suitable for long-term trips or larger families.
Amenities:
While they offer basic amenities, campervans may not have all the comforts of larger motorhomes, with more compact kitchens and bathrooms.
Storage:
Storage space is limited, so you'll have to pack more efficiently and may not carry as much outdoor equipment.
Sleeping Capacity:
Campervans may have limited sleeping capacity, typically designed for 2-4 people.
-
Motorhome Pros
Spacious Living:
Motorhomes are generally more spacious, offering ample room for living, sleeping, and storage. Larger models may even have separate living and sleeping areas.
Amenities:
Motorhomes often come with a wide range of amenities, including full kitchens, bathrooms, and entertainment systems.
Comfort:
They provide a more comfortable and home-like experience, which can be important for extended trips.
Towing Capacity:
Some motorhomes have the capacity to tow a car or trailer, allowing you to explore your destination without having to move the motorhome.
Generous Storage:
Motorhomes usually have generous storage space, making it easier to carry outdoor gear and personal items.
-
Motorhome Cons
Size and Maneuverability:
Their size can make them less maneuverable, especially in tight spaces or on narrow roads. Parking and navigating can be challenging.
Fuel Efficiency:
Larger motorhomes tend to have lower fuel efficiency, leading to higher fuel costs.
Cost:
Motorhomes are often more expensive to purchase, insure, and maintain compared to campervans.
Maintenance:
They may require more maintenance and service due to their complex systems.
-
Summary
In summary, the choice between a motorhome and a campervan depends on your specific travel needs, preferences, and budget. If you value space, comfort, and amenities, a motorhome might be the better choice. However, if you prioritize maneuverability, affordability, and versatility, a campervan may be more suitable for your adventures. Ultimately, your choice should align with the type of trips you plan to take and your personal preferences.

- Details
- Written by: Ricky Clark
- Category: FAQ
Taking Bikes on Your Roller Team Motorhome Holiday
Taking Bikes on Your Motorhome Holiday
-
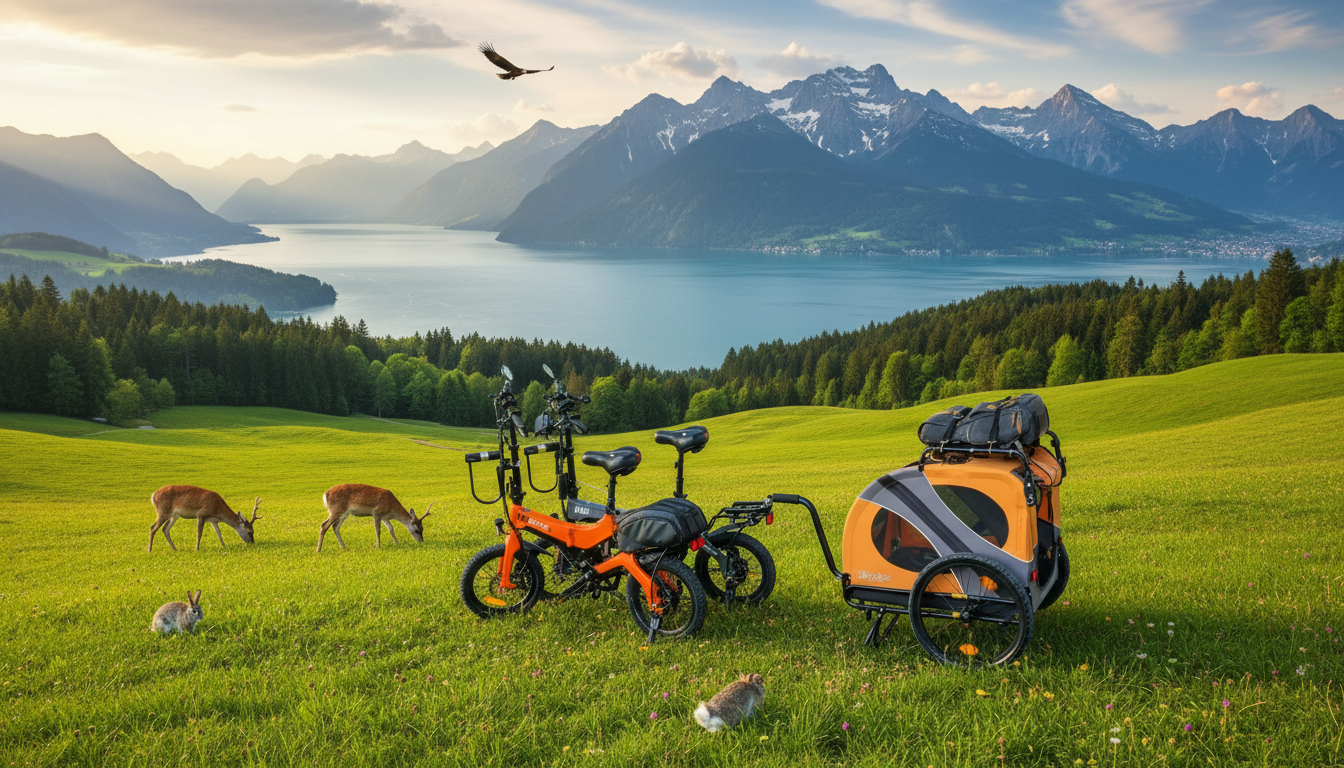
Explore beyond the campsite
discover lakes, castles, gardens, and hidden trails.
-

Gentle exercise
Great for gentle exercise without driving everywhere.
-
Perfect for dog owners
Take your pup along in a bike trailer and enjoy walks/cycle rides together.
Bike Options & Why It Matters
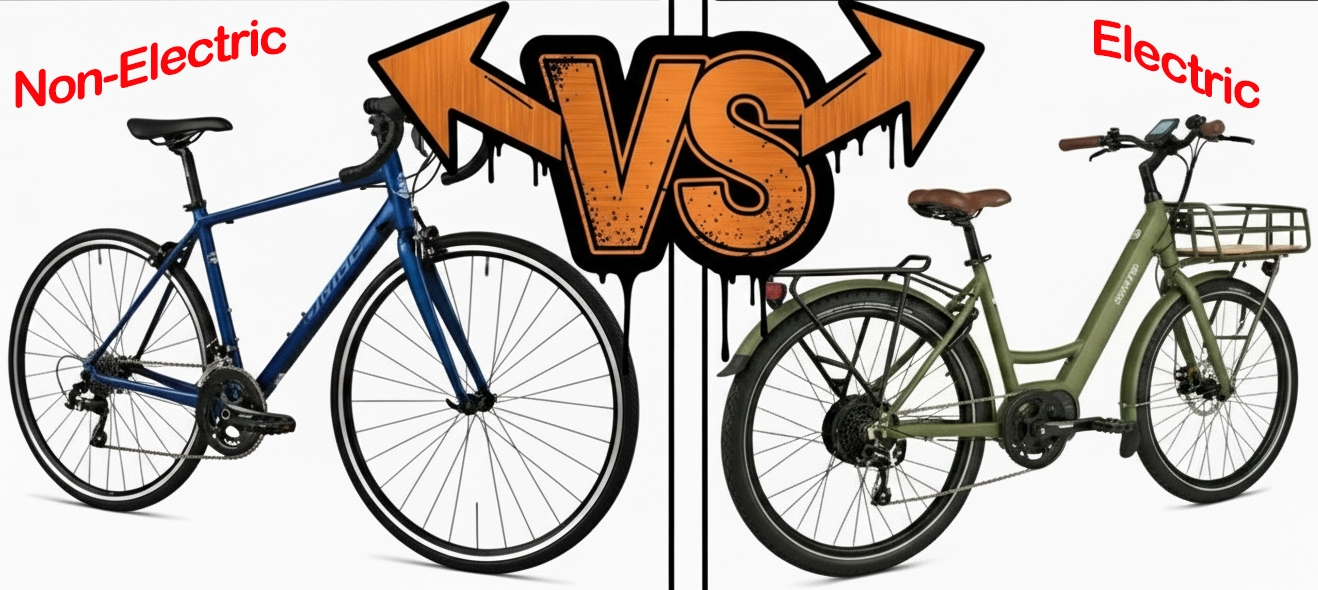
Non-Electric
-
Non-Electric Bike Pros:
- Lightweight: Much easier to lift onto racks (huge advantage)
- Lower cost: Cheaper to buy and maintain
- No charging needed: Just jump on and go
- Simpler: Less to go wrong mechanically
- Great for short/flat rides: Ideal around campsites and towns
-
Non-Electric Bike Cons:
- More effort: Hills and longer rides can be tiring
- Limited range: You may not go as far from your base
- Towing harder: Pulling a dog or shopping trailer takes effort
- Can limit exploration: Especially in hilly areas
Electric
-
Electric Bike Pros:
- Effortless riding: Hills and long distances become easy
- Great for towing: Ideal if you’re pulling a dog trailer
- Go further: Perfect for exploring larger areas from your campsite
- Less fatigue: You arrive fresh instead of worn out
- Adjustable assist: You can still get exercise if you want it
-
Electric Bike Cons:
- Heavier: Harder to lift onto bike racks (big one for motorhomes)
- More expensive: Higher upfront cost + batteries
- Charging needed: You’ll need to plan charging at campsites
- Weight limits: Can push your bike rack to its max quickly
- Theft appeal: More attractive to thieves → better security needed
Choosing an Electric Bike – Key Considerations
-
Electric bikes are quickly becoming the preferred choice for motorhome travel, especially if you want to explore further with less effort.
-
However, choosing the right one isn’t as simple as picking what looks good—there are a few important things to think about:
-
Weight is critical
Heavier bikes can be difficult to lift onto a motorhome bike rack. Always check what you can comfortably manage.
-
Bike rack limits
Consider both per-bike weight and total rack capacity—especially if carrying two bikes or adding trailers.
-
Battery & range
Think about how far you realistically want to travel and whether a single battery is enough.
-
Motor type & power
More powerful motors are great for hills and towing (e.g. dog trailers), but can add weight and cost.
-
Folding vs standard bikes
Folding bikes can be easier to store and handle, particularly on smaller racks.
-
Cost
E-bikes are a bigger investment than standard bikes.
-
Security
Because of their value, e-bikes are more attractive to thieves—good locks and security measures are essential.
Overall:
E-bikes offer huge benefits for motorhome travel, but the best choice comes down to what works for your setup, weight limits, and how you plan to use them.
Our Personal Setup & Why It Works for Us
After trying different options, we’ve found a setup that works really well for our style of travel.
Lightweight E-Bikes (Our Preference)
We use MiRider One (or similar lightweight folding e-bikes), and for us this has been a game changer:
-
- Around 17.5kg per bike – much easier to lift onto the rack
-
- Two bikes usually sit comfortably within most motorhome rack limits
-
- Folding design makes them easier to handle and store
The lightweight design makes a huge difference when loading and unloading—especially after a long day out.
Trailers for Flexibility
-
- Dog trailer: We use a DoggyRide trailer so our dog can come along comfortably
-
- Utility trailer: The second bike tows a small trailer for shopping or bits and pieces
This setup gives us the freedom to explore and be practical without needing the motorhome.
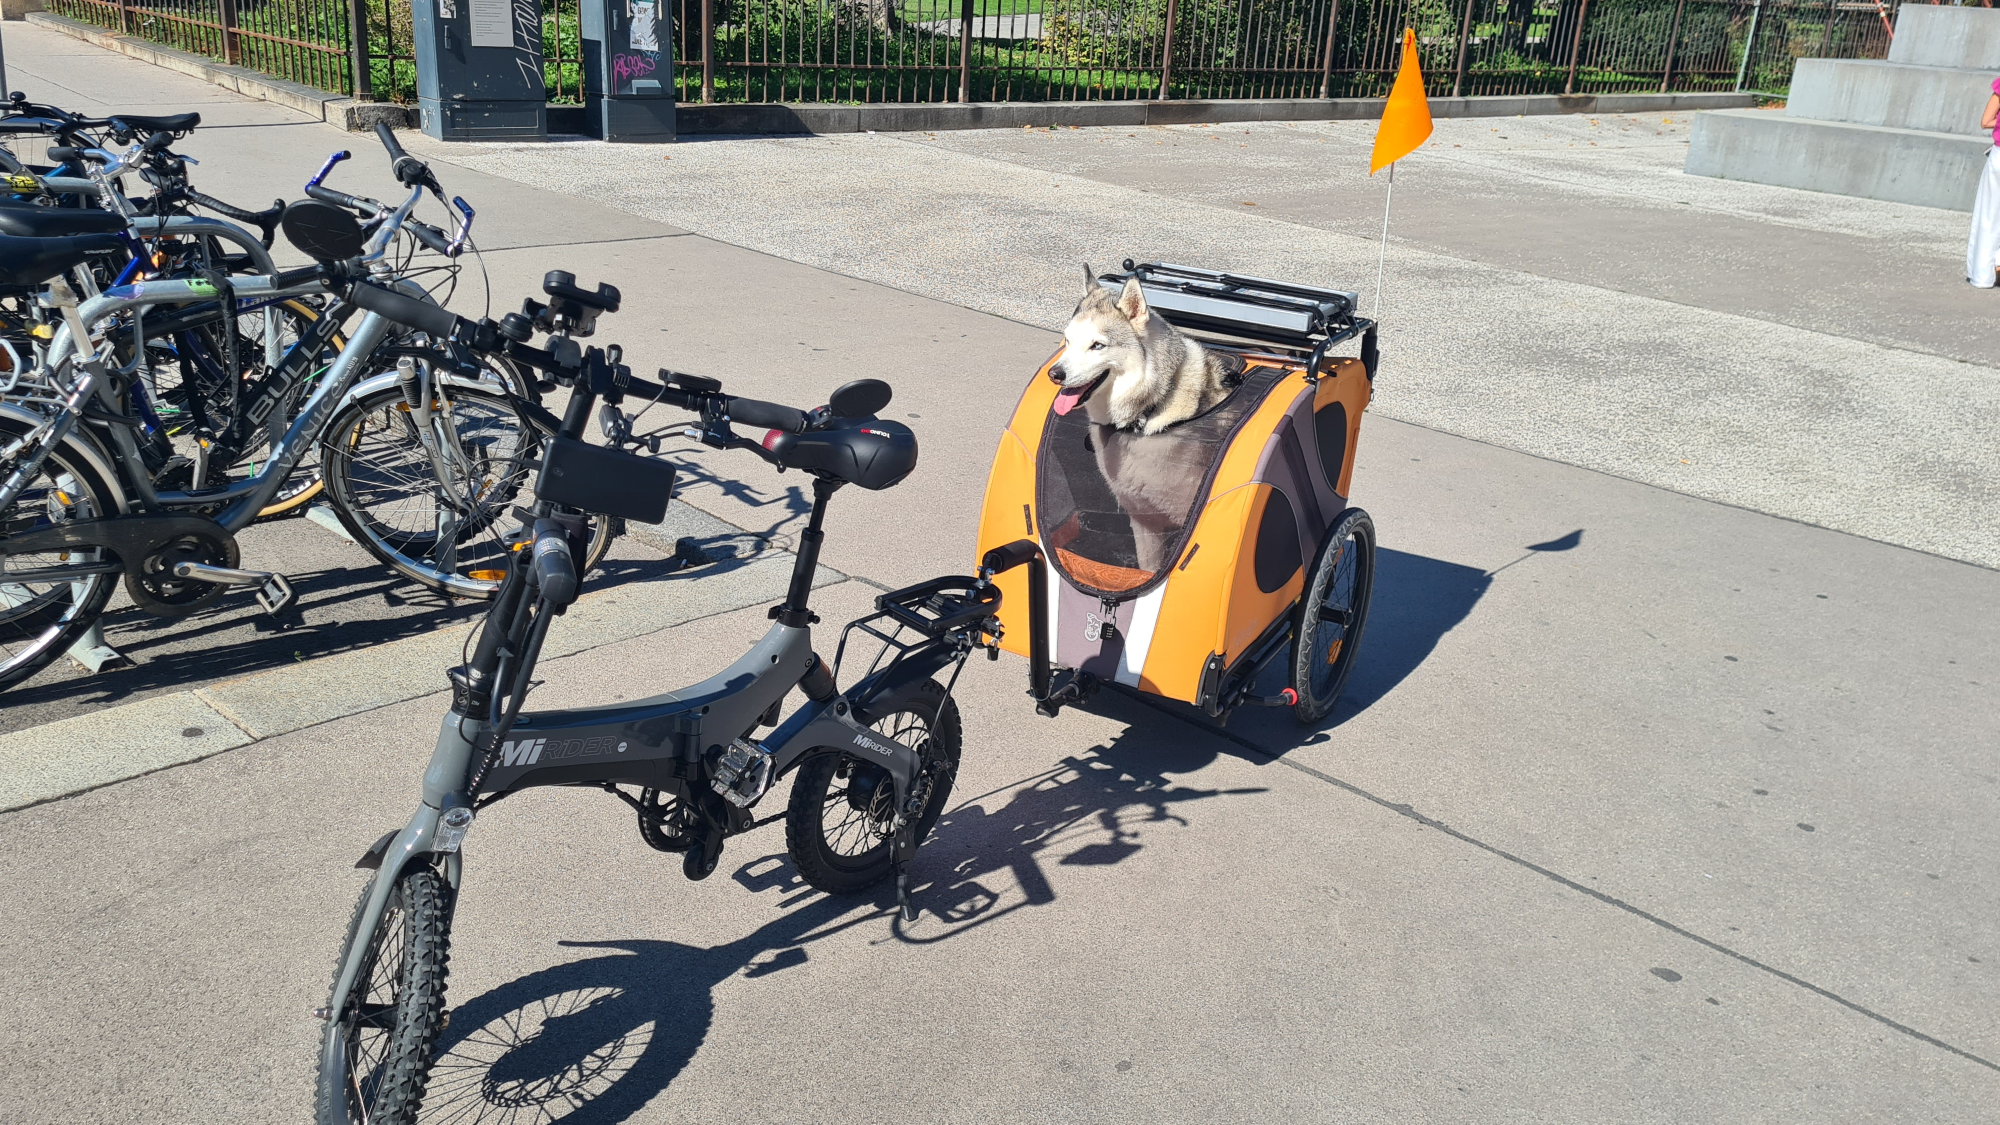
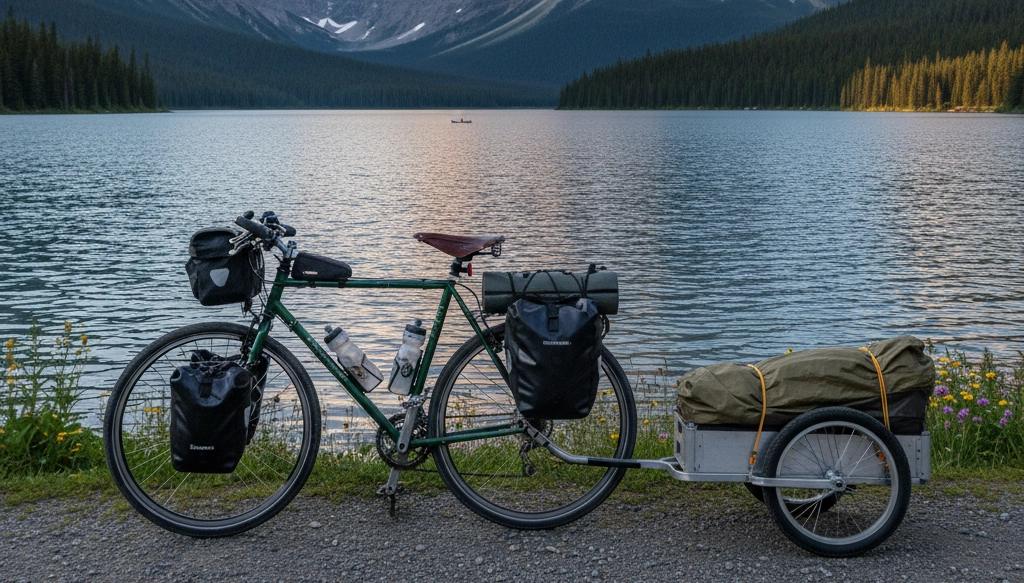
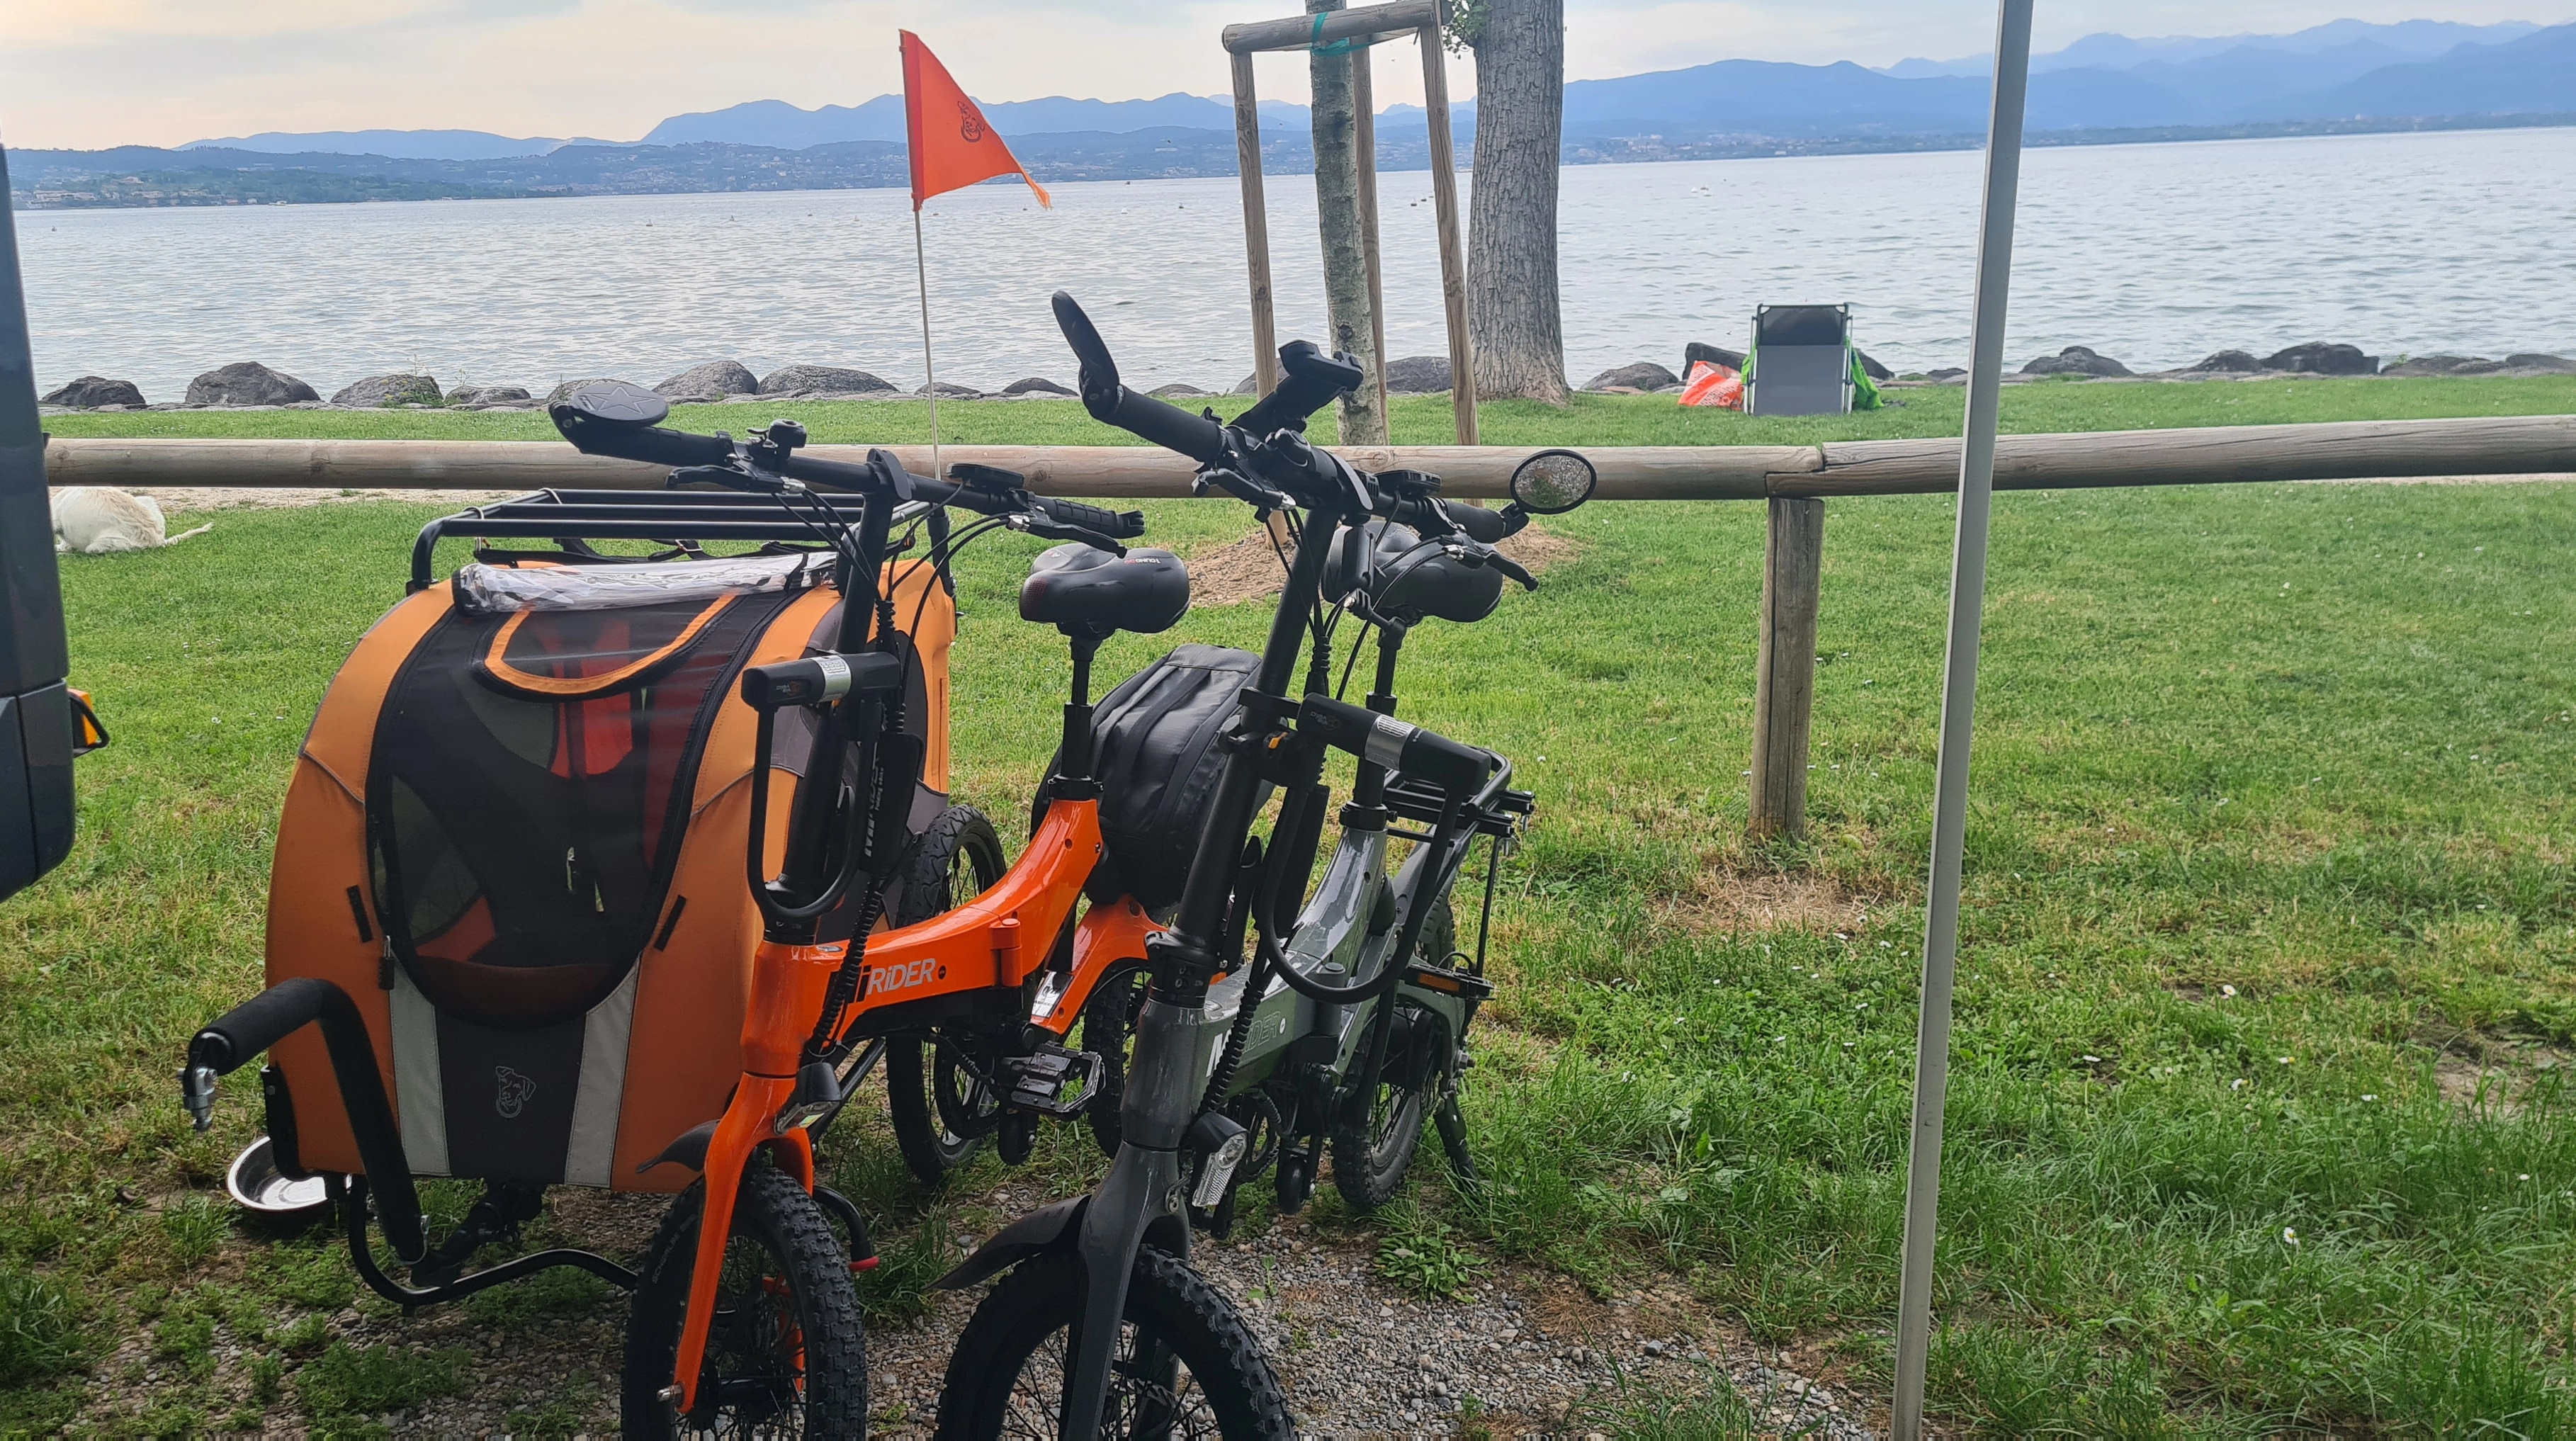
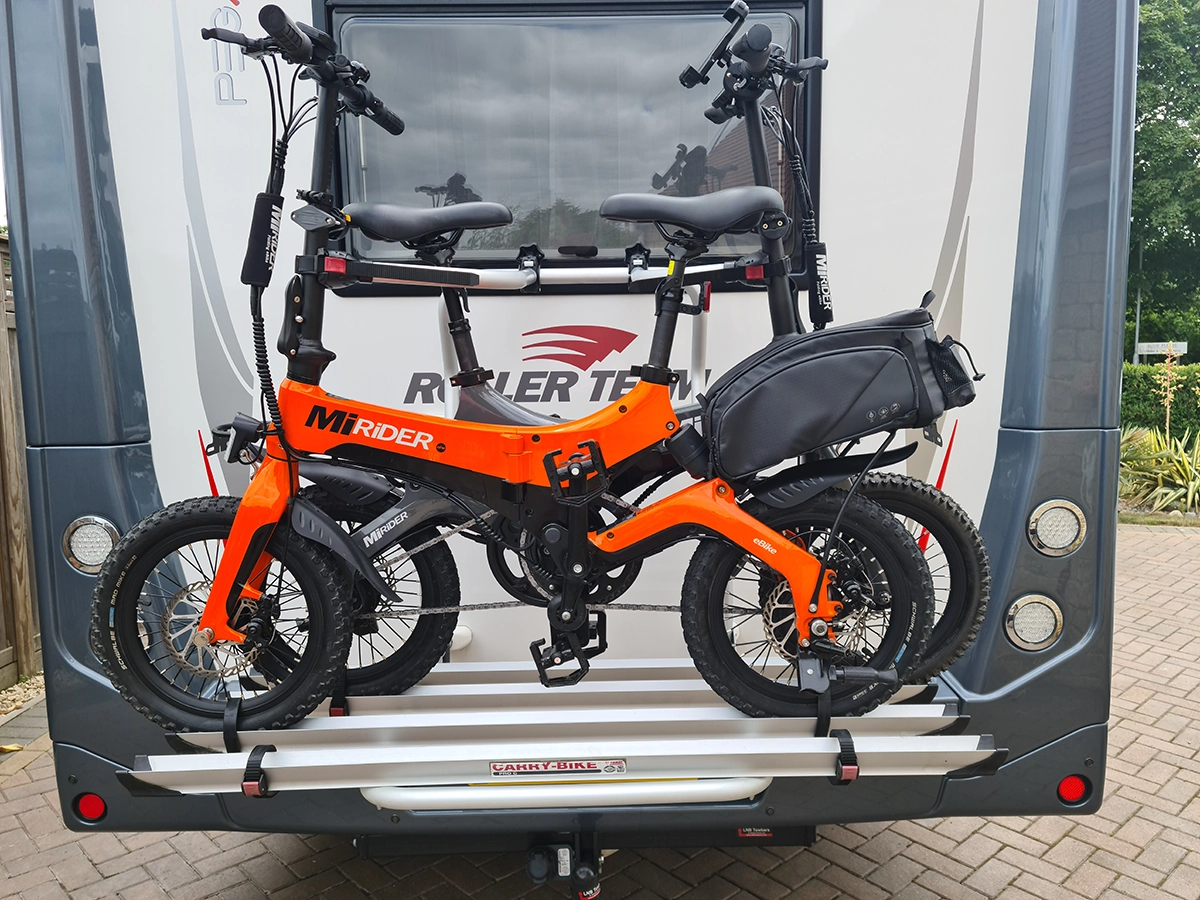
Complete Setup (Bikes + Trailer)
This shows our full motorhome bike setup ready for travel.
We’re carrying two lightweight folding electric bikes (MiRider One) along with our DoggyRide trailer, including the wheels, all securely mounted on the rear bike rack.
Because the bikes are only around 17.5kg each, the total weight stays within the limits of most motorhome racks, making it both practical and safe. The compact folding design also helps everything fit neatly without overloading the space.
This setup gives us maximum flexibility—bikes for exploring, plus the trailer so our dog can come along comfortably wherever we go.
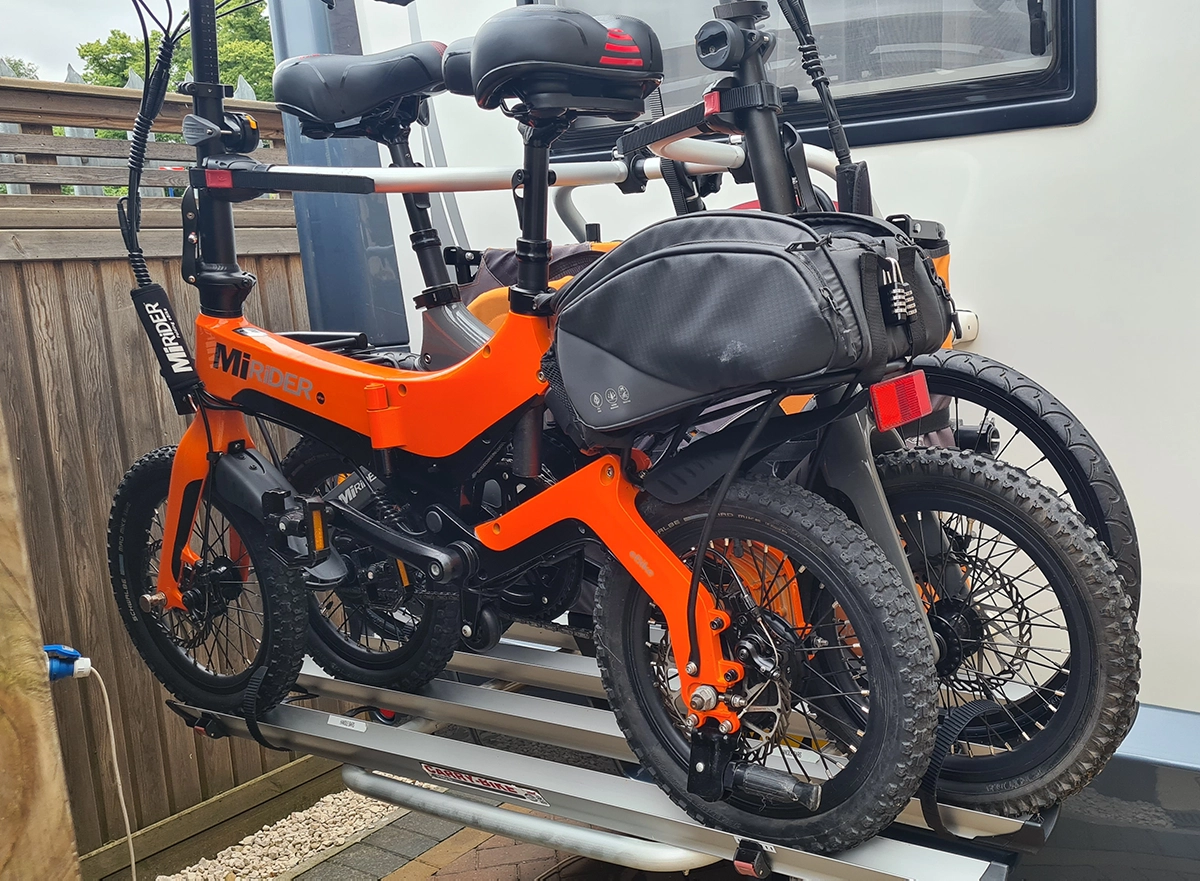
Bikes Only (MiRider Setup)
Here you can see our two MiRider One electric bikes mounted on the rack.
We chose these mainly for their lightweight design, which makes a huge difference when lifting them on and off the motorhome. Unlike many heavier e-bikes, these are much easier to handle day-to-day.
They’re also compact and foldable, which helps with storage and transport. Despite their size, they still provide plenty of power for longer rides, hills, and towing when needed.
For us, they strike the perfect balance between performance and practicality for motorhome travel.
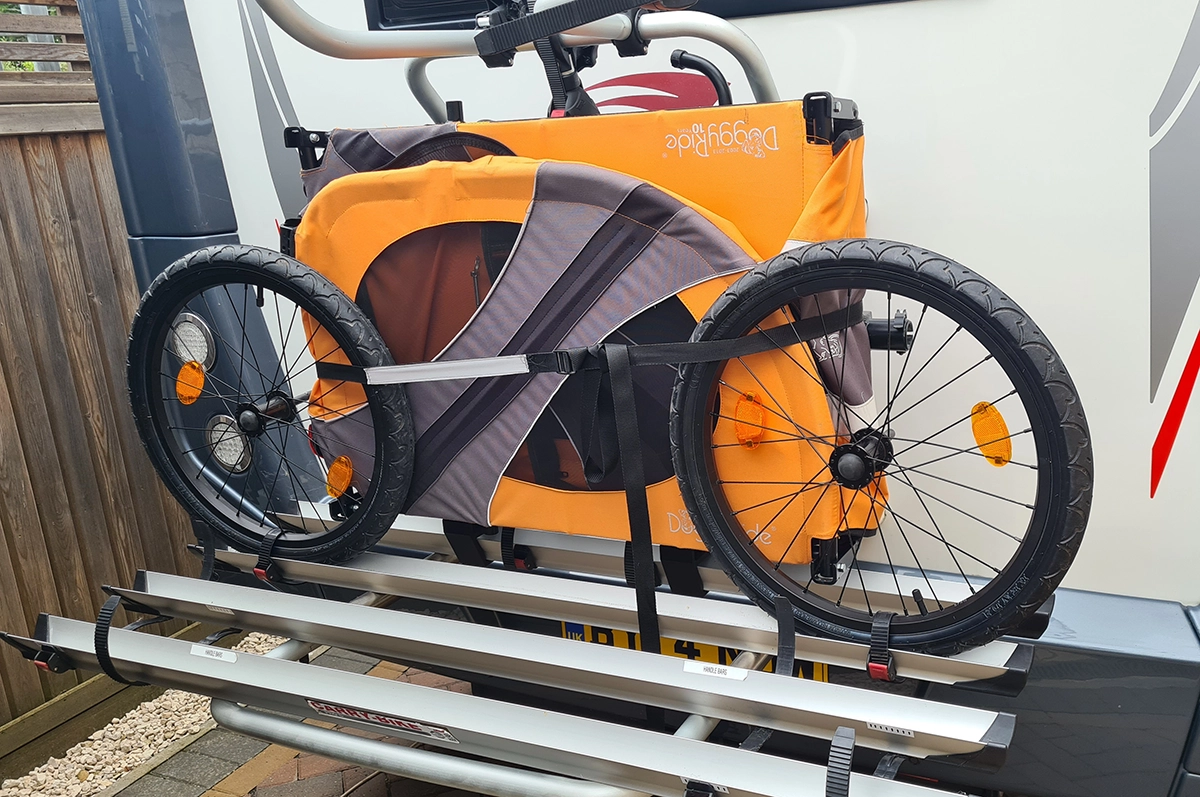
Trailer Setup (DoggyRide Trailer)
This image shows our DoggyRide trailer, which we bring along so our dog can join us on rides.
The trailer is lightweight, easy to attach, and provides a safe and comfortable space for our dog while we’re out exploring. We also bring the wheels along on the rack, so it’s ready to use whenever we need it.
In addition to the dog trailer, we sometimes use a small utility trailer on the second bike—ideal for carrying shopping or extra gear.
Having trailer options adds a whole new level of flexibility, making it easy to explore further without leaving anything (or anyone!) behind.
The Extras That Made the Biggest Difference
Honestly, this is where everything came together for us—these small additions made a big impact:
-
Second Battery for Each Bike
For us purchasing an extra battery was a game changer
- Nearly doubles our range
- Allows us to use more power when needed (hills, towing)
- Reduces range anxiety completely
-
Bluetooth Headsets
So amazing to be able to have this simple device, chat about things to see, warn your partner of dangers or just let each other know when you want to stop.
- Lets us stay in constant communication while riding
- Especially useful in towns where it’s easy to get separated
- Great for safety and coordination
-
Phone Holder + Google Maps
Your in a stange country, but you now know your way around, finding those short cuts like a local.
- Makes navigation simple and stress-free
- Helps find the best cycle routes and destinations
- No need to stop constantly to check directions
Final Thoughts
For us, the winning combination is:
Lightweight e-bikes + trailers + a few smart extras
It’s transformed how we explore—giving us:
-
More freedom
-
Greater range
-
Less effort
-
And a much more enjoyable experience overall
Get the right setup, and your bikes become one of the best parts of your motorhome trips.
- Details
- Written by: Ricky Clark
- Category: FAQ
Ford Transit vs Fiat Ducato – Roller Team Motorhome Comparison
Roller Team Motorhome: Ford Transit vs Fiat Ducato Comparison
Overview
This guide provides a full spec overview of Roller Team motorhomes built on Ford Transit and Fiat Ducato chassis, including standard features, optional extras, and a side-by-side comparison to help owners and prospective buyers understand differences.
Both chassis are excellent choices, but they offer slightly different driving experiences, layouts, and ownership benefits depending on how you travel.
Ford Transit-Based Roller Team Motorhomes
Base Vehicle: Ford Transit
Standard Features:
- Euro 6D 2.0 EcoBlue diesel engine, 130 hp (optional 165 hp)
- 16" steel or alloy wheels
- Driver & passenger airbags
- Cruise control with speed limiter
- LED daytime running lights & modern headlamps
- Electrically heated mirrors
- Pioneer touchscreen head unit (Bluetooth/USB)
- Radio with steering wheel controls
Optional Extras:
- Engine upgrade to 165 hp
- Automatic gearbox
- Cab air conditioning
- Larger touchscreen/navigation packs
- Additional cameras/sensors (dealer-fit or visibility pack)
Roller Team Conversion Additions
Living & Comfort:
- Swivel driver & passenger seats
- Integrated leisure battery system
- Cab blinds or full blackout
- Optional solar panel
- Reversing camera
- LED interior & exterior lighting
- Optional awning (markise)
- Fly screens on sliding door
- Dinette table extensions & foldable table
- Electric step (comfort pack)
Trim & Features:
- Tecno trim / upgraded upholstery
- Leather steering wheel & gear knob (optional)
- Exterior LED lighting packs
- Enhanced insulation and interior finish
Wet Belt Engine read on : Wet Timing Belt
Fiat Ducato-Based Roller Team Motorhomes
Base Vehicle: Fiat Ducato
Standard Features:
- 2.2 MJ diesel engine, 140 hp
- 16" alloy wheels
- Driver & passenger airbags
- Electrically heated mirrors
- Cruise control
- Manual air conditioning
- Pioneer 9" touchscreen with Android Auto/Apple CarPlay
- Rear-view camera
- Radio with steering wheel controls
- Dual-glass windows with blackout and flyscreens
Optional Extras / Packages:
- Panoramic roof
- Solar panel (Prestige Pack)
- Electric step (Prestige Pack)
- Hub roof with double bed (optional on some models)
- Markise (Prestige Pack)
- Leather steering wheel & gear knob (Techno trim)
- LED interior & exterior lights
Roller Team Conversion Additions
Living & Comfort:
- Swivel driver & passenger seats
- Integrated leisure battery system
- Cab blinds or full blackout
- Optional solar panel
- Reversing camera
- LED interior & exterior lighting
- Optional awning (markise)
- Fly screens on sliding door
- Dinette table extensions & foldable table
- Electric step (comfort pack)
Trim & Features:
- Tecno trim / upgraded upholstery
- Leather steering wheel & gear knob (optional)
- Exterior LED lighting packs
- Enhanced insulation and interior finish
More on the Fiat Ducato
Chassis Comparison: Ford Transit vs Fiat Ducato
Feature
Engine options
Transmission
Drive
Payload
Wheelbase
Handling
Popularity
Ford Transit
** 2.0 EcoBlue diesel, 130–165 hp **
Manual / Optional auto
FWD standard
** 500–650 kg **
4035 mm typical
** Car-like feel, tighter turning **
Less common in Europe
Fiat Ducato
** 2.2 MultiJet diesel, 120–180 hp **
Manual / Optional auto
FWD standard
** 485–635 kg **
3450–4035 mm
** Stable, slightly larger space **
Most common (~75% of motorhomes)
Practical Notes:
- Ford Transit offers a modern cab experience with updated tech.
- Fiat Ducato is historically the standard for European motorhomes, excellent resale and specialist support.
- Payload differences are minimal after conversion; layout & build quality impact real usability more.
Feature Comparison: Roller Team Fit-Out
Category
Engine power
Payload
Infotainment
Driver aids
Cab comfort
Conversion ease
Interior space
Fiat Ducato + Roller Team
** 140 HP typical **
~635 kg
Pioneer 9" w/ Apple/Android
ADAS depending on pack
Standard curtains/blinds
** Built for motorhomes **
Slightly wider internal due to FWD
Ford Transit + Roller Team
** 130 HP standard, 165 HP optional **
Similar, depends on layout
Similar touchscreen, SYNC 4 options
Modern cab tech, adaptive cruise
Better factory comfort & software
** Adapted from van base **
Slightly narrower but more agile driving
Owner Summary:
- Fiat Ducato: Excellent space, market-tested, ideal for long-term touring and resale.
- Ford Transit: Modern drive, car-like feel, premium cab packs, optional power upgrades.
Recommendations
Choose Fiat Ducato if:
- Prioritize internal space and modular layouts
- Want long-term support and resale value
- Prefer a platform designed for motorhomes
Choose Ford Transit if:
- Prioritize modern cab technology and driving experience
- Prefer optional engine upgrades and premium cab comfort
- Enjoy a car-like feel on longer drives
Major Concideration:
Ford Wet Belt Enigine does require a more regimented service level
Specs can vary slightly depending on model and packs, so always check your specific vehicle..
- Details
- Written by: Ricky Clark
- Category: FAQ
Understanding Roller Team Motorhome Builds
Understanding Motorhome Builds
Understanding Motorhome Manufacturer Builds
When purchasing a motorhome, one of the most important decisions is choosing the right manufacturer. Whether you're a first-time buyer or an experienced traveller looking to upgrade, it's easy to get lost in the wide range of brands, build standards, and price points. So, how different are the manufacturers really — and is paying more always worth it?
Let’s take a look at the pros and cons of motorhome manufacturers across the low-end, mid-range, and high-end markets.

Entry-Level & Budget-Friendly Brands (e.g., Roller Team, Rimor, Sunlight)
Pros:
-
Affordability:
These motorhomes are designed to be accessible, offering functional layouts at lower price points.
-
Modern Styling:
Despite their price, brands like Roller Team often offer attractive interiors and decent onboard tech.
-
Lightweight Conversions:
Usually based on popular chassis like Fiat Ducato or Ford Transit, making servicing straightforward.
Cons:
-
Build Quality:
While not poor, the materials and construction (such as thinner panels, simpler insulation, or plastic fittings) may not be as robust or long-lasting as higher-end models.
-
Noise and Rattles:
Over time, you may experience more squeaks, creaks, and movement inside as the van gets used.
-
Fewer Customisation Options:
Limited factory upgrades or choices in layout and finish.
Ideal for:
Couples or families entering the motorhome world or those who plan seasonal travel rather than full-time living.
Mid-Range Motorhomes (e.g., Swift, Bailey, Chausson, Adria)
Pros:
-
Balanced Value:
Mid-range brands often hit the sweet spot between price and quality, offering stronger construction, better insulation, and more storage.
-
Improved Comfort:
More refined interiors, wider beds, and more attention to acoustic insulation.
-
Better Aftercare:
Warranties and support are generally stronger at this level.
Cons:
-
Still Compromised in Places:
You’ll still find MDF in places where solid wood would be stronger, or plastic handles instead of metal. Some models may still have basic heating or water systems.
-
Inconsistency Across Models:
Quality can vary even within the same brand depending on the chassis or model line.
Ideal for:
Travellers seeking comfort and reliability for regular European tours without the premium price tag.
High-End & Luxury Motorhomes (e.g., Hymer, Carthago, Morelo, Niesmann + Bischoff)
Pros:
-
Exceptional Build Quality:
These vehicles are built for long-term travel, often using double floors, aluminium sandwich construction, and premium insulation.
-
Refined Living Experience:
Quiet on the road, warm in winter, cool in summer, and packed with luxury features like Alde heating, leather upholstery, and large garage space.
-
Resale Value:
They hold their value better due to the reputation of build quality and longevity.
Cons:
-
Price Tag:
You can pay double or even triple the price of a mid-range motorhome.
-
Servicing & Parts:
Luxury brands may have fewer service centres or require more specialist care, especially for integrated bodywork or unique components.
-
Overkill for Casual Use:
If you're only touring for a few weeks a year, the high cost may not offer a return on investment.
Ideal for:
Full-time travellers, winter tourers, and those seeking long-term reliability and luxury.
Are They All That Different?
Interestingly, most motorhomes share similar underpinnings: Fiat, Ford, or Mercedes chassis are extremely common, and appliances like fridges, heaters, and toilets are often sourced from the same manufacturers (like Dometic, Truma, or Thetford), regardless of the motorhome brand.
Yet when you look at the price difference — which can often be twice as much, or even more — between a basic model like a Roller Team and a premium brand like Hymer, it raises an important question:
Are you always paying for better quality — or could you be paying for things you don’t necessarily need?
The key differences typically lie in:
-
Construction Method
(e.g., timber vs aluminium framing, insulation thickness, single vs double floor)
-
Interior Finishes
(e.g., chipboard vs high-grade laminates or hardwood)
-
Factory Fit & Quality Control
(level of refinement, precision build, noise/vibration over time)
-
Dealer Network & Warranty Support
(length, responsiveness, and convenience of service options)
So, while an entry-level Roller Team may look quite similar to a high-end Hymer or Carthago at first glance, living in them or driving them long-term often reveals differences — especially in how solid, quiet, or warm the van feels after extended use.
However, that doesn’t mean lower-cost motorhomes aren’t a smart choice. In fact, brands like Roller Team offer excellent value for money, especially if:
-
You’re new to motorhoming and don’t want to overcommit
-
You tour mainly in spring/summer and don’t need heavy-duty insulation
-
You’re happy with stylish, functional design rather than luxury materials
-
You’d rather spend the money on travelling than on high-end finishes
-
You don’t need premium add-ons like automatic levelling, Alde heating, or double floors
In short,
if you buy based on what you actually need — not just what’s marketed as “premium” — a Roller Team or similar model can be a great investment. They meet all required construction and safety standards, look modern, and often come well-equipped for most touring needs.
- Details
- Written by: Ricky Clark
- Category: FAQ
Wet, Dry & Chain Brakes – Roller Team Motorhome Guide
Wet, Dry and Chain, what's the difference?
Timing belts are essential components in internal combustion engines, ensuring the precise synchronization of the crankshaft and camshaft for proper valve operation. There are three main types: wet, dry, and chain timing systems. Wet timing belts operate in an oil bath, reducing friction and extending their lifespan, while dry timing belts function without lubrication, often requiring more frequent replacements. Chain timing systems, made of metal, are durable and long-lasting but heavier and noisier than belts. Each type offers unique advantages and maintenance requirements, making the choice dependent on engine design and performance needs.
Wet Belts
Should You Steer Clear of Wet Timing Belts?
A Summary of Wet Belts
Recently, a different type of timing belt has gained attention: wet timing belts. These belts, prominently used in Ford's EcoBlue engines, have been causing significant issues in the automotive industry while largely flying under the radar. In this article, I take an in-depth look at this problematic component, exploring its intended purpose, the issues Ford aimed to address, and the challenges that have arisen as a result.
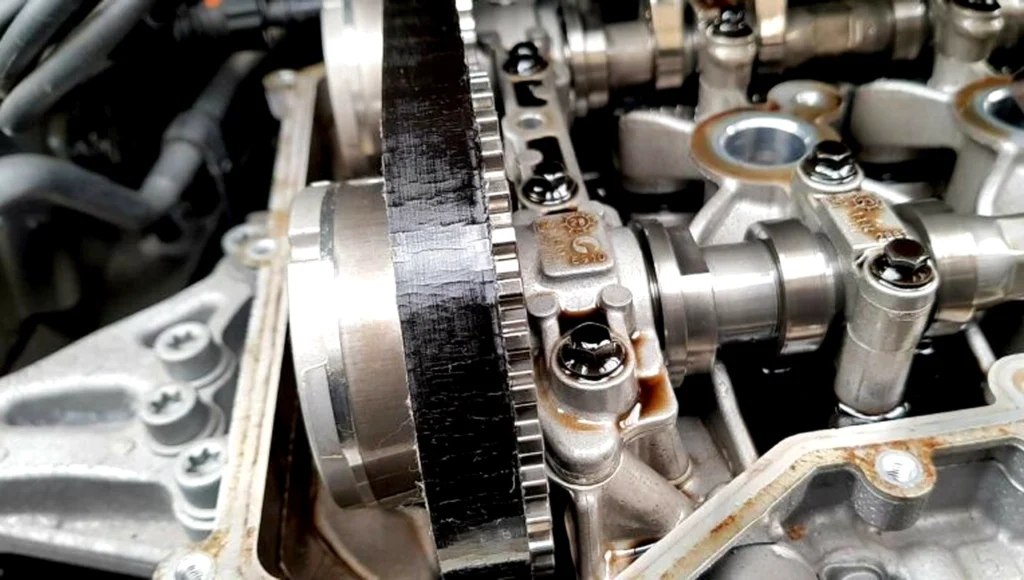
The Wet Timing Belt
A traditional dry timing belt is typically located outside the engine, shielded by a protective cover. In contrast, a wet timing belt is positioned inside the engine, submerged in oil.
The Purpose of Wet Belts:
Extended Maintenance Intervals
- Lubrication from the engine oil reduces wear and friction, potentially increasing the belt's lifespan, improving fuel efficiency, and lowering CO2 emissions.
Improved Heat Dissipation
- Any heat generated by the belt can dissipate into the surrounding oil, helping to regulate engine temperatures.
Reduced Noise
- Noise and vibrations from the timing belt are dampened by the oil, contributing to quieter engine operation.
The first "belt-in-oil" system appeared in European-market Ford 1.8L diesel engines (1.8 TDCi). Volkswagen soon adopted the concept in certain EA211 and EA288 engine families. Ford later integrated wet belts into its EcoBoost engines in 2010 and expanded their use in 2016 with the launch of the EcoBlue engine, which powers a wide range of vehicles.
However, one of the primary causes of timing belt failure is fluid contamination, particularly from oil. This is why the "belt-in-oil" system has raised eyebrows. Oil exposure typically degrades the rubber in timing belts, leading to tooth separation or snapping. Combining these two elements in the same system may seem counterintuitive and potentially problematic.
To minimize the risk of issues with wet timing belts, it’s crucial to follow best practices for maintenance and usage. Here are the most effective strategies:
Follow the Manufacturer’s Maintenance Schedule
- Adhere strictly to the timing belt replacement intervals recommended by the manufacturer. Wet belts often have longer replacement intervals, but delaying maintenance can lead to failure.
Use High-Quality Oil and Filters
- Ensure you’re using the manufacturer-recommended oil grade and quality. Substandard oil can accelerate belt degradation. Regularly replace oil filters to prevent contaminants from circulating in the engine.
Check for Oil Contamination
- Inspect the oil for signs of debris, excessive wear particles, or contamination. Any irregularities can affect the wet belt's lifespan.
Address Oil Leaks Promptly
- Even a minor oil leak can disrupt the wet belt system. Regularly inspect the engine for leaks, particularly around seals, and repair them immediately.
Avoid Harsh Driving Conditions
- Consistent heavy towing, aggressive driving, or extreme temperatures can place additional strain on the timing belt and oil system. Operate the vehicle within its designed limits.
Monitor for Warning Signs
- Pay attention to unusual engine noises, vibrations, or performance issues, as these could indicate wear or damage to the timing belt. Address these promptly with a professional inspection.
Choose a Trusted Mechanic
- When it’s time for belt replacement or engine servicing, use a reputable mechanic familiar with wet belt systems. Improper installation can lead to premature failure.
By taking these precautions, you can reduce the likelihood of wet belt failures and maintain optimal engine performance.
What Issues Do Wet Belts Cause?
Wet timing belts were originally introduced to address a key challenge: reducing vehicle emissions. Automakers sought affordable and efficient ways to meet stricter environmental regulations, and wet belts emerged as a compact, quiet solution. These belts provided a 30% reduction in friction loss, improved fuel economy by around 1%, and contributed to lower emissions, making them a promising innovation for the automotive industry.
However, despite their intended benefits, the problems caused by wet belts often outweigh their advantages.
Primary Issues with Wet Belts
Susceptibility to Oil Impurities
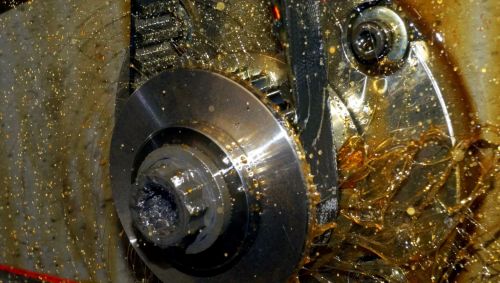
- Even minor contaminants in the oil, such as soot or crystalline particles, can accelerate belt wear. This wear results in belt material breaking off and mixing with the oil, which can clog the oil sump filter, leading to oil starvation.
Impact on Engine Components
- A clogged sump filter can cause cascading issues, including damage to the brake vacuum pump. This can lead to reduced braking performance, significantly increasing the risk of accidents.
Challenging Maintenance
- Replacing or maintaining a wet belt is significantly more labor-intensive compared to a dry belt. The process requires draining the oil and disassembling much of the engine to access the belt, resulting in longer repair times and higher labor costs.
While the wet belt was designed to solve efficiency and emissions challenges, its drawbacks—such as premature wear, system contamination, and maintenance complexity—often make it more trouble than it's worth for many vehicle owners.
Does My Motorhome Have a Wet Belt?
If your motorhome is powered by a Ford engine, there’s a good chance it may be equipped with a wet belt, particularly if it features an EcoBoost or EcoBlue engine.
To determine if your motorhome has a wet belt, check the engine:
-
Standard Timing Belt:
Located on the outside of the engine, it should be visible when you look under the hood.
-
Wet Timing Belt:
Positioned inside the engine and submerged in oil, it won’t be visible from the outside.
For a more definitive answer, you can refer to your motorhome’s manual or consult a mechanic.
How Can I Get the Most Out of My Wet Belt?
Dayco, a leading manufacturer of wet belts, emphasizes the importance of regular and proper maintenance to maximize the lifespan of your timing belt. Insufficient oil levels, neglecting routine maintenance, or using the wrong type of oil can negatively impact the belt's performance.
However, it's worth noting that many drivers are experiencing premature wet belt failures. While Ford recommends replacing the belt every 144,000 miles or 10 years, many garages suggest replacing it around 90,000 miles or every 5 years due to these early failures.
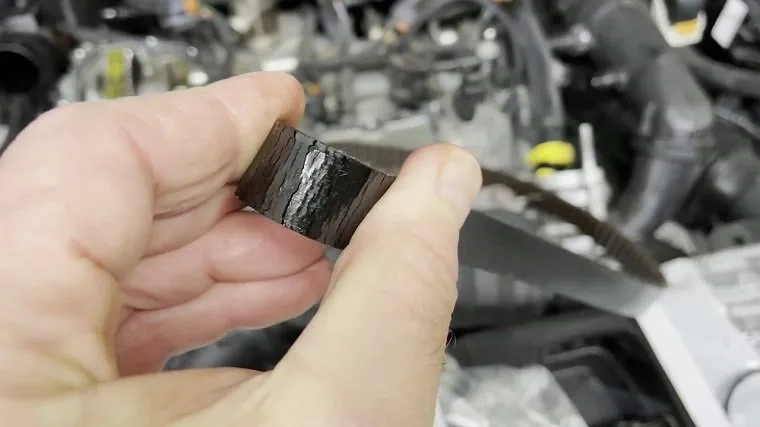
Unlike dry belts, which often show visible signs of wear, wet belts are more challenging to inspect. They don’t provide audible warnings before failure since any noise is dampened by the oil. As a result, drivers must rely on other indicators to detect potential problems.
Signs of a worn wet belt include:
- Difficulty starting the engine
- Poor idling or erratic engine performance at high speeds
Although wet belts are less likely to snap, their teeth can become loose, leading to belt slippage and engine desynchronization. A weakened belt may continue to run but will contaminate the oil with debris, further damaging the engine. Regular maintenance and early replacement are key to preventing these issues.
- Details
- Written by: Ricky Clark
- Category: FAQ
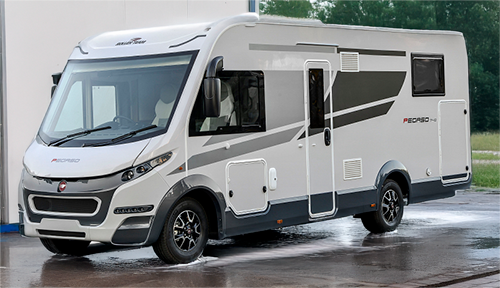
Cleaning Your Roller Team Motorhome – Tips & Advice
Motorhome Cleaning
Your Roller Team Motorhome Cleaning Guide to a Spotless Motorhome!
Like your home, your motorhome needs regular cleaning to stay fresh and welcoming. After all, it’s your home on wheels!
Before going on that much-anticipated summer adventure, why not give your motorhome a thorough clean? At first, it might feel like a big task, but with the right tips, you’ll soon find yourself enjoying the process.
Cleaning your motorhome goes beyond just washing the exterior and tires—it’s about giving it a deep clean from top to bottom.
This guide is your go-to "Motorhome Cleaning Handbook," packed with tips to make sure you tackle the job with ease and keep the stress to a minimum. Ready to dive in? Let’s get started!
The importance of a regular motorhome cleaning routine?
A shining example
For motorhome enthusiasts, maintaining a clean and well-kept vehicle is essential, not only for aesthetics but also for performance, comfort, and resale value. A consistent cleaning routine ensures that your motorhome remains a welcoming haven for you and your passengers while preventing wear and tear from the elements. Here’s why a regular cleaning routine is crucial for motorhome owners.
Preserve the Exterior Finish
The exterior of a motorhome is constantly exposed to elements like UV rays, rain, dirt, and road salt, especially during road trips and off-season storage. UV exposure can lead to fading, while road salts and dirt can cause corrosion if left unattended. By regularly washing and applying a protective wax or sealant, you can prevent these issues, extending the life and appearance of your motorhome’s finish.
Prevent Mold and Mildew in Interior Spaces
Motorhomes, like any small living space, are prone to mold and mildew, especially in areas like bathrooms, kitchens, and around windows. Moisture build-up can be particularly challenging, especially after rainy trips or in humid conditions. Regularly cleaning and airing out the motorhome helps control humidity, preventing mold growth that can lead to unpleasant odors and potential health hazards.
Enhance Air Quality and Hygiene
A clean motorhome offers a more comfortable and healthy environment. Dust, pollen, and allergens can accumulate quickly, especially if you frequently travel to rural or natural areas. Regular cleaning and vacuuming help improve air quality, reduce allergens, and ensure a healthier space for everyone inside, especially if you travel with pets.
Maintain Functionality of Appliances and Fixtures
The appliances and fixtures in a motorhome are essential for comfort on the road, and they’re subject to regular use and exposure to a variety of conditions. Dust, grime, and grease can build up, particularly in the kitchen and around vents, reducing the efficiency and lifespan of appliances. By including appliance cleaning in your routine, you ensure they run smoothly, reducing the chances of costly repairs.
Prevent Rust and Corrosion of Mechanical Components
Undercarriages, tires, and other mechanical parts are especially vulnerable to the elements. Dirt, salt, and debris can cause rust and corrosion if left unchecked, leading to potential safety hazards and costly repairs. Regular washing and inspecting these components keep them in good condition and helps ensure a safe and reliable journey.
Improve Resale Value
A well-maintained, clean motorhome retains its value better than one that has been neglected. Regular cleaning not only maintains the visual appeal but also indicates to potential buyers that you’ve taken good care of the vehicle. This attention to cleanliness and maintenance can translate into a higher resale value if you ever decide to upgrade or sell your motorhome.
Identify Potential Issues Early
A thorough cleaning routine allows you to spot small problems before they escalate. Checking for cracks, leaks, loose seals, and other wear and tear can help you catch issues before they turn into major repairs, saving both time and money in the long run.
Essential Tips for Maintaining a Regular Cleaning Routine
-
Set a schedule:
Decide on a cleaning routine that works for you. After every trip is a good rule of thumb for many, but you may want to increase this if you travel frequently or in challenging conditions.
-
Invest in the right cleaning products:
Use products specifically designed for motorhome surfaces, appliances, and finishes to avoid damage.
-
Don’t overlook the undercarriage:
Especially after winter trips, cleaning the undercarriage is essential to remove salt and prevent rust.
-
Regularly clean and sanitize water systems:
Empty and clean the water tank, especially if your motorhome has been in storage.
-
Wax and protect:
A fresh coat of wax after washing the exterior provides an extra layer of protection against dirt and UV rays.
In Conclusion
Establishing a regular cleaning routine for your motorhome is essential to ensure longevity, safety, and comfort. A clean motorhome isn’t just more enjoyable for your travels—it’s a commitment to maintaining a cherished asset.
What are the benefits of regularly cleaning my motorhome?
-
As a motorhome owner, maintaining a clean vehicle goes beyond aesthetics; it's about preserving its value and functionality. Dirt, debris, and exposure to the elements can have damaging effects that shorten your motorhome’s lifespan. Regular cleaning protects both the exterior and interior from preventable wear and tear.
Here’s a closer look at why cleaning your motorhome is essential and the potential issues that can arise when it's neglected.
Preventing Exterior Damage
-
Bird Droppings:
The acidic nature of bird droppings can quickly erode your motorhome’s paint, leaving unsightly stains and creating vulnerable spots prone to rust.
-
Green Algae and Mold Growth
In humid or rainy climates, green algae and mold can grow on the exterior. This not only dulls the motorhome's appearance but can also create slippery surfaces that make cleaning more difficult over time.
-
Mud, Dust, and Road Salt
When left on the exterior, mud and dust can lead to tiny scratches on the paint and windows. Road salt, especially in winter, is corrosive and can cause rust to form on metal components, including undercarriages and wheel wells.
Maintaining Shine and Aesthetic Appeal
-
Loss of Shine
UV rays from the sun can fade and dull the paint over time. Regular washing helps preserve the luster, especially when combined with waxing, which provides an added layer of UV protection. A well-maintained shine not only keeps your motorhome looking fresh but also improves its resale value.
-
Chemical Spotting and Water Marks:
Exposure to sun and rain without washing can lead to chemical spotting, water stains, and etching on windows. These blemishes can become permanent, affecting visibility and the overall appearance of the motorhome.
Preventing Corrosion and Rust
-
Corrosive Elements:
When left unattended, elements like saltwater spray, road chemicals, and even morning dew can accelerate corrosion. Cleaning these off, especially in hard-to-reach areas, is crucial to prevent rust from forming on metal parts. This includes hinges, locks, and frames, which, if corroded, can become costly to replace or repair.
-
Protecting Roof and Seals:
The roof and seals on your motorhome are particularly vulnerable to damage from environmental exposure. By cleaning and inspecting these areas regularly, you’ll spot any cracking, separation, or mildew early, reducing the likelihood of water leaks and other costly repairs.
Improving Air Quality and Reducing Allergens Inside
-
Dust and Allergen Buildup:
Cleaning the interior is just as important as maintaining the exterior. Dust, pet hair, and pollen can accumulate, leading to allergies or respiratory issues, especially in confined spaces like a motorhome.
-
Preventing Mold and Mildew:
Motorhomes are prone to moisture buildup, especially in bathrooms, kitchens, and under sinks. By regularly cleaning and drying these areas, you can prevent the formation of mold and mildew, which are not only unsightly but can cause health issues and unpleasant odors.
Enhancing Safety
-
Better Visibility:
Clean windows and mirrors are essential for safe driving. Dirt, water spots, and bug splatters can obstruct your view, increasing the risk of accidents. Regular cleaning helps ensure your vision is clear, particularly in inclement weather.
-
Avoiding Slippery Surfaces:
Algae, moss, or other growth on the exterior can make steps and handles slippery, posing a hazard when entering or exiting the motorhome. Keeping these areas clean ensures a safer experience.
Prolonging the Lifespan of Mechanical Components
-
Engine and Underbelly:
Dirt, salt, and grime can accumulate under the motorhome, impacting the engine, exhaust system, and other mechanical components. By cleaning these parts, you help prevent deterioration and improve performance, reducing wear on costly components.
-
Protecting Awning and Accessories:
If your motorhome has an awning, bike rack, or other external accessories, cleaning them regularly can extend their lifespan. Dirt and moisture can cause rust or mildew on fabric awnings and corrode metal accessories if left unaddressed.
-
Where can I clean my motorhome?
-
Cleaning Your Motorhome on the Driveway!
One of the most obvious benefits of cleaning your motorhome on your own driveway is convenience. You can clean at your own pace, whenever your schedule allows, without the hassle of driving to a professional cleaning service. Plus, you save on the costs associated with commercial washes, which can be especially high for larger motorhomes. Instead, with just a few affordable cleaning supplies, you can achieve the same level of cleanliness without spending extra money.
-
Cleaning Your Motorhome in your garage!
Cleaning your motorhome in your garage can be a smart move for many reasons. This approach offers protection from the elements, a more controlled environment, and increased convenience. If you’re lucky enough to have a garage large enough to accommodate your motorhome.
-
Cleaning Your Motorhome at an outside cleaning station!
Cleaning your motorhome at an outside cleaning station has unique advantages that make it a convenient and effective option. These stations are designed specifically for larger vehicles, offering the space, tools, and sometimes even professional assistance to help you get the best results.
-
Cleaning Your Motorhome at the roadside!
Cleaning your motorhome at a roadside can be a convenient, practical solution for keeping your vehicle in great shape while you’re on the go, it’s essential to understand the potential legal restrictions to ensure you’re in compliance with local regulations. In most cases this is not strictly legal, however most police would likely turn a blind eye to it, albite not guaranteed.
When to clean my motorhome?
Keeping your motorhome clean is key to maintaining its longevity, appearance, and overall comfort. But with factors like the weather, your travel schedule, and seasonal maintenance to consider, it can be challenging to determine the best time for a thorough cleaning
After a Long Trip or Adventure
Perhaps the most important time to clean your motorhome is after a long trip. Extended travel inevitably leads to a buildup of dirt, bugs, and grime on the exterior, especially if you've driven through varied weather conditions or rugged terrain. Inside, dust, sand, and other debris can accumulate, particularly if you’ve been camping or spending time outdoors.
Why Clean Now?
- Dirt and grime can damage paint and finishes over time, while bugs can become difficult to remove if they’re left on too long.
- Interior cleaning prevents dust, food particles, and any potential mold or mildew from building up in confined areas.
- Cleaning right after a trip ensures your motorhome is ready to go for your next adventure.
Start of the Travel Season
At the beginning of the travel season, often in spring, a comprehensive cleaning can help get your motorhome in shape for the months ahead. After a period of winter storage, dust, and dirt may have settled, even if you’ve taken steps to protect the vehicle.
Why Clean Now?
- Removing accumulated dust, cobwebs, and any musty smells from storage gets your motorhome fresh and ready.
- It’s the perfect time to do a deep clean and inspect for any maintenance issues that may have arisen over the winter, such as tire condition, seal checks, and undercarriage rust.
- Washing and waxing the exterior in spring helps protect your motorhome from sun exposure and weather elements during peak travel season.
End of the Travel Season
Once your travel season is winding down and before you put your motorhome into storage, a thorough clean is essential. This step removes dirt, road salt, and other residues that could cause corrosion or other issues if left on over winter.
Why Clean Now?
- Clearing away grime from the season protects your motorhome’s surfaces from corrosion and fading.
- Cleaning the interior removes food particles, preventing pests from finding their way in during storage.
- It’s an excellent time to clean and organize your gear, ensuring everything is dry and properly stored for the colder months.
After Exposure to Extreme Weather
If your travels have taken you through harsh weather conditions—such as heavy rain, snow, or intense sun exposure—cleaning your motorhome afterward is highly recommended. Road salt, mud, and harsh UV rays can all take a toll on your motorhome’s exterior, while rain and humidity can create conditions for mold and mildew growth inside.
Exterior Wash and Protection
Exterior Wash and Protection
Regularly washing and protecting the exterior is fundamental to maintaining your motorhome’s look and preventing damage from environmental elements.
Tasks:
-
Pre-Rinse:
Begin with a pre-rinse to remove dirt and debris from the motorhome's exterior. Avoid using a pressure washer for this step unless it allows for adjustable pressure control.
-
Wash the Exterior:
Use a gentle, non-abrasive cleaner to wash the sides, roof, windows, and doors. Avoid harsh chemicals that could damage paint or decals.
- What cleaner?
Ensure that your cleaning product is specifically formulated for motorhomes. Apply it to the motorhome’s exterior and gently scrub with a soft brush to prevent scratches and protect the acrylic windows.
Some company products that are highly recommended
- Fenwicks
- Wet & Forget
- Autoglym
Always read the manufactures instructions around using there product.
Can You Use a Pressure Washer on a Motorhome?
Yes, but with caution. Pressure washers can effectively remove stubborn dirt, mold, and grime from your motorhome, especially on large flat surfaces like the sides or roof. However, they can also cause damage if not used properly.
Best Practices When Using a Pressure Washer
Use the Right Pressure Setting:
- Opt for a pressure washer with an adjustable PSI (pounds per square inch). Stick to a range of 1000–1500 PSI to prevent damage.
- Use a wide-angle nozzle (25–40 degrees) to spread the force.
Maintain Distance:
- Keep the nozzle at least 2–3 feet away from the surface.
Avoid direct, prolonged spraying at a single spot.
Test First:
Test on a small, inconspicuous area to ensure the pressure isn't too harsh.
Focus Areas:
Use the pressure washer on hard-to-clean areas like wheels, undercarriage, and non-delicate bodywork.
Avoid Vulnerable Parts:
- Refrain from spraying near seals, vents, windows, doors, and decals, as the high pressure can strip or weaken them.
Never aim directly at seams or areas with caulking.
Use a Gentle Detergent:
Combine pressure washing with a motorhome-safe cleaning solution. Attach a detergent injector if your washer supports it.
Rinse Quickly and Evenly:
- Wash section by section and rinse immediately to prevent streaks or water spots.
Worst Things to Do with a Pressure Washer
Using Maximum Pressure:
-
- Excessive force can peel paint, remove decals, and compromise seals.
Spraying at Close Range:
-
- Holding the nozzle too close risks gouging the surface or pushing water into seals and vents.
Ignoring Sensitive Areas:
-
- Spraying water directly into electrical components, roof edges, or air vents can lead to water ingress and costly repairs.
Skipping Pre-Wash Steps:
-
- Pressure washing without brushing or rinsing first can grind debris into the surface, causing scratches.
Alternatives for Sensitive Motorhomes
If you’re unsure about using a pressure washer or have an older vehicle with delicate surfaces:
- Soft Wash Method: Use a hose with a low-pressure nozzle and soft microfiber brushes.
- Foam Cannon: Apply foam, let it sit to loosen grime, and then rinse with a garden hose.
- Bucket Method: Use a two-bucket system for manual washing.
In conclusion, pressure washing your motorhome can be safe and efficient if done carefully. However, when in doubt, hand-washing is always the safer, albeit more labor-intensive, option.
Cleaning sequence
The Motorhome Cleaning Sequence: A Step-by-Step Guide to Keeping Your Motorhome Spotless
Cleaning a motorhome involves more than a quick wipe-down; it’s about establishing a thorough routine that keeps your vehicle looking great and operating smoothly. By following a step-by-step cleaning sequence, you can cover every essential area and ensure that your motorhome is ready for the road in top condition. Here’s a complete motorhome cleaning sequence to make your next cleaning session efficient and effective.
Start with the Roof
It is always good to start at the top. You don't really want all that dirty water running down your freshly cleaned side pannels
Cleaning a motorhome roof is often overlooked, but it’s a critical starting point. Dirt, leaves, and even mold can accumulate on the roof, leading to water pooling and potential leaks. Follow these steps:
- Sweep off large debris like leaves or twigs.
- Use a mild cleaner suitable for motorhome roofs, particularly if you have a rubber roof.
- Rinse thoroughly and inspect for any signs of cracks, damage, or leaks, as addressing these early can prevent bigger issues.
Work Your Way Down to the Exterior Walls
Once the roof is clean, work down to the exterior walls. It’s best to clean from the top down to prevent re-soiling lower areas:
- Rinse off the dirt and grime with a hose or pressure washer (at a low setting).
- Apply a gentle, motorhome-safe soap, and scrub in sections.
- Rinse as you go to avoid soap drying and streaking.
- Check for any cracks, damaged decals, or wear, especially around windows, seals, and joints.
- After drying, apply a wax or protective sealant for an added layer of protection.
Clean the Windows and Mirrors
Clear windows and mirrors enhance visibility and aesthetics:
- Use a glass cleaner and a microfiber cloth for streak-free results.
- Be sure to clean both inside and outside surfaces.
- For tinted or special coatings, check the cleaner’s suitability to prevent damage.
- Clean any screens or shades attached to the windows for complete visibility and cleanliness.
Tidy Up the Awning
Awnings can attract dirt, mildew, and leaves, especially if they’re frequently extended in different locations. Clean these as follows:
- Extend the awning fully, and check for any damage.
- Sweep off loose debris, then scrub with a fabric-safe cleaner and brush.
- Rinse thoroughly and let it air dry before retracting to prevent mold and mildew.
Clean and Protect the Undercarriage
The undercarriage of your motorhome collects road grime, salt, and other materials that can lead to rust:
- Use a pressure washer to remove dirt and salt buildup from long trips, especially in winter.
- Inspect the undercarriage for rust and apply a rust prevention product if needed.
Focus on the Wheels and Tires
Tires and wheels accumulate brake dust, mud, and grime, and deserve special attention:
- Rinse off loose dirt, then use a brush with a tire cleaner to scrub thoroughly.
- Apply a rubber protectant to prevent cracking and extend the life of your tires.
- Check tire pressure, as well as the tread and condition, as part of your cleaning routine.
Deep Clean the Interior
Now it’s time to move inside. Follow these steps for a fresh and organized interior:
- Declutter:
Remove personal items, bedding, dishes, and anything else that’s not fixed in place.
- Dust and Vacuum: Use a vacuum to remove dust, pet hair, and debris from floors, furniture, and nooks and crannies.
- Clean the Kitchen: Scrub the countertops, sink, and appliances. Make sure the fridge is empty and cleaned, particularly before long storage.
- Sanitize the Bathroom: Clean and sanitize the toilet, shower, sink, and all surfaces. Don’t forget to check for any signs of mold or mildew.
- Wipe Down Surfaces: Use appropriate cleaners to wipe down all other interior surfaces, such as windowsills, counters, and cabinets.
- Freshen Upholstery: Clean and freshen upholstery, vacuuming any fabric surfaces. Consider using a fabric cleaner for any stains or dirt.
Sanitize Water Systems
Clean water systems are essential for safe and enjoyable trips:
- Drain and clean your freshwater tank, especially if it has been sitting unused for a while.
- Run a solution of water and a safe cleaning agent or sanitizer through the pipes.
- Drain and rinse thoroughly to prevent any residual chemicals from remaining in your water system.
Test and Clean Appliances
Appliances, like the fridge, stove, and HVAC systems, can harbor grime that impacts performance:
- Check each appliance to make sure it’s working properly.
- Clean vent covers and filters if accessible.
- Remove any residue or buildup in the kitchen area, particularly from the stove and microwave.
Final Touches: Refresh and Organize
Now that your motorhome is thoroughly clean, add the finishing touches:
- Place fresh linens, towels, and any essentials.
- Restock kitchen items and toiletries as needed.
- Add air fresheners or dehumidifiers if your motorhome will be in storage.
Perform a Final Check
Before declaring the cleaning job complete, walk through your motorhome and inspect all areas:
- Make sure all windows and doors are securely closed.
- Check that appliances are off and any loose items are secured.
- Ensure that everything is dry to prevent mildew or mold.
Final Thoughts
By following this motorhome cleaning sequence, you’ll keep your vehicle in top condition, inside and out. Regular, thorough cleaning not only preserves your motorhome’s value but also ensures a comfortable, inviting environment for you and your family. Happy travels!
Cleaning the roof
Cleaning the roof tools
As much as your tempted to get out there on a sunny day, it's not always the best time. A slightly dull overcast might be better. Harsh sun will dry up your work to quickly.
-
Ladder or access platform:
Ensure it is sturdy and safe for climbing. You might also find that fitting some pads to the ladder to stop it marking the motorhome if you need to lean it onto the side, alternatively lay a towel over the top to protect it or pipe-insulating foam tubes with a split down one side are ideal.
-
Soft-bristled brush:
To avoid scratching the roof surface us a soft brush, also a soft paint brush can help in those hard to reach areas or on the sealant to remove algae.
-
Non-abrasive cleaning solution:
Choose a cleaner safe for the roof material (EPDM rubber, fiberglass, or aluminum). Try to us approved motorhome- caravan cleaners and extra care on plastic windows and solar panels
- Bucket with water:
For rinsing or mixing the cleaning solution. If you take this up onto the roof, sit the bucket on a towel or simular. You don't want to drag it accross the roof and scratch it.
-
Hose with a spray nozzle:
For rinsing off dirt and cleaner, The multi spray heads are great for this, but again, be careful not to drag it accross the roof and try to find one with rubber protection and not brass head.
-
Microfiber cloths or mop:
For wiping and drying, or even the good old chamois leather
-
Safety equipment:
Rubber-soled shoes, gloves, and possibly a harness. The roof can become slippery.
-
Can I Stand on the Motorhome Roof to Clean It?
Yes, you technically can, but is it safe? Absolutely not.
Avoid those less solid parts like the bed overhang section which are often only bonded on. Stay close above the habitation section.
The roof of your motorhome can become dangerously slippery when wet with soapy water, increasing the risk of falling. Additionally, not all motorhome roofs are designed to support weight, and you certainly don’t want to find out the hard way. For your safety, it’s best to avoid standing on the roof. Instead, consider using kneel mats, similar to those used in yoga or fitness training, for added comfort and stability. Most importantly, always have someone nearby to pass tools up and down or assist if needed. Safety should always come first.
-
Solar Panel Cleaning
Keeping the solar panels on your motorhome clean is essential, as dirt and grime can significantly reduce their efficiency.
Use a sponge with water to gently clean the panels, and be sure to rinse thoroughly to remove any soap residue.
-
Arial
Don't forget to give this a quick wipe-down. While it has little impact on the reception, it will add that extra touch of sparkle!
-
Roof Lights
These need a degree of care as they can be damaged by harsh cleaning, so only use cleaners designed for it, (Fenwick Windowize or other acrylic windows cleaners)
Don't forget to open the window and use a paint brush and cleaner liquid to clean all those hard to reach areas and maybe spray with silicon lubricant well your there.
-
Polish
The polishing can add a lot of extra time, but will protect your hard work for a much longer period, but it's better to give it all a clean rather than only having enough time for a part clean. Alternatively - clean the whole motorhome and polish the roof and then next time clean the whole motorhome and polish the rest, then alternate.
Cleaning the main body
Tools Needed
As much as your tempted to get out there on a sunny day, it's not always the best time. A slightly dull overcast might be better. Harsh sun will dry up your work to quickly.
- Soft Brush or Wash Mitt
- Microfiber Cloths
- Bucket and Grit Guard
- Hose with an adjustable Nozzle
- Cleaning Products
- Squeegee
- Extendable Wash Brush & Paint Brush
-
Pre-Rinse:
Begin with a pre-rinse to remove dirt and debris from the motorhome's exterior. Avoid using a pressure washer for this step unless it allows for adjustable pressure control and do not point directly at seals (windows - panels). These will eventually be damaged by this. (at this stage just use clean water)
-
Wash the Exterior:
Wash with soapy water mix appied with a soft brush or cloth to avoid damage - Always avoid using dry cloths or brushes on dry panels, as this could cause scratches. For best results, use recognized motorhome cleaners such as Fenwicks or Jennychem, Autoglym. These products are specially designed to clean without damaging the surface or finish of your motorhome.
- Rinse Thoroughly:
After washing, rinse the vehicle thoroughly with clean water to remove all soap residue.
- Dry Gently:
If necessary, dry the surface using a microfiber cloth or chamois to avoid water spots.
-
What cleaner?
Fenwick's Caravan & Motorhome Cleaner
A popular and trusted cleaner for caravans and motorhomes. It's gentle on surfaces but tough on dirt, removing grime, bird droppings, and road tar. It's biodegradable and safe for use on all surfaces, including windows and decals.
Muc-Off Cleaner
Muc-Off is known for its high-performance cleaners, and their Caravan Cleaner is no exception. It’s formulated to remove dirt, grime, and road salt, leaving a streak-free finish. It's also eco-friendly and safe for all caravan finishes.
Thetford Caravan Cleaner
Thetford’s cleaner is specifically designed for cleaning caravans and motorhomes. It removes dirt and grease without damaging the surfaces and is suitable for both the bodywork and the windows
Turtle Wax Caravan & Motorhome Wash & Wax
Turtle Wax’s wash and wax formula cleans and polishes your caravan in one step, providing a protective layer to help resist dirt and grime build-up in the future. It’s ideal for maintaining a glossy finish.
Jason's Caravan Cleaner
A professional-grade cleaner, Jason's Cleaner removes dirt and stubborn stains while protecting the exterior finish. It’s easy to apply and is safe for use on a wide range of surfaces, including aluminum and fiberglass.
-
Polish
The polishing can add a lot of extra time, but will protect your hard work for a much longer period, but it's better to give it all a clean rather than only having enough time for a part clean. Alternatively - clean the whole motorhome and polish the Sides and then next time clean the whole motorhome and polish the rest, then alternate.
Let there be light, window cleaning?
How to Clean Your Motorhome Windscreen for a Crystal-Clear View:
Keeping your motorhome windscreen clean is vital for safety, especially on long trips where visibility is paramount. Dirt, streaks, and smears can obstruct your view, so maintaining a spotless windscreen should be a priority. Plus, clean windows enhance your motorhome's overall appearance. Here’s a straightforward guide to achieving sparkling results.
What’s the Best Way to Clean a Motorhome Windscreen?
The optimal method involves starting with the exterior, progressing to the interior, and finishing by topping up your wiper fluid. Cleaning the outside first ensures you can easily spot any smudges or streaks on the inside.
Essential Equipment for Cleaning Your Windscreen
To achieve a streak-free finish, gather these tools:
-
Microfibre cloths:
Excellent for removing dust, grease, and debris.
-
Glass cleaner:
Choose an ammonia-free or specialist auto glass cleaner.
-
Water and bucket:
Useful for pre-cleaning heavy dirt.
-
Telescopic squeegee:
Ideal for reaching tall windscreens.
-
Optional products:
Rain repellents, anti-fog solutions, or DIY vinegar mixtures.
Cleaning the Outside of Your Windscreen
Start by removing heavy dirt and debris. Use water and a soft brush or a telescopic squeegee to cover every part of the windscreen.
- Lift wiper blades to clean underneath and inspect for wear or damage.
- Clean wiper blades with a mix of water and baking soda, alcohol, or mineral spirits.
- Replace wipers every 2-3 years or sooner if they show signs of wear.
Deep Clean with a Microfibre Cloth
Once surface dirt is gone, dry the windscreen with a lint-free towel.
- Apply a glass cleaner and wipe in a circular motion with a clean microfibre cloth.
- Finish with paper towels for a streak-free shine.
Polishing Your Windscreen
Polishing removes fine streaks and provides a protective finish.
- Use products like smear-free glass cleaners, anti-fog treatments, or rain repellents.
- Alternatively, polish with a vinegar solution (480ml water, 60ml vinegar, ½ tsp dish soap).
Cleaning the Inside of Your Windscreen
Move to the interior once the exterior is spotless:
- Sit in the passenger seat for easier access.
- Use a microfibre cloth and water or a pivoting cleaning tool for hard-to-reach areas.
- Avoid spraying cleaner directly onto the dashboard to prevent damage.
Top Up Wiper Fluid for Smear-Free Driving
Keep the wiper fluid reservoir full with a solution that includes antifreeze, ensuring clear visibility in all weather
FAQs and Pro Tips
Can I Clean My Windscreen with Vinegar?
Yes, mix 480ml water, 60ml white vinegar, and ½ tsp dish soap for an effective DIY cleaner.
What’s the Best Windscreen Cleaner?
Opt for products like ArmorAll, Autoglym Fast Glass, or Car Gods 54 Zeus Glass Perfection. Always choose ammonia-free formulas to avoid streaks
DIY Cleaner Options?
Aside from vinegar solutions, water with a microfibre cloth works well for routine cleaning.
Pro Tips for Sparkling Results:
- Clean both sides: Don’t forget the interior, where fingerprints and suction cup marks accumulate.
- Use clean cloths: Ensure microfibre cloths are lint-free before use.
- Approach from the passenger side: This avoids interference from the steering wheel.
- Protect the interior: Cover your dashboard and seats while cleaning to prevent spills.
By following these steps, your motorhome windscreen will stay crystal clear, ensuring safe and enjoyable journeys!
Motorhome Wheels
How to Clean Motorhome Wheels: Alloy and Steel
Cleaning your motorhome wheels is a crucial part of maintaining its overall appearance and functionality. Whether you have shiny alloy wheels or rugged steel ones, proper cleaning prevents corrosion, improves safety, and ensures your motorhome always looks its best on the road or at the campsite.
Both alloy and steel wheels require different approaches to cleaning, but with the right products and techniques, the process can be simple and effective.
Why Keep Motorhome Wheels Clean?
Motorhome wheels endure tough conditions—mud, brake dust, road grime, and even salt from winter roads. Neglecting them can lead to damage or rust, especially for steel wheels. Cleaning not only enhances the look of your motorhome but also extends the lifespan of the wheels.
Products to Use for Motorhome Wheels
For Alloy Wheels
-
Acid-Free Alloy Wheel Cleaner
-
- Look for a product specifically designed for alloy wheels. Acid-free formulas dissolve brake dust and road grime without damaging the wheel’s surface.
Many cleaners change color as they react with dirt, making it easier to see where to rinse.
Rain Repellent or Tyre Gel
- Apply a protective product to repel water, dust, and grime, keeping the wheels cleaner for longer.
- A tyre gel can restore shine to your tyres, giving them a brand-new appearance.
For Steel Wheels
-
Heavy-Duty Degreaser or Steel Cleaner
- Steel wheels can accumulate rust and tougher grime. Use a cleaner with rust inhibitors to prevent corrosion.
A general-purpose automotive cleaner works well for regular maintenance.
-
Rust Remover (if needed)
- For steel wheels with rust spots, a rust remover will clean them up effectively.
- Follow up with a rust-resistant sealant or paint for long-lasting protection.
Wheel Cleaning Tools
- Wheel Brush:
Use soft bristles for alloy wheels to avoid scratches. For steel wheels, a sturdier brush is better suited to remove tough dirt and rust.
-
Pressure Washer:
A powerful spray of water can loosen dirt and debris quickly, saving time and effort.
-
Microfibre Cloths:
Essential for drying the wheels after cleaning to prevent watermarks or streaks.
-
Protective Sealant or Wax:
- A sealant creates a barrier against future dirt buildup and protects against corrosion for both alloy and steel wheels.
Step-by-Step Guide to Cleaning Motorhome Wheels
Step 1: Pre-Rinse the Wheels
- Use a pressure washer or hose to remove loose dirt, mud, and debris. Ensure you spray both the outer and inner surfaces of the wheels.
Step 2: Apply the Cleaner
- Spray your chosen cleaner evenly across the wheels.
- For Alloy Wheels: Use an acid-free cleaner designed to dissolve brake dust and grime.
- For Steel Wheels: Apply a degreaser or cleaner, focusing on rust-prone areas.
Step 3: Agitate Stubborn Dirt
- Use a wheel brush to scrub the surface gently.
- For alloy wheels, concentrate on hard-to-reach areas like spokes.
- For steel wheels, a stiffer brush can help break down tougher grime or rust.
Step 4: Rinse Thoroughly
- Rinse off the cleaner using a pressure washer or hose, ensuring no residue is left behind.
Step 5: Dry the Wheels
- Use a microfibre cloth to dry the wheels completely. For steel wheels, ensure no moisture is left behind to prevent rust.
Step 6: Protect and Shine
- Alloy Wheels: Apply a rain-repellent spray or tyre gel to enhance the shine and protect the surface.
- Steel Wheels: Use a rust-resistant sealant or automotive paint for added durability.
Additional Tips for Long-Lasting Results
-
Regular Cleaning:
Clean your motorhome wheels every few weeks or after trips through muddy or salty areas. -
Inspect for Damage:
Look for cracks, rust spots, or worn areas. Address these immediately to prevent further damage. -
Avoid Harsh Chemicals:
Stick to products designed for your wheel type to avoid damaging finishes or causing corrosion. -
Use the Right Tools:
Ensure your brushes and cloths are clean to avoid scratching or spreading dirt. -
Store Smartly:
If your motorhome is stored for long periods, cover the wheels to protect them from UV rays and dirt.
With these steps and tips, your motorhome wheels—whether alloy or steel—will remain in excellent condition, ready for every adventure.
Don't be a Streaker - clean those streaks
-
Those black Streaks
To remove black streaks on your motorhome, use an abrasive polishing agent or a dedicated black streak remover (several brands are available). Apply it with a microfiber cloth, mitt, or brush for best results.
-
Prevent them black Streaks
Absolutely! The most effective way to prevent those dreaded black streaks on your motorhome is with regular cleaning.
After washing your motorhome, open the windows and doors, and use a black streak remover to wipe down the rubber seals. This will help clear away denatured rubber particles from the seals before they can streak down your paintwork.
Additionally, applying an overwintering spray will keep the surface slick, helping to prevent dust and particles from sticking to the paintwork.
Get inside - clean inside
Complete Guide to Cleaning Your Motorhome Interior
The interior of your motorhome is just as important as the exterior. A clean, organized interior enhances comfort, promotes hygiene, and helps you make the most of your travels. Here’s a step-by-step guide to ensure your motorhome interior stays in top-notch condition, along with additional tips for storage, maintenance, and odor control.
- Declutter and Remove Loose Items
Before you begin cleaning:
- Remove items not in use: Decluttering frees up space and makes cleaning easier. Be selective and practical—store sentimental items elsewhere if not essential for the trip.
- Secure all loose items: Prevent items from falling or shifting during cleaning or while driving.
Dusting and Vacuuming
- Start with the ceiling: Use a duster or vacuum with a soft brush attachment to remove cobwebs and dust from vents, corners, and light fixtures.
- Vacuum systematically: Work in small sections, focusing on floors, carpets, and upholstery.
- Move furniture where possible: Cleaning under and behind furniture prevents the accumulation of dirt and allergens.
Wipe Down Surfaces
- Use a damp microfiber cloth and a mild, non-abrasive cleaner to wipe surfaces like cabinets, countertops, and cupboard doors.
- Avoid dishwashing liquid with harsh chemicals, as it can damage finishes.
- Pay special attention to corners and edges where crumbs and dirt may accumulate.
Kitchen Cleaning
Treat your motorhome kitchen like your home kitchen:
- Clean sinks and worktops: A vinegar-water solution works well to remove stains and grease.
- Wash utensils and appliances: Ensure all pots, plates, and utensils are clean and stored securely.
- Appliance cleaning:
- Refrigerator: Empty it completely. Clean removable shelves and trays with dish soap, then wipe the interior with a damp cloth. Don’t forget to clean the vents.
- Microwave and stove: Remove food residue and clean with mild soap and water.
- Oven or dishwasher (if present): Follow manufacturer guidelines for cleaning.
Bathroom Cleaning
Bathrooms in motorhomes require special care:
- Antibacterial solutions: Use these for general cleaning, especially on countertops, faucets, and handles.
- Shower walls and curtains: Clean with vinegar or a non-abrasive cleaner to prevent mold and soap scum.
- Toilet care: Avoid bleach, which can damage seals and plastic. Instead, use soapy water for scrubbing and a vinegar solution in the cassette to eliminate odors and sanitize.
Upholstery and Fabric Care
- Vacuum regularly: Remove dirt, dust, and allergens from upholstery and seating areas.
- Spot cleaning: Treat stains with a fabric-specific cleaner, ensuring the material doesn’t discolor or damage.
Window Cleaning
Motorhome windows are often acrylic and require extra care:
- Avoid harsh cleaners: Use mild, non-corrosive products to prevent scratches.
- Dry with chamois leather or a soft cloth: Prevent streaks and damage by using gentle materials for drying.
- Clean the windscreen and mirrors thoroughly: Ensure visibility and safety by keeping all glass surfaces spotless.
Floor Cleaning
- Vacuum first: Remove loose dirt and debris.
- Clean according to material:
- Rugs or carpets: Use a vacuum cleaner or carpet cleaner for deep cleaning.
- Vinyl or laminate floors: Mop with a mixture of warm water and mild detergent.
- Hard floors: Use a damp mop for an even, polished finish.
Cleaning Storage and Organization
- Empty storage spaces: Remove everything from cupboards, drawers, and exterior lockers.
- Clean inside and out: Wipe down storage compartments and remove any debris or odors.
- Organize smartly: Group items by use (kitchenware, clothing, tools) and store them securely to prevent movement during travel.
Odor Control
- Ventilation: Open windows and roof vents regularly to allow fresh air circulation.
- Odor absorbers: Use baking soda or activated charcoal to eliminate smells in small spaces like cupboards and refrigerators.
- Regular waste disposal: Empty waste bins and cassettes frequently to prevent unpleasant odors.
Maintenance Tips for Longevity
- Inspect regularly: Look for wear and tear, leaks, or signs of pests. Address these issues promptly.
- Clean spills immediately: Prevent stains and lingering odors by cleaning up as soon as spills occur.
- Protect surfaces: Use mats or protective liners on countertops, shelves, and under seating areas.
A Final Touch for a Sparkling Motorhome
After cleaning, make your motorhome feel homely and inviting:
- Add fresh linens: Replace bedding, towels, and curtains with clean ones.
- Decorate sparingly: A few personal touches like cushions, throws, or plants can make the space cozy without cluttering.
- Double-check essentials: Ensure all cleaning tools, safety items, and frequently used accessories are in their designated spots.
A clean, well-organized motorhome not only improves your travel experience but also ensures the longevity of your investment. With these comprehensive cleaning practices, you’ll always be ready to hit the road in style and comfort!
Cleaning a motorhome’s decals and graphics
When cleaning your motorhome decals and graphics, it's important to avoid harsh chemicals that can cause discoloration or fading. Be gentle during cleaning to prevent any risk of the decals detaching.
For a safe and effective clean, use a soft cloth or brush with plenty of soapy water. Alternatively, consider using Erase Away foam pads. These non-abrasive pads are free from harmful chemicals and are perfect for cleaning both flat and raised decals without causing damage.
Cleaning Seals, and not the ones found in the zoo
The seals around a motorhome’s hatches, doors, and windows can accumulate algae and dirt over time. Start by thoroughly washing them with soapy water and allowing them to dry completely.
To keep the rubber seals in good condition, apply a silicone spray like Thetford’s Seal Lubricant. This helps maintain their flexibility, prevents cracking, and offers protection against UV damage, ultimately extending their lifespan.
Awning And Outdoor Accessories
When cleaning your motorhome awning, be gentle and avoid scrubbing too hard to prevent any damage. Don’t forget to clean the underside, as it’s especially prone to dirt buildup. For effective cleaning, you can use awning cleaners such as 303 Fabric Cleaner, Thetford Awning Cleaner, or Fenwick’s Caravan Awning Cleaner, all of which are designed to safely clean and protect your awning fabric.
- Details
- Written by: Ricky Clark
- Category: FAQ